How to Create a Clickable Prototype in Minutes

In simple terms, a clickable prototype is an interactive representation of a software or website's user interface or UI. There are several clickable prototype tools that can help you create these interactive models, and this article showcases some of the best ones available today. One thing to keep in mind is the value that clickable prototypes bring to the design and development process. Even though clickable prototypes are relatively cheap to create, they save a lot of time, effort, and money in the long run because they allow the project team to test, modify, or correct any flaws in user flows early on, thereby avoiding expensive mistakes.
- Part 1. The Best Tool to Make Clickable Prototype
- Part 2. Steps to Create Clickable Prototype
- Part 3. What is Clickable Prototype
- Part 4. How to Create Clickable Prototype in Figma
- Part 5. How to Create Clickable Prototype in Adobe XD
- Part 6. How to Create Clickable Prototype in InVision
- Part 7. How to Create Clickable Prototype in Sketch
The Best Tool to Make Clickable Prototype
Wondershare Mockitt is the first platform we'll showcase today. It is a versatile cloud-based design platform that can be used to create prototypes very quickly. Mockitt not only contains all the design components that you need but also offers an intuitive way to rapidly create designs and deploy them, as we'll see. Let's look at what Mockitt offers in the way of being able to create a clickable prototype in minutes:

- Extensive asset libraries with access to templates, UI kits, and design systems
- Drag and drop actions to create designs and prototype them
- Rapid prototyping using editable links to add gesture triggers, transitions, effects, and animation
- Dynamic widgets to avoid multiple page states
- Global editing of widgets through Master Widget attribute
- Instant preview of the clickable prototype at any stage
- Easy sharing online or offline
- Design tools, flow charts, templates, and everything else you need to get started
- Gentle learning curve - intuitive UI, easy navigation, clear feature labels
How to Create a Clickable Prototype in Mockitt
Step 1: Add Widgets to the Prototype
Once you log in and enter your workspace, start adding widgets and other components by dragging them from the Resources/Libraries tab on the right panel. A simple example has been shown here.
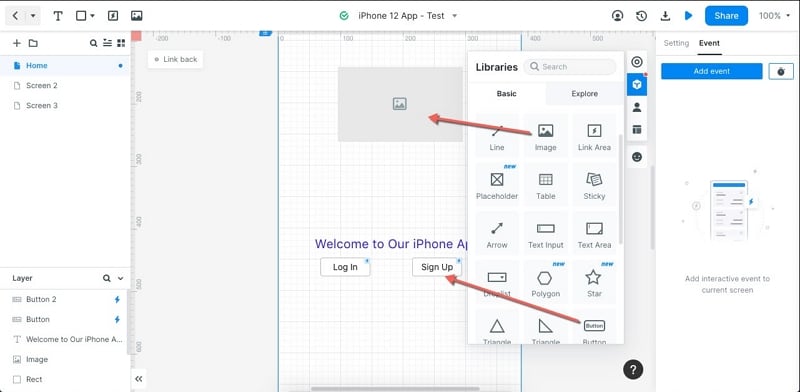
Create additional screens and states to show transitions. In the above example, we have created three screens - Home, Screen 2, and Screen 3 to show different screen states.
Step 2: Add a Screen Transition
Create a clickable prototype by linking a particular element on a page to its corresponding page/screen. You can do this by dragging the link icon to the correct screen.

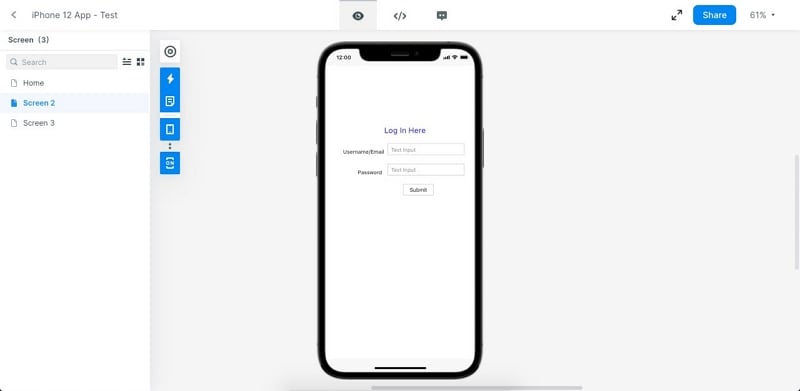
Click the gesture icon in the middle of the link to open the Event panel on the right side. Here, you can specify the action to be performed when the user executes that gesture. In this example, when they tap that login button, it will take them to Screen 2, which can be your login page.

To preview the clickable prototype, click the Play icon (preview button) next to the Share button on the top-right of your Mockitt window.
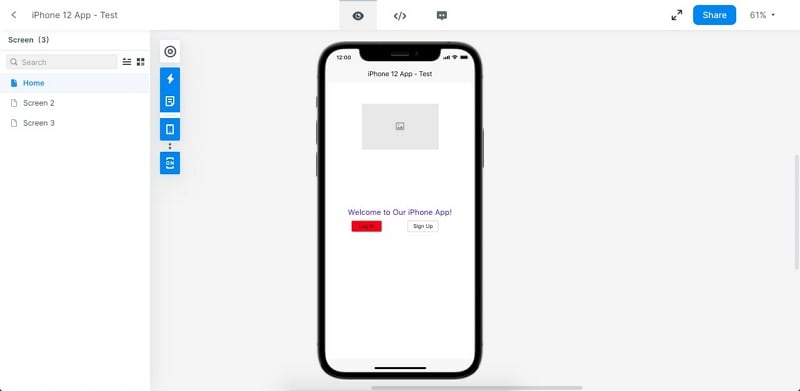
Clicking on the Login button will now take you to Screen 2, the login page.
And that's how easy it is to create a clickable prototype in Wondershare Mockitt!
Step 3: Add a Widget State
You can also use dynamic widgets to change states within a single screen or page. This helps you avoid duplication of work because you don't need multiple screens to show one single interaction.
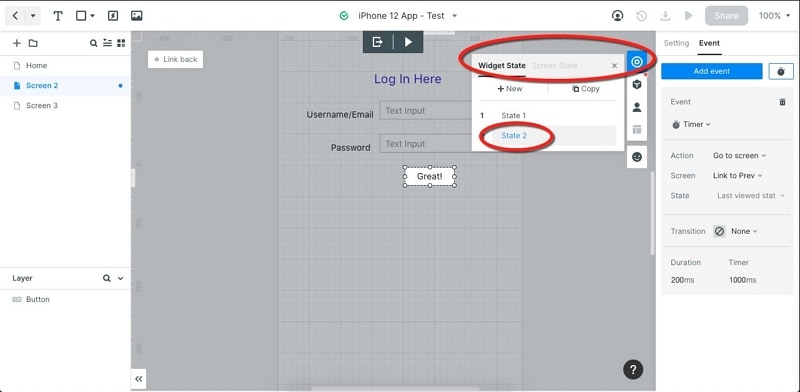
In the example above, we have added a second widget state to the Submit button. When the user fills out their credentials and clicks the Submit button, it will change to Great!, indicating that they have successfully logged in. You can then set a timer on that screen to take them to their account or whatever page you want.
In this way, you can easily create multiple screens, screen states, and dynamic widgets to create a fully clickable prototype. And all you need to do to see if it works is to preview it as you create new interactions. Once you're done, you can share it with others using the Share button, where you'll see multiple share settings.

As you can see, Mockitt is a versatile platform that gives you all the tools you need to rapidly create clickable prototypes. Incidentally, it is also one of the most affordable tools that include a free-forever plan with all the features unlocked.
What is a Clickable Prototype?
Let us now get back to the basics. Prototypes are essentially working visual models of a website's or application's functionality. In other words, they represent the interactive features of a user interface or UI. Clickable prototype tools allow the designer to create user flows and share them in a tangible format that others can interact with. They are used extensively for user testing, design validation, and many other purposes.
A clickable prototype, therefore, is one that a user or tester can interact with by clicking through from one step to the next, just as they would on the final product. The advantage of having a clickable prototype is that it saves a vast amount of resources by allowing corrections and modifications in the early stages of website or software development.
How to Create a Clickable Prototype in Figma
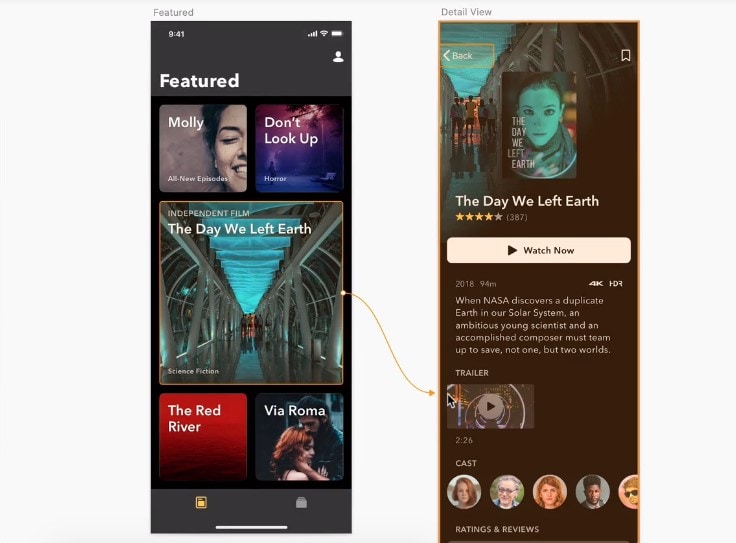
Creating a Figma clickable prototype is slightly different (and less intuitive) than doing it on Mockitt. Once you have your design laid out, you'll need to go to the Prototype tab. After that, you can select any element and drag the circle on the border of the element to its corresponding screen.
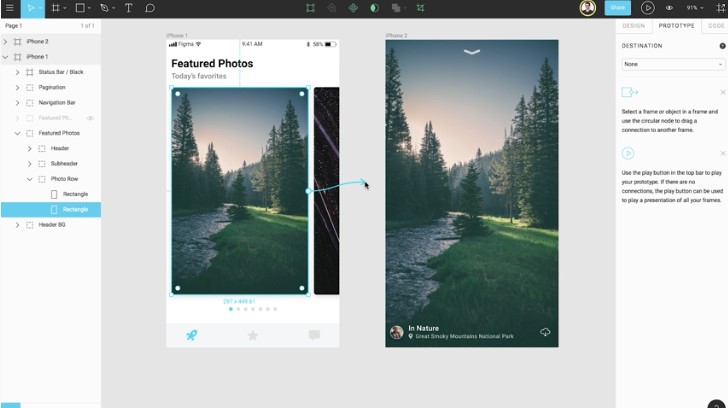
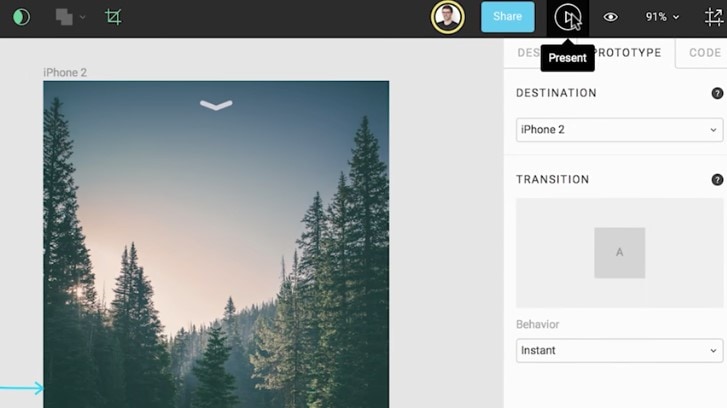
Once you have established the link, you'll see various options in the Prototype tab, such as Destination, Transition, and Behavior. You can set these parameters to show the desired effect. When you're done, you can preview the interaction using the Present button at the top.
As you can see, this process might require a little getting used to, but Figma does have a lot of advantages as well. In summary, here's what to do:
- Create a project and layout your design using the built-in libraries, images, and other components.
- Drag the blue circle from the trigger element to the destination page or screen to establish a link.
- In the Prototype tab, specify the resulting state of the interaction.
- Preview your clickable prototype before sharing it. The Share button at the top can be used to send a share link to others.
How to Create Clickable Prototype in Adobe XD
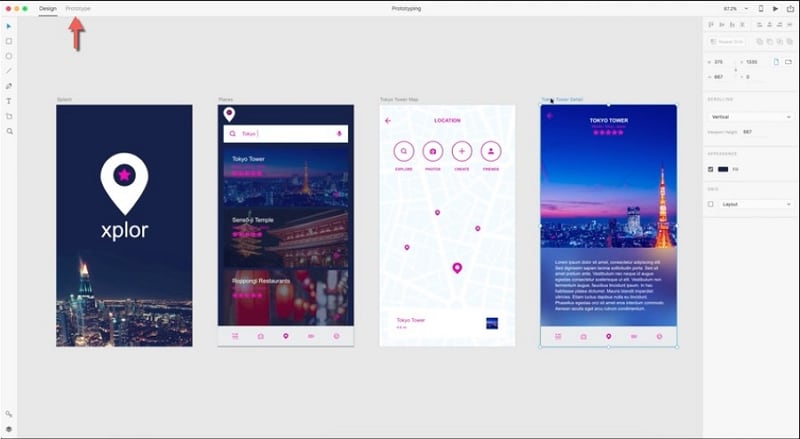
You can create an Adobe XD clickable prototype by wiring your artboards together similar to Mockitt. However, as with Figma, there's a separate Prototype Mode that is distinct from the default Design Mode, and you will need to switch back and forth unless you fully create the design/artboards first before you begin prototyping. The process works as follows:
Once you complete your artboard designs, click the Prototype tab on the top left of your screen. This will put Adobe XD into Prototype Mode.
Here, you can click various elements to see their link icons. Drag a link icon from an artboard or element to its target screen and drop it there.
At the target end of the link, if you click the icon, you can set a particular transition and other parameters.

To preview the prototype, use the Preview button on the top right.
You can use the Upload icon on the top right to share the prototype with others.
Adobe XD also has what are known as component states, which is similar to Mockitt's dynamic widgets. Using this feature, you can show multiple states for a single component on a single page. This makes the prototype more dynamic rather than a simple set of linked artboards.
How to Create a Clickable Prototype in InVision
Creating an InVision clickable prototype has a bit of a variation from what we've seen so far. The linking part is essentially the same but instead of dragging a link directly, you'll be going into Build mode and then specifying link parameters before creating the hotspot link. When you save the parameters, the link will be created. The advantage here is that the hotspot can be used as a template if you're going to have multiple links there. The process to use this clickable prototype tool is as follows:
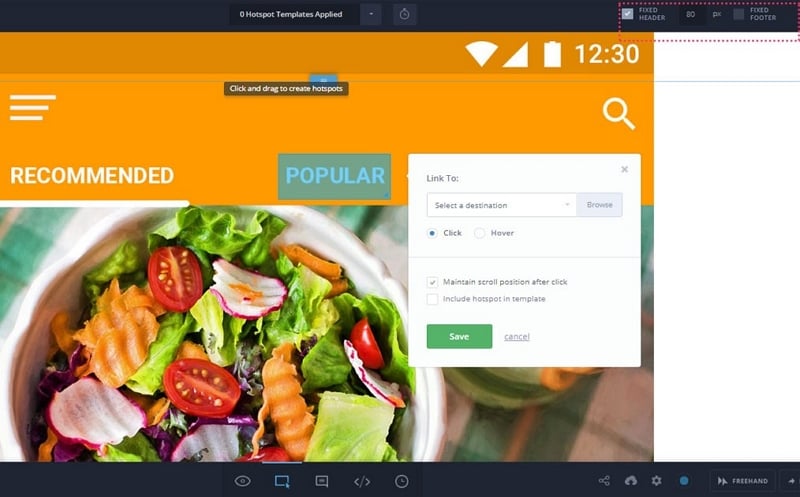
After you drag your wireframes or mockups into the project in InVision, go to the bottom of the page and choose the Build icon.
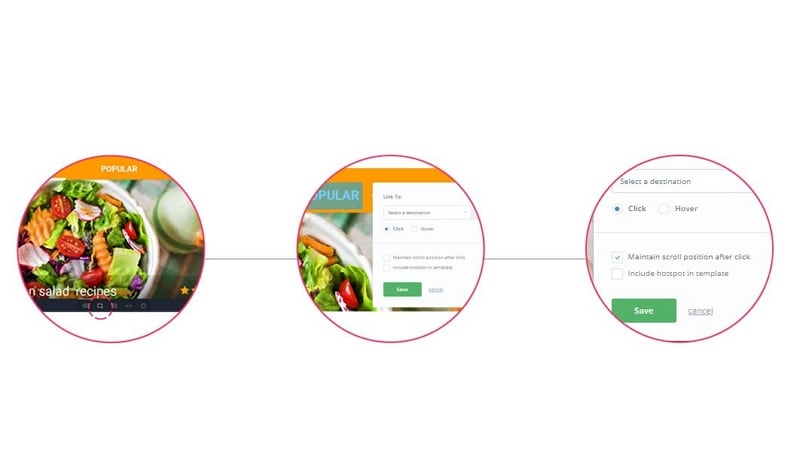
When you click and drag to generate the hotspot, the modal will open up, where you can specify various parameters such as the trigger action, the destination page, maintaining the scroll position, etc. When you hit Save, the interaction will be created.
InVision also allows you to link to a screen as an overlay that you can position anywhere over the first screen. There's also a Transition option that allows you to animate the overlay.
As you can see, the principle is essentially the same, but the process of creating a clickable prototype is different from what we've seen so far.
How to Create a Clickable Prototype in Sketch
You can easily create a Sketch clickable prototype, but it only works if you're using artboards as part of your design. Once your artboards are in place, you can establish links between any two artboards. You can also link from a specific layer to a destination or target artboard. Let's look at how it's done:
Once a layer or artboard is selected, drag the small circle in the border of the layer or artboard and drag it to the destination artboard. Dropping it there will create the link, which you can now edit.
Next, go to the Inspector panel and edit the link to specify the target, the animation to be used, and other parameters.
Finish linking all interactive elements this way. If you need to create a larger clickable area, you can use Hotspots. For this, use the Insert → Hotspot function, then click-drag to select the area. You can then link it to a target page or layer. You can also convert a link into a hotspot by using the Create Hotspot icon in the Inspector panel after selecting a particular link. You will need to re-draw the hotspot if you do this.
Conclusion
Each of these tools offers its own unique method of creating clickable prototypes, but Mockitt is the most user-friendly and intuitive of them all, not to mention the most affordable. What makes it a compelling choice is that creating links is very simple, as is the process of creating multiple page states and widget states, which makes your prototype even more dynamic and gives reviewers a much richer experience when evaluating user flows.
