How Can I Make a Slideshow on Google Photos
How do you create an awesome Google Photos slideshow with images you've collected on the web or captured with your camera? In fact, how do you make a Google slideshow from scratch? If you're pondering this topic and haven't found the right answers yet, you've come to the right place. In this article, we'll show you how to create a Google slideshow (Google Photos slideshow) and even how to make a slideshow with music with Google Photos. The process is quite simple if you know the steps, but if you're unfamiliar with Google Photos features, don't worry. We'll guide you every step of the way.
- Part 1. How Can I Make a Slideshow on Google Photos
- Part 2. The Best Prototyping Tool to Create a Slideshow Like Google Photos
How Can I Make a Slideshow on Google Photos
1. Create an album with the photos you want.
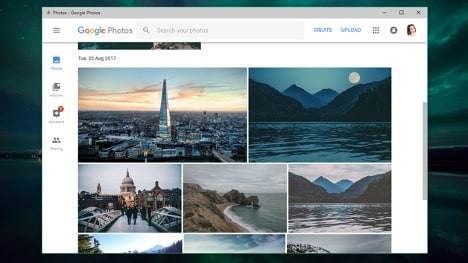
To create a Google Photos slideshow, you will need to first create an album containing the images to be showcased.
You can do this by going to the Google Photos app in your browser (or the mobile apps in the case of iOS and Android) and clicking the Select option on a particular photo.
Source: TechRadar
Similarly, do this with all the other photos.
When you're done, click Add (the + symbol) at the top and choose Album → New Album.
Name your album and click the Done button.
2. Choose the Slideshow option.
Next, click on the album to open it and make sure the photos you need are there. You can also go back to your photos and add them to the newly created album if required.
If you need to, you can reorder the photos to control the sequence they'll appear in when the slideshow is created.
Source: The Verge
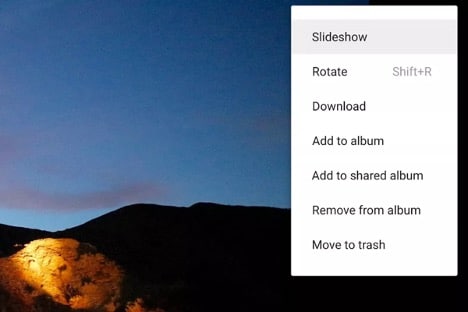
In the top-right menu, select the three vertical dots and choose Slideshow from the options you see.
That's it! Your slideshow will be displayed on your computer.
But what about the music? How to make a slideshow with music on Google Photos?
Adding music to your slideshow is equally simple but instead of just creating a slideshow, you'll need to create a video. The process is a little different and you can only do this on your phone or tablet at the moment, not on your desktop computer. The following is the process for Android devices:
1. Go to the Photos app on your Android phone or tablet.
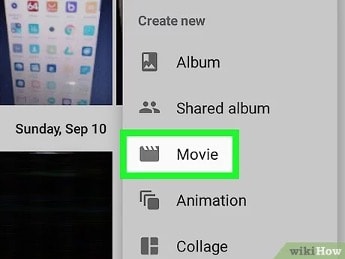
2. In the bottom menu, go to Library → Utilities → Movie (under Create New)
Source: WikiHow
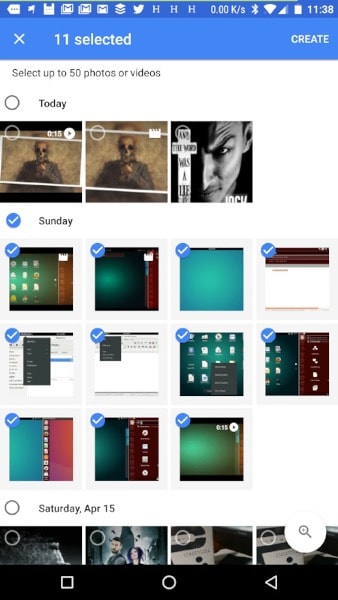
3. Choose the photos for the movie. You can also choose video clips.
Source: TechRepublic
4. Once you've selected everything, tap Create and then Save.
5. The music will be added automatically to your video. If you want to change it, tap Edit and tap the Music icon to select your own music track.
Once the video is ready, it will appear under Albums → Movies, from where you can share it with someone else.
The Best Prototyping Tool to Create a Slideshow Like Google Photos
If you're creating a UI/UX prototype and you want to show the slideshow effect in your design, you obviously can't use Google Photos for this. The best design tool that has this functionality integrated into it is Wondershare Mockitt, a robust online design and prototyping tool with hundreds of component libraries to give you exactly what you need. First, an overview of Wondershare Mockitt's key features:

- Full asset library: Hundreds of components, along with UI kits, design systems, and other asset resources to include in your designs, customize, and share with other team members.
- Component flexibility: Change the attributes of any component, assign it a Master status, use dynamic state changes on a single page, and do much more with a fully flexible asset base.
- Prototype like a pro: Rapid prototyping is one of the highlights of this online software. Drag and drop a link from a component to a target screen, add a gesture, add animations, transitions, and other effects. Prototype UI designs in minutes, not hours.
- Share and collaborate: Sharing your designs is as simple as sending a secure URL or QR code. Collaboration is part of Mockitt, allowing stakeholders to review and comment on your designs, and other designers to work on the same project. Complete visibility and transparency based on secure role-based permission levels and login access.
- Intuitive design: The UI of Mockitt is designed to be highly intuitive. Clear menu and tool layouts, unambiguous labeling, crisp iconography... all these elements make it much easier to navigate through to any function you need to execute. New users can jump right in and start working without the usual steep learning curve seen with most other professional design tools.
- Cloud-based environment: The secure online environment offered makes it accessible from anywhere in the world. Whether your team works from different parts of the city or different cities in the world, Mockitt unifies them in real-time, giving them the flexibility and freedom they need to be more productive and more efficient.
- Easy developer handoff: it simplifies the developer handoff process by segregating it from the design process. Code is automatically generated at the back end so the developer can come in, inspect code, and download all the asset information they need including style code for various platforms. No conflict, no fuss.
To mimic the Google Photos slideshow feature in your UI/UX prototype, you can use the carousel widget in Mockitt to replicate the experience. This will make it dynamic in the prototype so your clients can see and experience what it will look like in the final version of the product once it is developed. Here's the process to follow:
1. Log in to your Mockitt account and create a new project.
If you don't have an account, you can create a free account for yourself to test out the product. Once you're logged in, just click the "Create" → "Project" under "Personal Space" or "Enterprise Space" to set up a fresh project.

Define the device and model you're creating the prototype for and proceed to the design stage.
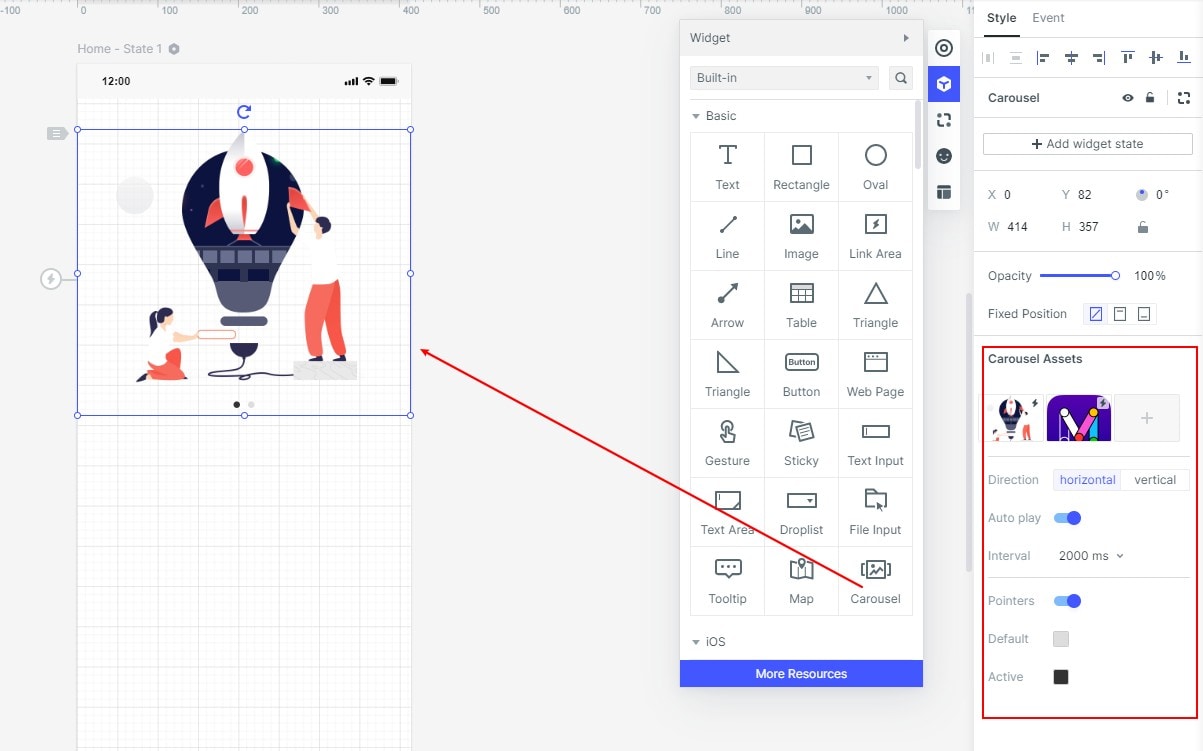
2. Add photos slideshow.
Working with Mockitt is as simple as dragging components from the library into your screen and adjusting them to create the layout. Drag the carousel widget into the canvas to add a "Carousel" photos slideshow to your design.
In the right-side toolbar, you can upload the images for the carousel and you can set if you want the photos be played automatically.
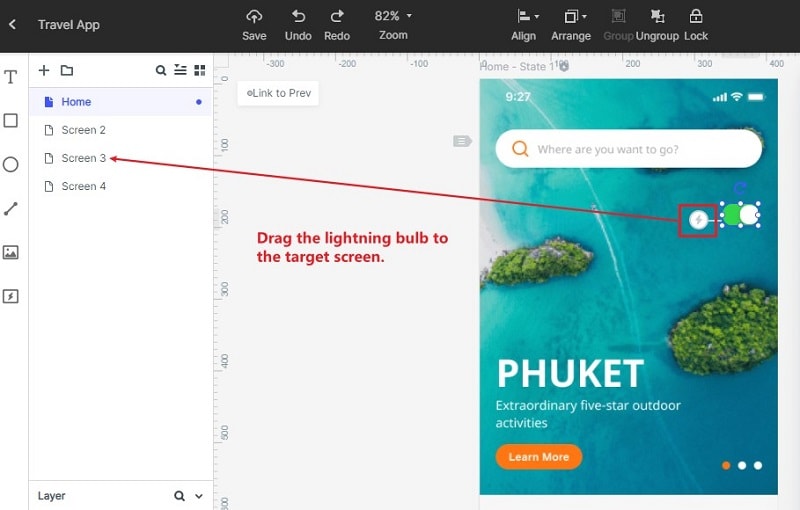
3. Start prototyping your design.
To prototype a design, just pull the link icon from an asset or component (on the left side) to the appropriate target screen, which is the page state you want the app/site to show when the user interacts with that component.
Next, edit the link you've created and add a gesture to trigger the transition or action. Specify the type of transition, effect, or animation that should be triggered by the gesture.
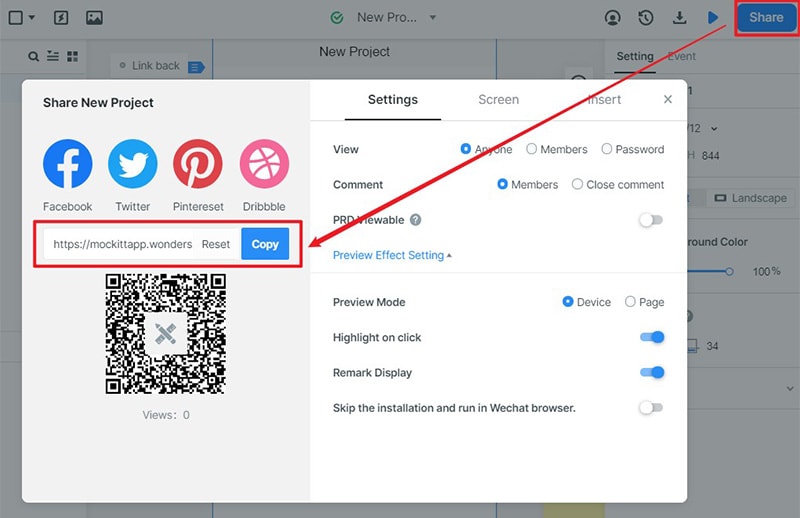
4. Share and get feedback.
Once your prototype is ready, click the "Share" option in the top-level menu to generate a secure QR code or URL to share with other stakeholders in the project.
Get feedback from them online and make the necessary tweaks to your design. If you need to add notes before this, you can use the 'Sticky' widget on any screen.
5. Developer handoff.
The final step is to invite the developer to inspect code and download whatever asset information they require to begin the development phase for the product.
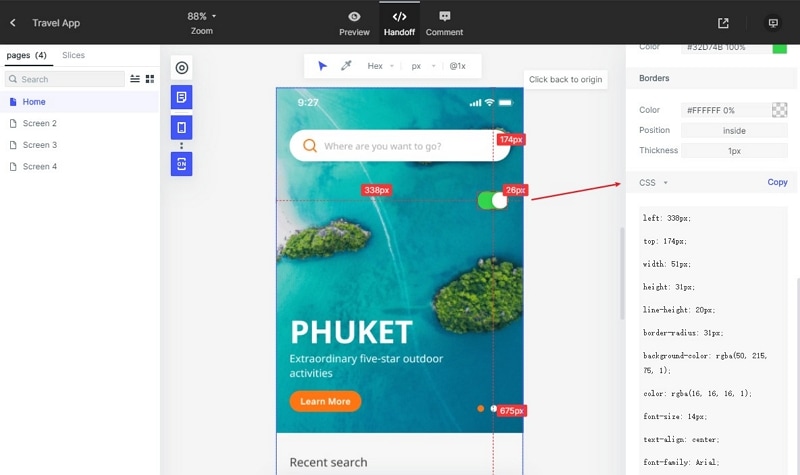
All the asset code and style code is generated at the back-end so the designer doesn't need to worry about any of that.
The process of how to make a Google Photos slideshow has been simplified, as you can see. Even the entire prototyping process has been boiled down to its essentials so new designers as well as experienced professionals have the right tools to get the job done quickly.
