How to Use Sketch Prototyping Step-by-Step

Are you caught between a rock and a hard place with Sketch prototyping? Do you want to burry your sketch app prototyping challenges? Yes, worry no more because you just hit the right button. Sketch prototyping can turn troublesome, and a vast range of users over the continents have experienced difficulties in creating and sharing prototypes. Luckily, this article is here to address your problem in the best way possible. In this article, you shall receive a thorough guide on how to do Sketch prototyping.
- Part 1. How to Use Sketch Create Interactive Prototype
- Part 2. The Best Sketch Prototyping Tool Alternative
- Part 3. How to Create Prototype with Sketch Alternative
How to Use Sketch Create Interactive Prototype
A Sketch is an excellent tool that lets users create sketch interactive prototypes with ease. Users can create links between layers an artboards, hotspots, and create sketch prototyping animations with minimum effort. With Sketch, you can build designs that scale to fit your content. Leverage the hundreds of integration and plugins to perform interactions and designing with live data, among others. Once you have created your sketch wireframe mockup prototype, you can share it with your team members and receive feedback for improvement. The following steps illustrate how to use Sketch to Create an Interactive prototype.
Step 1. Create a Project in Sketch Prototyping Tool
Install Craft and open Sketch prototyping platform. Choose an artboard preset or create a custom preset then resize it to meet your need.
Step 2. Create the Linking for Your Sketch Prototyping Project
Select a layer and hit the "+" icon located next to the Inspector. Choose the layer you would like to link to your artboard, press C on your keyboard, and hit on the target artboard. You should see a dialogue box that prompts you to make selections on the kind of animations you want. Select the desired gesture from the "Gesture" drop-down icon and transition from the "Transition" drop-down button. Finally, click "Add Link" to create the linking. If you want to create a large clickable area, Hotspots could be of great benefit as compared to links. To add a hotspot, go to the "Insert" button at the top left and select "Hotspot". Drag and begin drawing your hotspot area.
Step 3.Sync Your Sketch App Prototyping Project and Preview
Now that you are through with the links, you have to sync your prototype with InVision. Go to the Craft toolbar and open the "Sync" tab. Log in to your InVision account or create one if you don't have. Hit the "+" button to create a new prototype. Provide a suitable name to your new prototype and hit the "Create Prototype" tab to create your prototype finally. Open your prototype directly from the "Sync" tab. Your prototype is now ready to view, comment, inspect, and share.
The Best Sketch Prototyping Tool Alternative
Frankly speaking, there is no better Sketch prototype alternative than Wondershare Mockitt. Yes, it is enriched with every single feature you would demand from a top-notch prototyping tool. Its elegant and total no-brainer interface adds up to the list of attractive features as users won't have a rough ride in their navigation.

Now, to design your prototype faster, the program offers plenty of UI assets and templates. These over 20 templates are suitable for diverse industries, and they are updated continuously. Customize them to meet your needs and remember to save them in your library so that you can reuse them many times as possible. The cloud feature is another outstanding capability. Users can access their prototype anywhere without time and space limitations. Therefore, there is no need to install or download your project. Collaborate across several different devices with your members and co-edit the project in real-time.
Features of Wondershare Mockitt
- With the Cloud feature, you can sync your team members and access your project without time and space limitations.
- It supports real-time collaboration and co-editing across different devices.
- It has built-in widgets and icons that make it easy to design beautiful interfaces.
- It provides many UI assets and templates for different industries.
- Users can preview and share their prototypes on PC, mobile, and offline.
How to Create a Prototype with Sketch Alternative
Step 1. Create a New Project
Sign in to Wondershare Mockitt using your log in details. On the main interface, locate and hit the "Create Project" button. The program will give you two ways to start your project. You can either start from scratch by selecting the "Blank Project" option or build from demos by selecting the "Create project from demos" option. After selecting the suitable option, chose the device design for your prototype. Just click the respective icon and the device drop-down icon to select the specific type further. Now provide a suitable name for your project and click the "Create" button to get started.

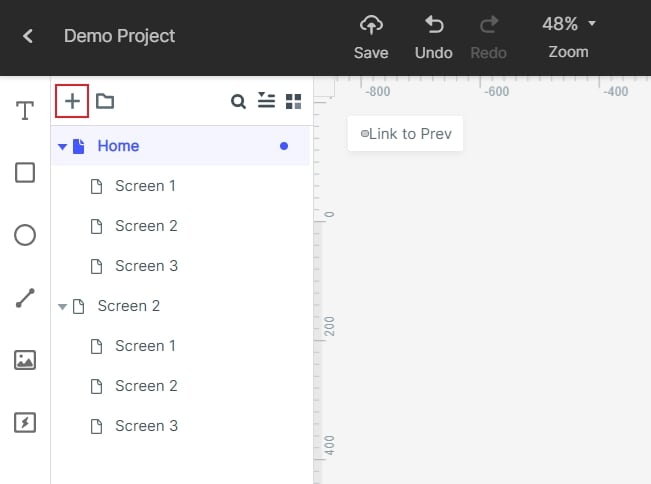
Step 2. Add more Screens
Wondershare Mockitt will take you to the prototype design window. When you want to create a more interactive prototype, it is important to add more screens to your project. Click the "New Screen" button and add the desired number of screens.
Step 3. Add Page Elements
Once you have the target number of screens, start adding the various objects and elements to individual screens as dictated by the project. Create buttons, text fields, and several other components associated with page design. Draw these shapes using plenty of widgets available on the window. You can use fast widgets, Build-in Widgets, My Widgets, and Icons. Double-click on these widgets, drag them to the canvas and start drawing your designs. To edit a widget, click on the target widget and edit from the Instructor Panel. To reuse your edited widget the next time, simply drag the edited widgets to the "My Widgets" library.

Step 4. Connect pages and objects
When you are through adding the various page elements across the screens, what remains is linking these objects to the various screens. This ensures that when you click on a button, for example, it should take you to the respective page. To link them, click on the object and drag the circular handle to the target screen. Repeat this for all other elements and objects you want to link.

Step 5. Preview the Prototype
Now that you have finished creating your connections, it's time to wrap up with the preview. Simply click the "Preview" icon located on the toolbar and do the various clicks to see whether your prototype is working accordingly.

