Mockitt - Free UI/UX Design Tool
"UI is the saddle, the stirrups and the reins. UX is the feeling you get being able to ride the horse. - Dain Miller
- UX Design vs UI Design | What's the Difference?
- Step-by-Step Guide on How to Do UI/UX Design with Ease.
- Top List of Must-Recommend UI/UI Tools.
- Leading UI/UX Design Trends to Dominate in 2020-2021.
- UI/UX design secrets you need to know.

How to do iOS and Android UI Testing
In this generation, mobile phones are widely used and designed. Android UI testing has become exciting as the days go by. You can’t sign off the app by just running functional tests. There are other testing types like field testing, network testing, UI testing, and battery life testing among others that need to be done. UI testing in android is important and should not be taken for granted. Graphical User Interface creates differences in how interactive and interesting a user finds your app.
The Best iOS and Android UI Tool
The best iOS UI testing and Android UI testing tool is Wondershare Mockitt. It is an online prototyping tool that will empower your design journey, present new ideas, make your concept valid, and implement the design. Wondershare Mockitt’s main features include:

1.Asset Library
Here, you can enjoy bountiful assets for free. Plentiful widgets and icons can be used directly. No experience is needed to create prototypes. The templates are continually updated. With Wondershare Mockitt, you can easily customize your widgets, save, and reuse them with a just click. Soon, you will be able to share a design system with the team jointly to manage, maintain, and update assets. This makes the designers consistently.
2.Design
Design prototypes build dynamic effects quickly without coding knowledge. You can make interactions and interface designs so fast. You can also import design files directly and add interactions.
3.Efficient Presentation and Review
In this feature, you can frame your prototype with the device shell prompt a real interactive experience. The black and white full-screen demonstration mode is used to highlight your proposal. Others can view your prototypes on mobile phones or computers. This is achieved when you share a link or QR code. You can also set permissions and passwords to restrict viewers.
When the other party is a member of the enterprise, they can comment and collect feedback on the prototypes. HTML demo package can be downloaded with one click. You can also experience steadily without an internet connection
4.Cloud Editing
You don’t need to download the software to use it. You can log in using a browser. The experience is the same. No need to save the user flow anywhere, anytime. With one account you can work from wherever you are. The system automatically saves all the changes.
No more sending of files manually. You only need to send a link and the others will edit or view the project. They will also give immediate feedback.
5.Handoff
Wondershare Mockitt automatically provides and multi-platform codes. The color picker can identify and record color. Handoff allows the manual input of the font size of HTML. It allows designers to focus on the real work and not do some repetitive work.
6.Multi-member collaboration
Here you can edit and manage products with your team members in Wondershare Mockitt enterprise. You can see the number of views and the activities going on the app. The enterprise owns the data. Members can be managed. The multi-level permission management will make you balance the privacy and publicity of the projects. It has a 128-bit SSL protocol for data transmission encryption.
How to Do a UI Testing
Step 1: Create iOS or Android UI
You can create prototypes for mobile (iOS/Android), iPad, Web, TV, or watch. You can also customize the project size for any screen.
When you log in, click “Create Project” to start prototyping. You may create a blank project, choose the device type, and name the project. You may choose “create project from demos”.
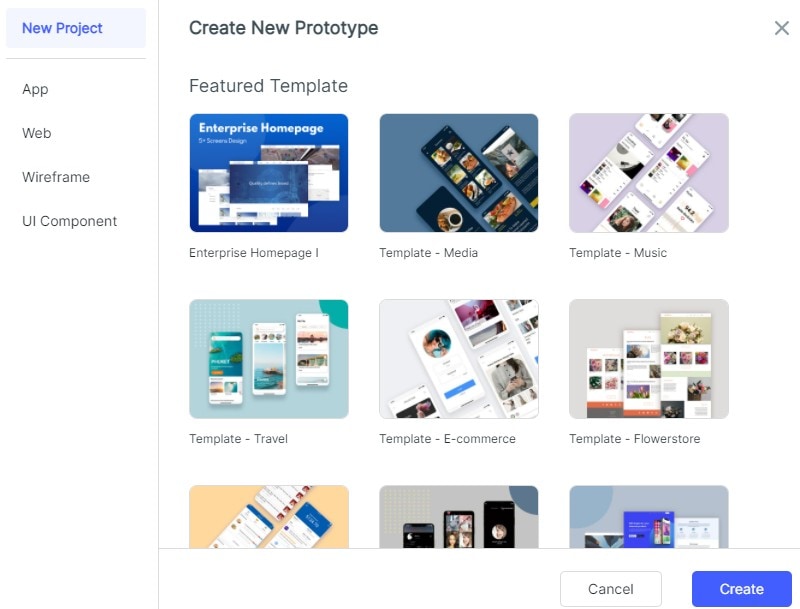
Click “blank project”. Choose whether you want to create it in a mobile, tablet, web page, TV, watch, others, or customize. Followed by size. Then click the “create” button.
Click on “settings” in the project. Change the project name, the device type/size, and save. If you change the size of the screen, adjust it manually.
Step 2: Design the iOS or Android UI
- Add Widgets and Icons
On the left, there are fast widgets. There are three ways to add widgets to canvas. Double click widgets˃ drag the widgets to the canvas˃ press the hotkeys and draw.
On the right, build-in widgets, my widgets, and icons are the type of assets found. There are two ways to add them. Double click the widgets˃ drag the widgets to the canvas.
To edit the widgets, click a widget and edit its properties in the inspector panel.
To save the widget, add it to “my widget” library in the following ways: drag the widget to "My widget" panel and Right-click the widget to “Add to My Widgets”.
- Add Links between Screens
- There are two ways to do it. Choose one widget, then click “New link” in the link panel on the right. Then set the gesture, action, target screen/state, and animation for the widget.
- Drag the link icon on the left of the widget to the target screen. Then adjust the gesture, action, target, screen/state, and animation on the link panel.
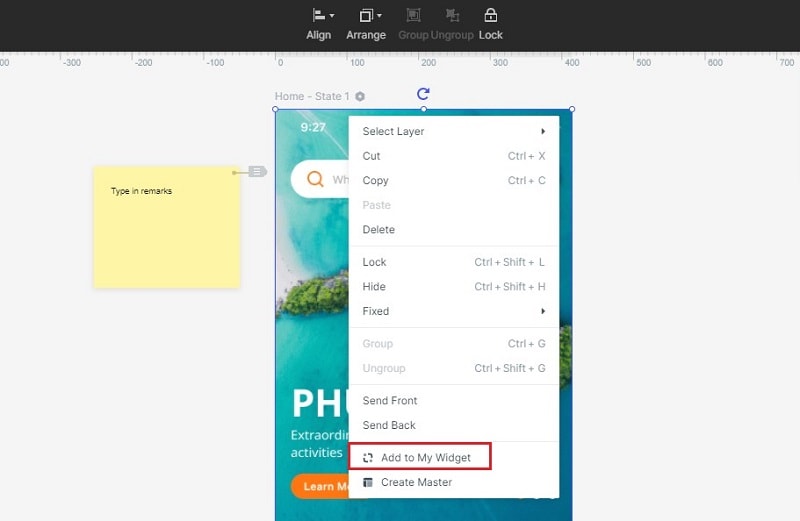
To convert widget to master:
- Right-click the widget to “create master”.
- The master will be saved in the master library. Drag the master canvas to create its instances.
- To change the Master, click “edit”.
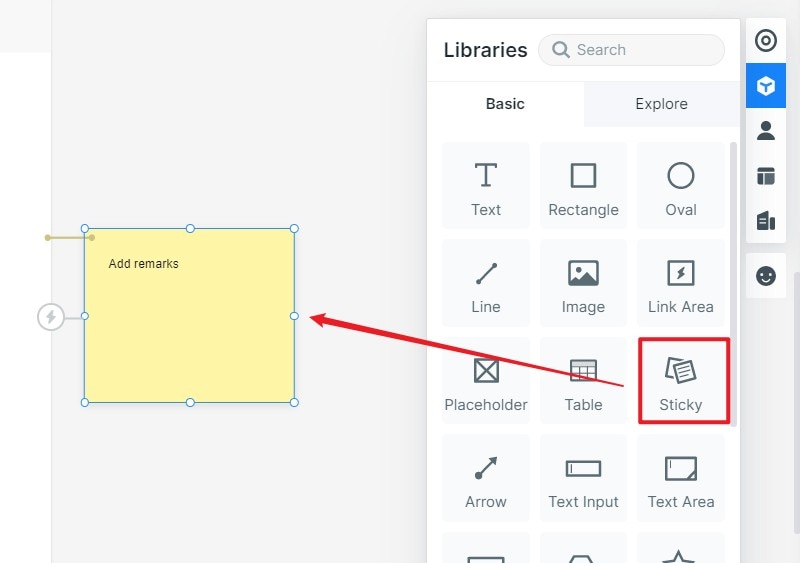
- To Add Notes:
- Use the “sticky” in the build-in widget library.
- Input texts in the “sticky”.
- The “sticky” is viewable in preview mode.
- Creative interactive animations
Use dynamic widgets to create interaction animation. Animation effects of dynamic widgets and screen states are achieved by the state. It affects the widgets on the whole screen, and the animation effect will only affect the widgets within the dynamic widgets. Users are recommended to use dynamic widgets to achieve interactive effects.
To make animations using dynamic widget:
- Create a new widget. Click the “widget” icon beside the inspector panel then click “new widget” to create a new widget and name it.
- Create states of the widgets. Click the “state” icon and the state panel will pop up. Click “new state” to create a new state.
- Link the states. Drag the “link” icon to the target state. You can also adjust the animation settings in the link panel.
Step 3: Preview the iOS or Android UI
To preview it on a pc:
- Click “preview” on the top toolbar

- Adjust the preview settings such as “page scroll”, “highlight on click”, “sticky”, and “shell”.
- To get a more immersive presentation effect, click “full screen”.
To preview it on mobile:
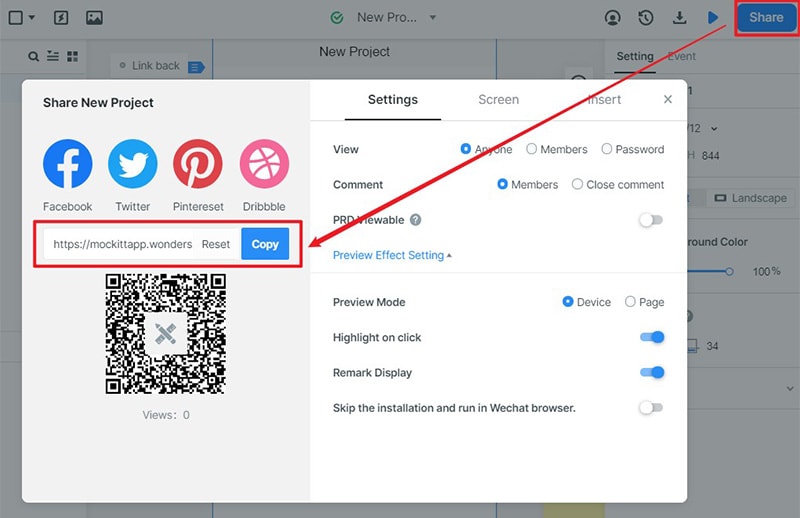
- Click the “share” button to get the sharing link and the QR code of the project.
- Open the link on your mobile or scan the QR code to preview the prototype.
To preview offline, there are three ways to do it.
- Download the HTML demo package. Click “download” and download “HTML5 zip”. Use chrome to view the index.html file.
- Download APK. Click “download” and get “Android APK” and send it to an Android device and install it.
- Use “Wondershare Mockitt player”
Step 4: Share the iOS or the Android UI
- Click the “share” button. You will get a QR code or a link.
- Send the link or QR code to others.
- You may change the “privacy” settings as you wish.
- You can also download your prototype and send the offline file.
Tips for iOS and Android UI Testing
Test the overall color scheme, the theme of the app, style, and color of icons. Check the look and feel of the web content in a variety of devices and network conditions.
Check if the multi-column layout is aligned correctly and are viewable on low resolution. Test if the progress indicators are showing when pages are loading.
Observe how the menus are invoked. Check the items contained in the menu. Screen orientation should be tested in both landscape and portrait menu. Check whether the virtual keyboard is working and if it changes with the screen mode.
Test the sliding effect. Test the sensitivity of the buttons. They should be clickable with any kind of touch. Virtual keyboard pops-up when the user wants to enter ant type of text.
Check if the app is integrated well with the mobile hard keys e.g. start, home, menu. And back buttons. Check how the app generally responds.
