What is PRD - Product Requirements Document?

In simple terms, a PRD or product requirements document is the rock that sets the snowball of the SDLC or software development life cycle in motion. It is the most important component of a software project because it sets the ultimate goals for the end-product, thereby defining the architecture, design, development, testing, and all other phases. Let's look at this concept in greater detail so we can understand the significance of how it helps shape the entire project from start to finish.
- Part 1. What is a PRD?
- Part 2. What Should a Product Requirements Document (PRD) Contain?
- Part 3. Product Requirements Document Examples and Outlines
- Part 4. How to Create a PRD or Prototype with Mockitt
What is a PRD?
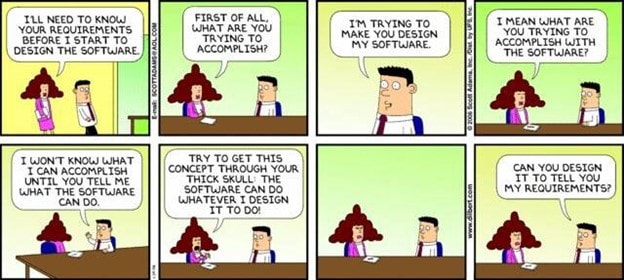
A product document is essentially a blueprint of a future product's features and capabilities. It is typically prepared by the project manager based on inputs from the client and is a comprehensive summary of what the client wants the product to be able to do. It is vitally important for the PRD to holistically define the product, its capabilities, its look and feel, its objectives, and other aspects required by the design/UI/UX team, the development team, and the testing team.
The PRD should act as a clear roadmap, which is then expanded into a full-fledged project with task owners, deadlines, and so on. As such, a PRD may go through several iterations before the scope of the project can be defined. While PRDs are generally used in waterfall projects where there is a sequential progression of phases, they can also be used in agile software development. The only thing that might be missing in a PRD document or product specification document is the exact implementation, which will come later on in the UI/UX design and prototyping phase.
Since the PRD is the initial blueprint that ultimately gets translated into the end-product, it is critical for several elements to be defined clearly and unambiguously within the document. For this reason, a product requirements document template or PRD template is often used to ensure that nothing is missed out. Let's look at what a PRD typically contains.
What Should a Product Requirements Document (PRD) Contain?
The core purpose of a PRD is to define a particular capability and then give an example of a use case where the user might utilize that capability. If there are nuances within that feature, each variant or additional sub-feature should likewise be defined and given a specific use case.
The PRD should also provide an overview of what the product needs to accomplish for the user. In other words, it should define the goals and objectives of the next release of the product. In contrast, an MRD or marketing requirements document is often used for multiple releases. This is an important point because a PRD shouldn't merely replicate the more generic scenarios of an MRD. The PRD is tied to a specific release, while the same MRD might be used for multiple iterations of the same product or set of products.
So far we've talked about the functional aspects of a PRD. However, it also needs to outline the platform (device type, OS environment, etc.), specific usability and accessibility requirements (text to speech, one-hand usage, etc.), as well as dependencies, assumptions, and constraints.
In short, any piece of information that can help accurately translate the PRD into a fully functional product that achieves its purpose must go into the product requirements document.
Product Requirements Document Examples and Outlines
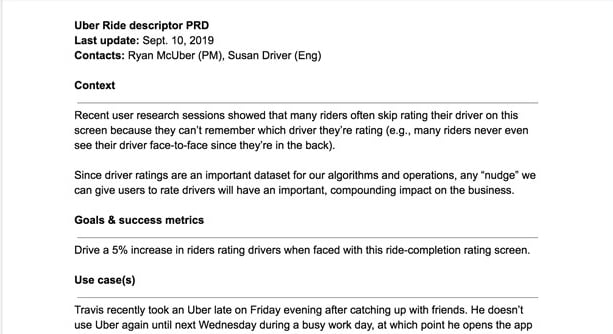
A PRD does not have to be an extensive document. At times, just one feature may need to be added to a particular application. In the fictional example below, the PRD requires a single feature to be added to the Uber app:
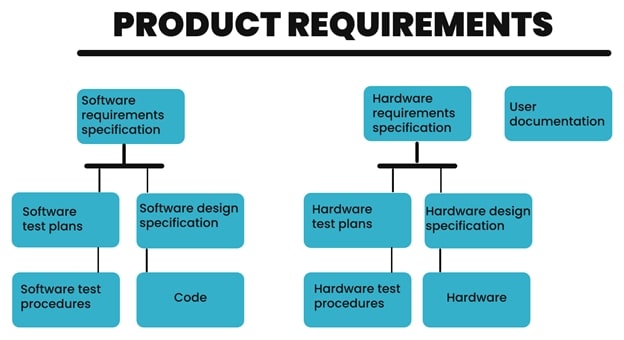
A full-scale PRD, therefore, is a fleshed-out version of this that covers every individual feature that needs to be designed, developed, and tested for a particular release. It can often run into hundreds of pages depending on the complexity and extent of the requirement. The template for such a comprehensive document might look something like this but with a lot more pages, as you can imagine.
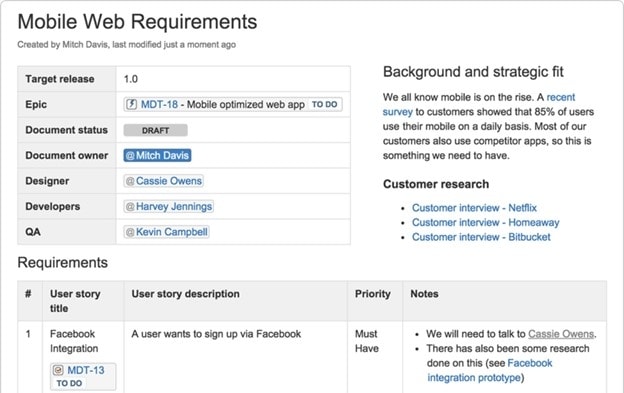
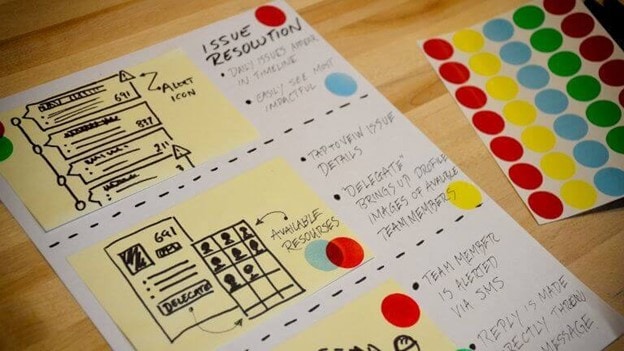
There are several different formats for a PRD because every product is unique. The common aspects of a product requirements document have been outlined above, but keep in mind that every type of product may require a specific set of contents in the PRD. Some might even be hand-written, as in the example below:
Whatever the scenario, there's a very important component of any product requirements document, and that's the wireframe or prototype. The project manager typically deploys a resource to help create a prototype that will give the development team a clear picture of how the process flows should work and what the various interfaces should look like.
The prototype, as such, is a critical bridge between verbal requirements and the translation of that into a functional product. That's what we'll look at next.
How to Create a PRD or Prototype with Mockitt
Wondershare Mockitt is a versatile and flexible cloud-based design and prototyping platform. It can be used to create PRDs as well as design mockups and fully interactive and dynamic high-fidelity (hi-fi) prototypes that project stakeholders can interact with to get a crystal-clear picture of what's required. It operates in a highly collaborative environment where everything is updated to the cloud in real-time. That means the designer can share their work with the project manager or product manager as well as the developer, the UX architect, the client, and everyone else in the value chain.

Key Features
- Rich asset libraries of platform-specific and generic components and widgets - easily customizable and sharable within teams.
- User-friendly drag-and-drop design and prototyping functionality to make you more productive.
- Robust collaborative tools like real-time previews, prototype-sharing, commenting, and feedback mechanisms.
- Fast prototyping with extensive gestures, rich transitions, eye-catching effects, dynamic animation, etc.
- All code automatically generated at the back end for the development team to work with.
- Easy developer handoff in terms of code inspection and downloading of code packages and other asset-related information.
Creating a PRD Prototype with Mockitt
Although you can certainly create a process flow for the PRD itself, a much better use of Mockitt would be to create an interactive prototype that shows stakeholders what the product should look like and how it should function. In many ways, a prototype is a 'touch and feel' version of the product requirements document that is more tangible and easier to grasp visually. Let's look at how a prototype can be created in minutes using Wondershare Mockitt. Let's assume that a particular release of a software version requires one single functionality to be added. As an example, let's say the app's owners want a star-rating pop-up to appear that will allow users to rate the app in the app store (Apple App Store or Google Play Store.) Here's what the creation of the prototype might look like in Mockitt:
Step 1. After setting up the Mockitt account and starting a new project for this PRD prototype, the first step would be to detail the various screens involved in the rating process.
For instance, the first screen would be a prompt for the user to rate the app. It could have a button that will allow the user to proceed with the rating.
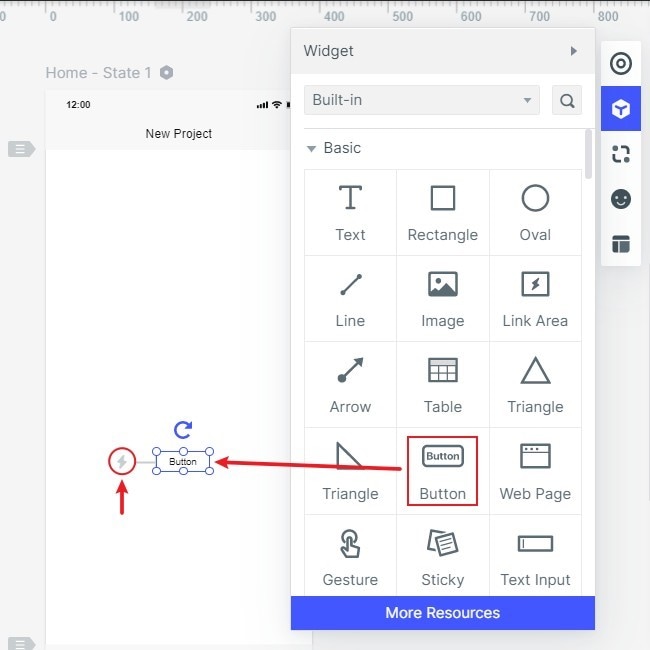
In Mockitt, this is as simple as dragging the required component onto the screen and positioning it where it should appear.
Similarly, the second screen might be a mockup version of the review page on the App Store or Play Store.
For the second screen or page, you might want to show multiple page states - a blank review page, a page with the star rating only, and a page with the star rating and a written review. You may also want to include a Submit button on these pages.
The third page might be the success message page where the review has been accepted and is under review.
All of these can be laid out on their individual screens in Mockitt, and the various page states for a particular interaction can also be created. To do this, you simply drag the component from the asset library on the right-side panel and drop it into the screen to position it.
But what about being able to interact with this basic design? That's the next step - prototyping.
Step 2. In the prototyping stage, the various screens and the assets/components/widgets are connected with their corresponding pages or page states.
For instance, you may have a Rate Us button on the first prompt screen asking the user to rate the app.
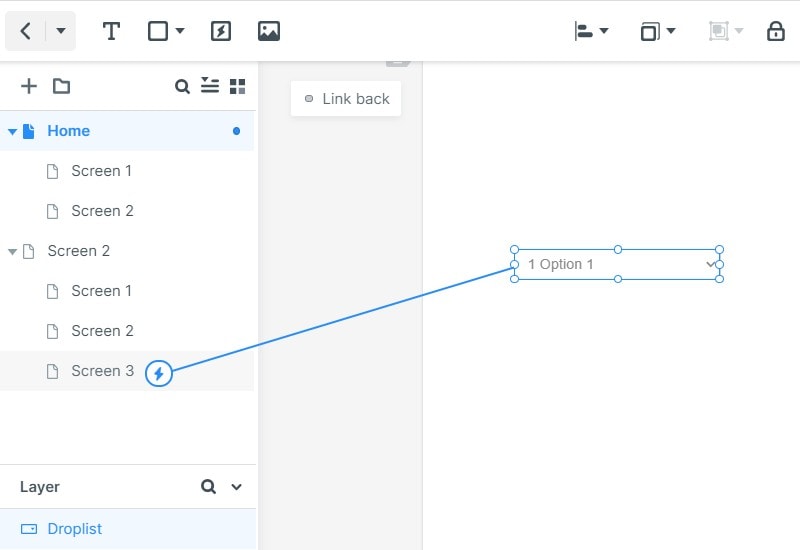
This widget can be linked to the second page by simply dragging the link from the left edge of the asset and dropped to the second page on the left-side navigation panel where all the pages and page states are listed.
Similarly, the 'star rating only' page state can be linked to the 'star rating with written review' page state by dragging the link from the stars widget to the relevant page state.
Mockitt also offers the use of dynamic widgets, which show multiple widget states on a single page. For instance, tapping the stars widget can turn it from empty to full (no rating to 5-star rating) without the need for two different page states, which saves a lot of time in the long run.
Once you create an interactive link, you can edit the link to add a gesture like a swipe, tap, etc., which will trigger a transition, an effect, or an animation. For instance, tapping the Rate Us button on the first prompt might make the button wobble or animate in some other way. This tells the user that the button has been tapped.
You can now proceed to create the various interactions required for this feature.
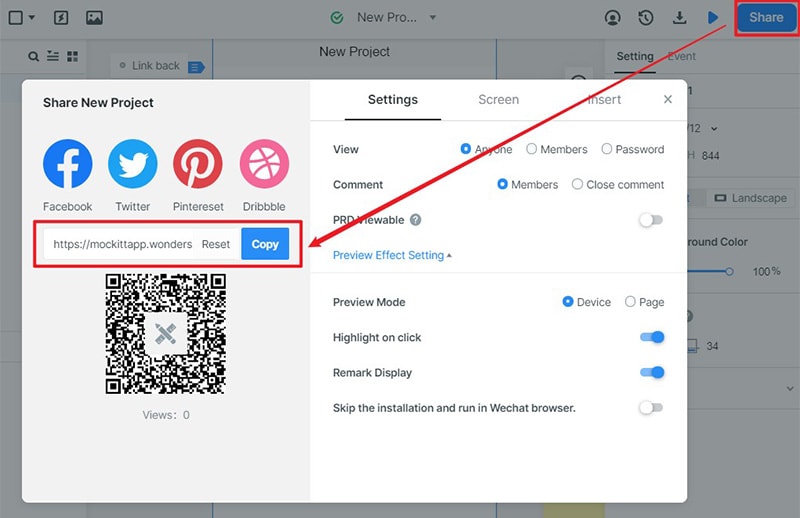
Step 3. In this step, you can share the prototype with project stakeholders by clicking Share and generating a QR code or URL. You can also use Export to download the HTML demo package for offline viewing or save the file as PDF and other formats.
Step 4. The prototype can be previewed at any stage by anyone who has access to that project. Once it has been fully approved, it can be added to the PRD and sent for a final review before it goes into subsequent stages.
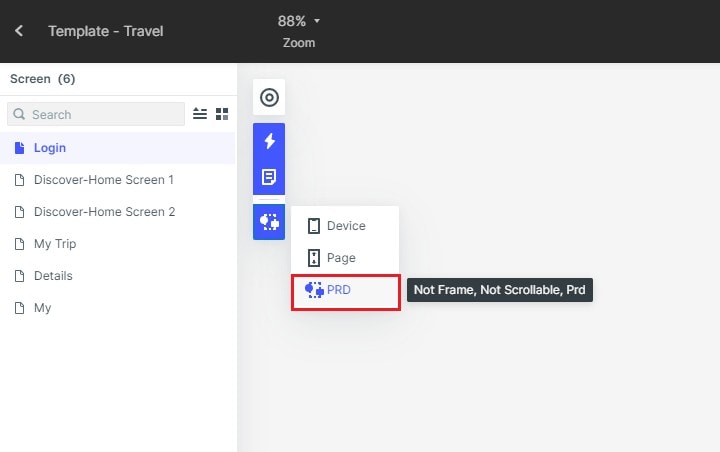
The PRD itself can be created in Mockitt, in which case you would design pages of content instead of a process flow. Additionally, you can use a template for a PRD and use Mockitt to do the prototype, then merge the two by saving the prototype as an image and embedding it as an object in the PRD.
