How To Create Mockup With Axure
Developing a prototype without coding has always been a dream for those seeking a smart and quick way to complete their prototype wireframe. Axure mockup gives you the power to develop an axure RP mockup. It has the power to help business stakeholders, business analysts, and product managers. The time it takes to complete one single line of coding, the entire prototype will be ready and can be presented to the stakeholders. Further in the discussion, we will be discussing the key steps to develop the mokeup with axure.
How To Create Mockup With Axure:
Step by step guide to creating a mockup with axure is as follows:
Step 1 - Developing The Basic Page:
- Axure RP files are grouped into pages that can be handled inside the Pages window.
- Click on the Add Page button in the top-right of the Apps pane to add a page.
- To open it on the screen, double-click on the name of a page in the Pages window.
Step 2 - Construction Of The Canvas:
- The canvas is where you are going to build your projects. You can operate without constraints, or you can set page dimensions based on the target computer for which you are designing.
Step 3 - Creating The Widgets:
- Using widgets you can create your templates, which are grouped into libraries inside the Libraries window. Axure RP comes with four pre-installed widget libraries - Normal, Flow, Icons, and Sample UI Patterns — but you can also build your own or add libraries created by your coworkers.
- Drag it out from the Libraries pane to apply a button to the canvas. Also, you can use the Insert menu options to incorporate text, pictures, and shapes.
- Double-click or pick the text on a monitor to edit it and press Enter
- To adjust the widget's graphic appearance, head over to the Style window. Many resources such as fill color and font are also placed along the top of the canvas for easy access in the design toolbar.
Step 4 - Establishing Interaction:
- When you have some widgets on the canvas, interactivity can be applied to them in the Interfaces window.
Step 5 - Linkage between the pages:
- Production of links between pages in your prototype is easy and fast.
- Attach a new tab in the Pages window. Now you should have two pages, on page 1 and page 2.
- Drag a button slider from the Libraries pane on to the canvas on Page 1.
- In the Interactions window, pick the button and on On or Tap Open Connection.
- Pick Page 2 from the emerging list, and press Yes.
- To open the prototype inside your web browser, press the Preview button at the top right of the UI.
- To go to Page 2 please press the button.
Step 6 - The Feedback:
At the end of this process, you can enjoy the feedback from the teammates and colleagues that will help you to craft new innovative ideas in the upcoming projects. You can transform a simple mockup to a customized and interactive mockup that can be used as a benchmark or the axure mockup example for the rest of the colleagues.
Would you interested in Axure for Mac Alternatives? Click and learn more about Top 5 Axure For Mac Alternatives in 2021 (Including Mac OS 11).
How to Make Mockup using Axure RP Alternative:
Wondershare Mockitt, a term for trustworthy, convenient, and competent forum for product design that helps to turn your ideas into practice. With the aid of this app, the wireframes and prototypes can be produced and used at no expense. Many of the related tools are charging high subscription fees but using Wondershare Mockitt comes with the advantages that value your time, commitment, and resources you are investing in. And if you as a customer want a simple kit, you'll be able to get it free, showing that the business owners your commitment. Also, the value-added cloud interface and helpful model collections help you keep track of your project wherever specifications are used worldwide. Built-in widget, axure mockup tool, real-time co-editing functionality, and icon library allow you to create the best of products where your management, design staff, and developers can work together and communicate with each other.

Whereas if we talk about details that how you can create a mockup with Wondershare Mockitt the process is as follows:
Step 1 - Selection Between Mobile And Web Projects:
- In Wondershare Mockitt you can build smartphone (iOS / Android), Tablet, Screen, Computer, and Watch prototypes.
- You can also adapt the scale of the project to each computer.
- Only click on "Build Project" after logging in to start prototyping.
- You can create a Blank Project, pick the correct type of computer and name the project, or choose "Build Project from demonstrations."

Step 2 - Add Widgets And Icons:
- Fast widgets are on the left and there are three options on connecting Fast Widgets to the canvas.
- Double click such widgets
- Drag widgets onto your canvas
- Hotkeys push and pull
- Three resource forms are on the right: Build-in Plugins, My Apps, Icons. And there are two methods of adding these. -Double click some widgets - Drag the widgets onto the canvas

Step 3 - Add Links Between Screens:
There are 2 ways to connect screen links:
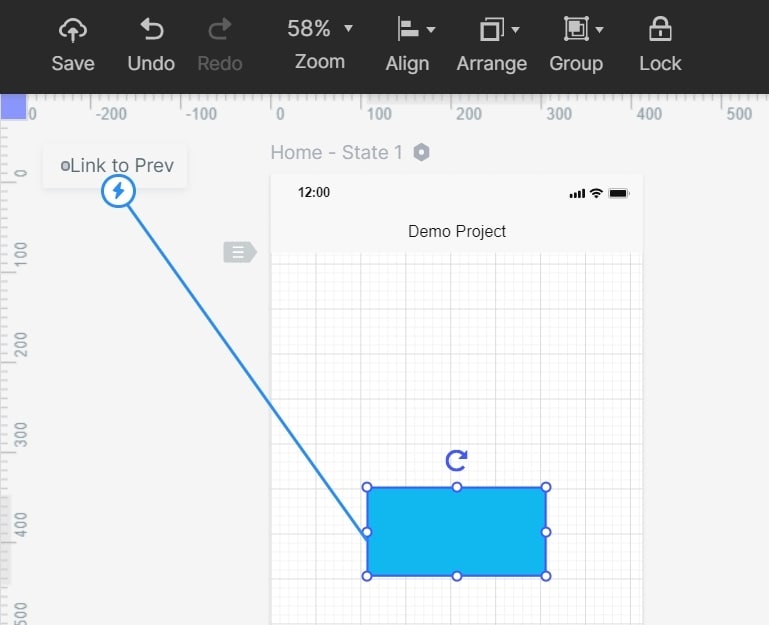
- Choose one button, then right-click on "New Link" in the Path Window.
-Then configure the button for motion, movement, destination screen/state, and animation.
- Drag the Connection icon to the destination screen on the left of the button.
- On the Connection Column, you should then change the motion, behavior, target screen/state, and animation.

Step 4 - Convert Widget To Master For Bulk Editing:
- The Master of Wondershare Mockitt is identical to the sign of Axure, or Sketch.
- When you transform a widget to a Master and modify its attributes, the modifications will be inherited from all its instances included in the project.
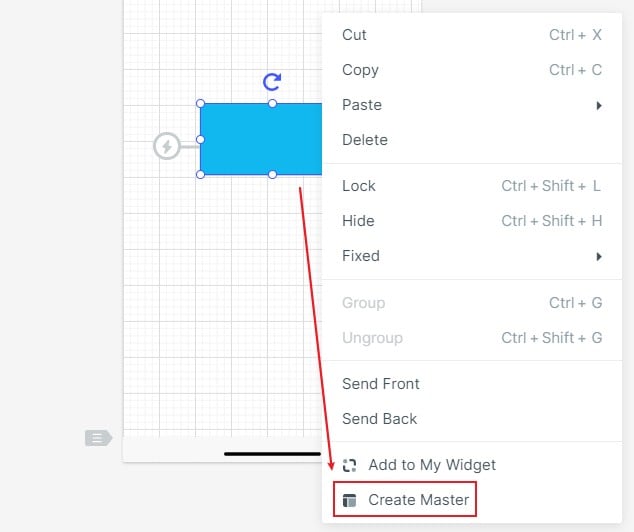
- Right-click the "Create Master" button. The Master would then be preserved in the Master Library. To build the instances, simply drag the master onto the canvas.
- To change the Master, press the "edit" button on the Master

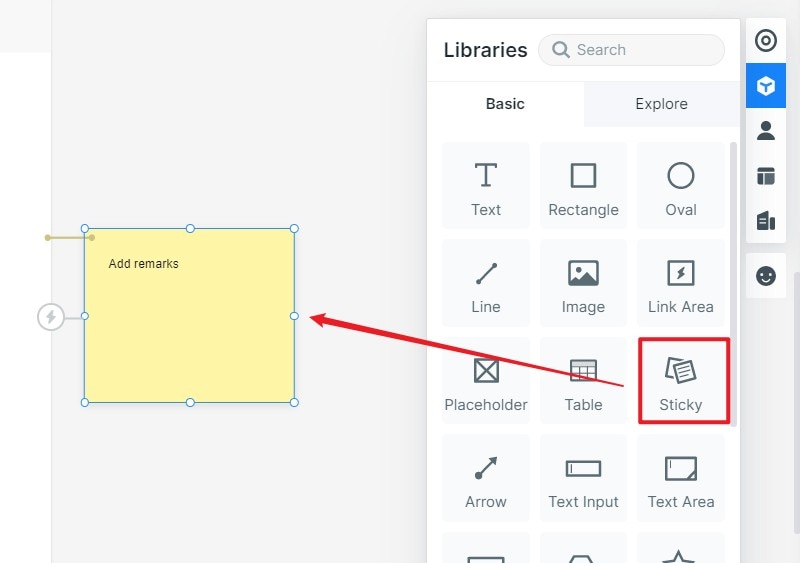
Step 5 - Add Notes For Your Design:
- Wondershare Mockitt 's Master is synonymous with Axure, or Sketch's symbol.
- When you turn a widget into a Master and alter its attributes, all of its instances used in the project will inherit the changes.
- Right-click button on "Master Building." Then the Key will be conserved in the Key Library. Only move the master on to the canvas to create the instances.
- Click the Erase button on the Master to change the Key


