Top 5 Bootstrap Carousel Examples and How to Create Carousel with Bootstrap

Bootstrap is a very popular front-end framework that helps your build various digital elements like web apps, modern websites, and carousels. You don't need any high-end technical skills, just a few steps and it will create a professional carousel that can be used for both marketing and web-designing purposes. In this article, we will present the top 5 bootstrap carousel examples. Along with this, you will also discover a step-by-step process on how to create a bootstrap carousel slider easily. So if this sounds useful, stick to the very end.
- Part 1. Top 5 Bootstrap Carousel Examples
- Part 2. How to Create Carousel with Bootstrap
- Part 3. The Best Tool to Create Carousel and Generate Code
Top 5 Bootstrap Carousel Examples
1 - Two Slider Carousel
This is a very clean bootstrap image carousel that features only two slides. However, it is very easy to add more just by writing a few lines of code. On a single screen, you could upload three images of your content. The black arrows look very elegant and are very easy to navigate. You could manually switch them or set the automatic timer.
2 - Big Banner Carousel
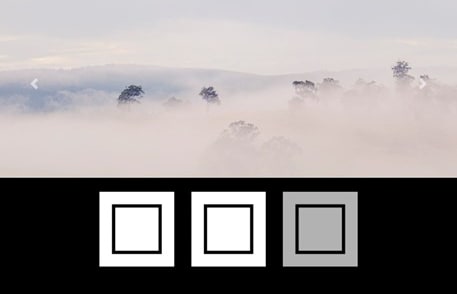
This is a bootstrap carousel slider with thumbnails. It features a very stylish look and is perfect for branding websites and stores. Each page consists of a big image along with 3 thumbnails, which gives a sneak peek of other slide images. This template only contains images but you could also add buttons and other widgets by making some coding changes.
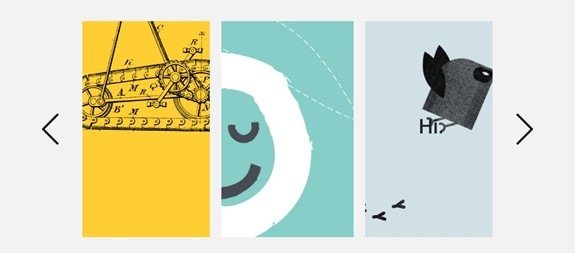
3 - Wide Image Carousel

This carousel template is an ideal option when you want to showcase a lot of content. It features multiple slides and each slides contains four items. It's an automatic slider but you could use the arrow to navigate it manually. Users can also move to a specific slide by clicking on the same dot, placed at the bottom.
4 - Full-Size Carousel

This is a full-size carousel that flaunts three slides with extra-large images. The design is clean and optimized and you could easily navigate by clicking the three dots placed below. However, it moves automatically but you could also change slides by pressing the arrows.
5 - Multiple Slider Carousel

This is a modern-looking carousel template that allows you to include a lot of things. You could edit text, add images, and even write a tagline. The navigation arrows look very sleek and the bottom cursors are also designed properly. It is a fully customizable bootstrap 4 carousel slider, which means if you don't like any element, you could easily change it.
How to Create Carousel with Bootstrap
- Step Open Bootstrap and create a fresh project in the visual code and add the folder where you have kept your slider images. It is best to optimize the size of the images and save them in a new folder. Now create a new file and rename it as index.html.
- Step Now make Html 5 snippets by typing Html5 and enter. Rename the page title and link the index.html file to the Bootstrap file. To do that, you will have to go to the bootstrap website. There you will see a documentation tab. Click on that and copy the CSS tag and paste it in the head.
- Step Again visit the website and copy the JavaScript file under the same tab and place it before the closing body tag. This is an important step. Never forget to include these three JavaScript files because carousels need JavaScript to run smoothly. After this, create a div with a class container. Simple write div. class and hit tab. Enter the height and width. Now create one more div with slide class and carousel. Specify the data-id and then make a data-ride carousal.
- Step Make a div with carousel inner class. Now add div with carousal element and active class. After that, create slides with the carousel item class. Do it with all the images you want to have in the slider. Once this is done, press the Go-live next to run the project.
- Step To get a live preview, you will have to install the go-live extension. Run the file and check if the slider is working properly. If the images seem too big, change the width and height to 100 bootstrap class and apply it to all images.
- Step That's it, your basic carousel is ready. If you want to add the next and previous buttons, you can do that by starting a new anchor tag and specifying carousal ID in the ahref attribute.
- Step Put the class name 'carousel control next' and 'data slide next'. Now in this span, you need to make a 'carousel control next icon class' and make sure to specify 'area hidden true'.
- Step Now create one more class but this time it's with 'sr only class'. That's all, go back to the go-live extension and you will see 'next' and 'previous' icons.
The Best Tool to Create Carousel and Generate Code
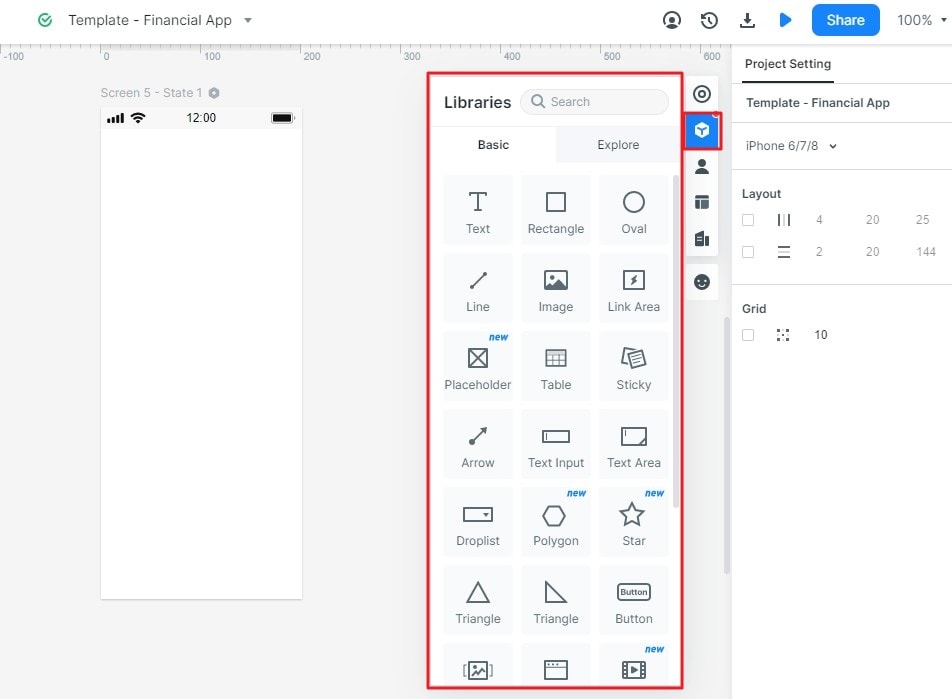
There are several ways to create a carousel but using a prototyping tool like Wondershare Mockitt makes it extremely easy and convenient. It is a cloud-based prototyping platform that helps you build interactive prototypes without writing a single code of line. Equipped with features of real-time viewing, this tool makes communication seamless. It is a fully-featured mobile and web solution that hosts a broad range of features.

The user-friendly drag and drop interface makes it perfect for non-techies. You will get access to an extensive resource library that contains a 500+ collection of icons, templates, screens, and components. It comes with a carousel widget that makes creating a carousel very easy along with a handoff feature, which allows you to generate Carousel into CSS code.
Here is a tutorial on how to create a carousel and generate code.
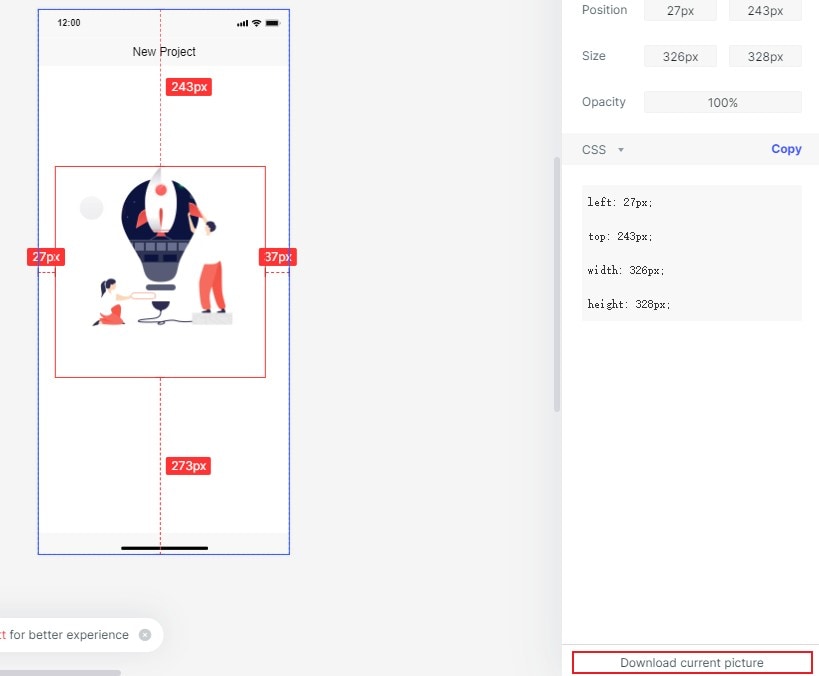
Step 1. Click on the "Create > Prototype" option. It will take you to the device selection window. Choose a device, and click "Create" to move to the next step.

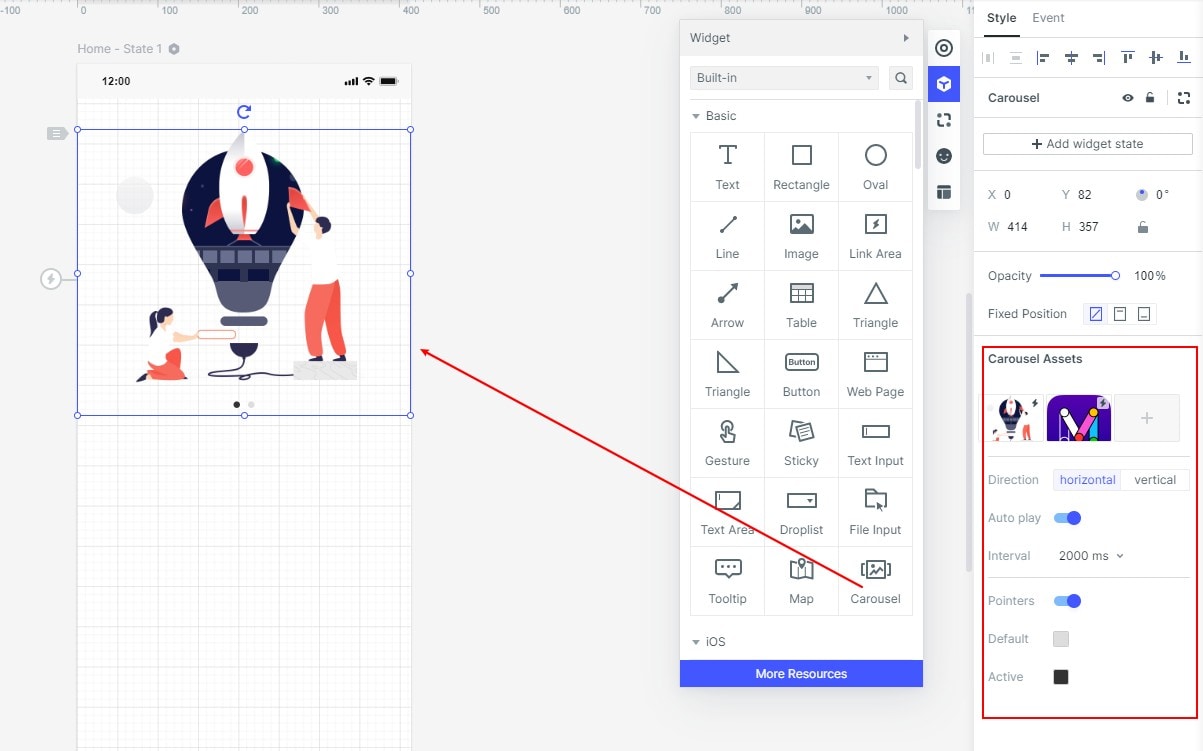
Step 2. Now on the right side, you will see some icons on a straight bar. Click on the cubical one, which says "built-in". Once you click this, a pop-up will appear, containing a lot of widgets. Scroll down and click on the "Carousel" button.
Step 3. This will add a carousel widget on the artboard, which you can expand and collapse as per your needs. Now to add a picture, you need to click on the image-like icon, which you will get under the "Carousal Assets" section.
Step 4. You can add as many images as you want. Just click on the + icon under and it will add more image's container. You can also add text to your images by using the text input widget.
Step 5. Once you have finished customization and want to check how your carousel is looking, then you could do that by clicking on the "Preview" button.

Step 6. Now if you think that your project is ready and you want to generate the CSS code, then simply click on the "Handoff" option. Tap on the carousel and the right side, you will get the CSS code. Copy it and you can easily use it on any platform you want.