How to Use Adobe XD Collaboration

Adobe XD collaboration tools allow you to work together in a remote work environment with colleagues, other teams, clients, and other stakeholders in a seamless fashion. Adobe XD collaboration is a real-time experience where you can do do-editing, see feedback and comments instantly, and do other team activities. Any document shared on the cloud can have other members invited to join for co-editing and collaboration. XD collaboration makes document workflows simpler and more effective.
- Part 1: Can you collaborate on Adobe XD?
- Part 2: How do you collaborate in XD?
- Part 3. How do you co edit Adobe XD?
- Part 4. How do I share XD prototype with client?
- Part 5. The Best Adobe XD Alternative that Have Better Collaboration
Can You Collaborate on Adobe XD?
Yes, but with Collaboration in Adobe XD, this is only applicable for documents and projects that have first been saved to Adobe Document Cloud. These files can then be shared with email IDs of other users who have an associated AdobeID. Once they have been granted permission, you will need to enable collaboration for co-editing. If not, they will only be able to view and/or comment on the design.
You should also note that this is different from sharing a design, for which the process is different. With regard to the sharing feature, you are simply sending them a preview version of the project and not the actual artboards themselves. Since they are only reviewing the prototype, they won't be able to make any changes to the design itself.
On the other hand, in Adobe XD team collaboration, the co-editing feature gives members full access to the project (if you enable co-editing) and can make all the changes that you can.
How Do You Collaborate in Adobe XD?
As discussed, co-editing is just one of the modes for Adobe XD real-time collaboration. In addition, anyone with access to a project on Adobe Document Cloud can comment on a file, and others will be able to see those changes instantaneously.
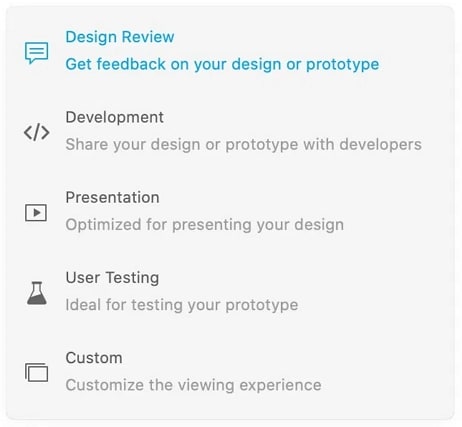
To share a design, you don't need to save it to the cloud. You can share it directly from within Adobe XD using the Share function, which has four View Settings options:
- Design View
- Development
- Presentation
- User Testing
- Custom
To add a team member for co-editing, do the following:
- Upload the design to Adobe Document Cloud and have it open in Adobe XD
- Invite team members by clicking the Add Member icon on the top right and then entering their email ID associated with an AdobeID. At the bottom of the window, you'll see Enable Co-editing (beta). Click that and then click on the blue Invite button.
- The team member will receive a message with a link that automatically takes them to their own AdobeID and gives them access to the cloud document in question.
How Do You Co-edit in Adobe XD?
Once the team member is logged into their Adobe XD account, they will be able to view the project and edit it. Each member is assigned a specific color, and you will be able to see their avatars next to your Invite to Document button, similar to when multiple people access a Google Docs or Sheets file.
You can tell who's editing what element because when a user selects a layer or page, the boundary box outline will change to their color to prevent others from editing the same element. This eliminates any confusion with two people editing the same element and causing a conflict.
Similar to adding a team member, collaborators can also be removed using the process shown in the previous section. Just hit the Remove button against their name and they will immediately lose access. Remember: you can only do this if you are the creator of the project and they are the invitee.
How Do I Share an XD Prototype with a Client?
In order to share a design, first, make sure that all the artboards are part of a single user flow. This is required for sharing all pages. After that, you can follow the process shown here:
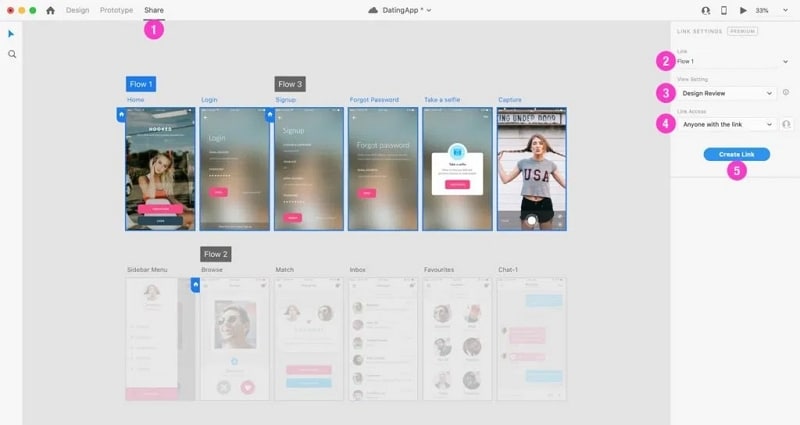
Click the Share button in the top menu bar and then select the user flow to be shared. If you have wired all your artboards together, it will be shared as a single user flow.

In the Link Settings panel on the right, add a title and choose one of the View Settings options and one of the Link Access options (Anyone with link, Only invited people, and Anyone with password.)
Click on Create Link and you're done. If you make any changes to the settings, you can click Update Link and the access parameters will change.
The generated link can now be shared with your client via email, chat, and other channels.
The Best Adobe XD Alternative with Even Better Collaboration
Wondershare Mockitt is a compelling design and prototyping platform that rivals some of the best design tools in the world. Built for collaboration from the get-go, this cloud-based utility requires no installation and no syncing of your work. Everything is accessible through your browser and available in real-time to others, which includes co-editing of designs, annotations, and comments. Here are some of the top features that make this a highly collaborative tool

- Invite others to co-edit your designs - color-coding by individual or team makes it clear who's working on what
- Team management tools to assign permissions and prevent accidental deletion or removal of design components
- Share a secure link or QR code for others to review your designs online, with permissions and other security measures that you can control
- Comment and communicate in a true real-time environment for greater efficiency
- Enterprise workspaces for team collaboration
- Rich asset libraries
- Easy and rapid prototyping
- Smooth developer handoffs
How Do You Co-edit in Wondershare Mockitt?
Step 1: Invite Others to Co-edit your Design
There are a couple of ways to invite other team members to co-edit your design. One of them is to go to the relevant Enterprise Space, click the ellipsis (expandable menu) icon on the project and then select Manage Member.
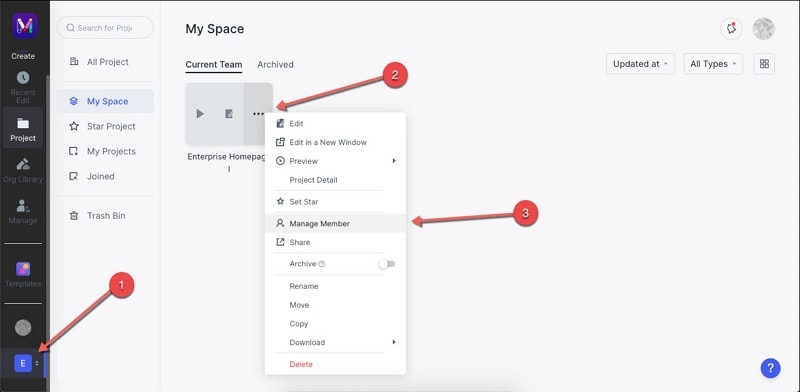
In the new window, you can search for and add members from your organization or anyone else with appropriate credentials. You can also assign specific permissions before adding them to the project.

Step 2: Co-edit the Design
Once they have access to the project, they can log in to their own Mockitt account and access the project with the rights assigned to them.
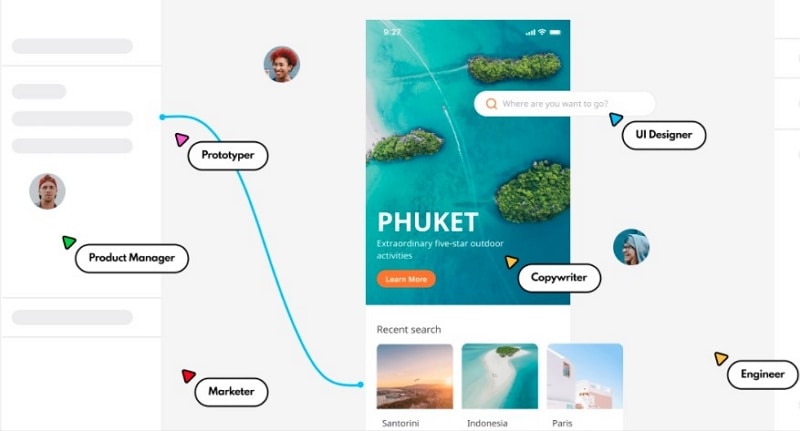
If that includes, co-editing, you'll be able to see their avatar, and any action they perform will change the color of that layer, screen, or component to their specific color.
Step 3: Share the Design
After the edits are done, you can share the design using the Share option on the top right.
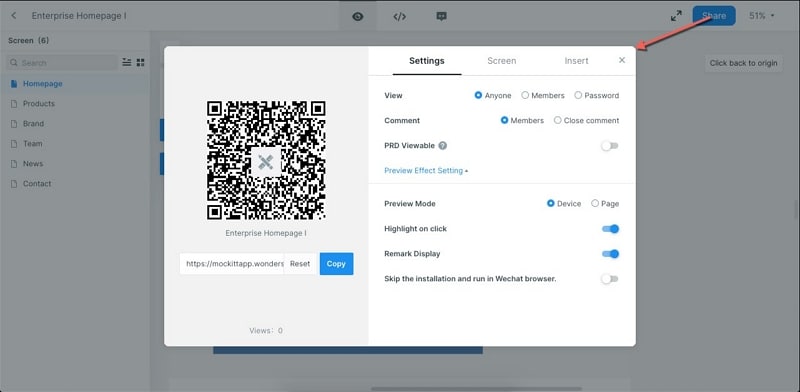
As you can see, there are various settings options for permissions, what you want to share, how it should be visible to them, and much more. You can then copy the URL or the QR code and send it to all collaborators.
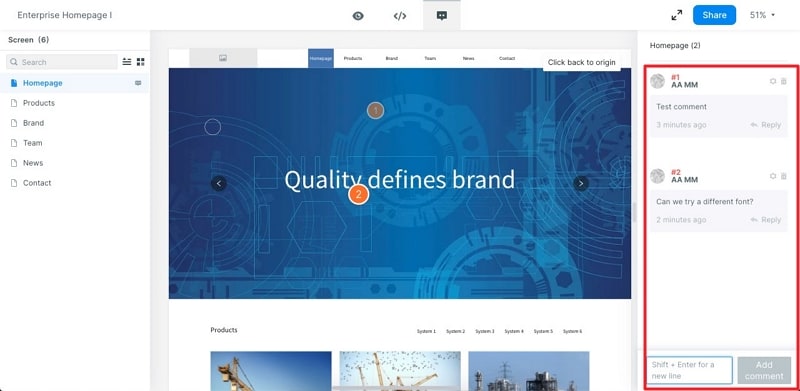
Step 4: Gather Comments
Once you share the link or QR code, people with comment access can add numbered comments to the design, which you will be able to see in real-time in your own Preview mode in the Comment section.
In this manner, collaboration becomes a simple but highly effective tool for streamlined design workflows.
Conclusion
Wondershare Mockitt is clearly a much better collaborative tool than Adobe XD on many counts, including ease of adding members, assigning permissions, co-editing without having to wireflow the whole project, easy user management, and many other reasons. But perhaps the most compelling reason of all is the price point. For instance, while you have to pay $22.99 a month or $275.88 per year per user for Adobe XD as a single app, Wondershare Mockitt is available to enterprise users at just $99 per user per year, which is a fraction of Adobe XD's pricing. The personal plan for Mockitt will cost you just $5.75 a month versus Adobe XD's $9.99 a month for individuals and small teams.
It's practically a no-brainer, especially considering the fact that Mockitt is cloud-based and accessible anywhere, while Adobe XD is tethered to a single computer. Moreover, Mockitt is easy to upgrade at the back end because you don't have to install anything anyway, which means new features can be added at lightning speed, which is the case with the flowcharting tools for user flows and the design tool that's on the cards.
