Tips On How to Build iOS App
Are you an amateur app designer looking for the best and easiest way to build iOS app? If this is the case, then worry no more because you just hit the right page. Traditionally, building an iOS app required good coding skills and expertise. But now? Technology has transformed all those complexities, and you can build iOS app without cracking your mind with endless lines of codes. You want to know how? Go through this article and get acquainted with how to build an iOS app like never before.
How to Build an App for iPhone
Step 1. Create the iOS App Wireframe
Creating a stunning iOS app wireframe requires a proper app design tool for iOS. Fortunately, Wondershare Mockitt is the best tool to design the iOS app wireframe. The program is enriched with an array of top-notch features that make the entire design process seamless. There are several widgets and icons you can choose from to create eye-catching interfaces.

You can edit them and save them in your widget library so that you can reuse them and save your time. The plenty of customizable templates of different industries allows users to build their designs faster. Simply pick a suitable template and customize it to avoid starting from zero. Make your designs more interactive with the help of gestures, transitions, actions/states, and animations. Once you are through with your design, you can share it with friends or team members and receive real-time reviews and comments.
Main features of this tool
- With this program, users can collaborate in real-time and co-edit the project.
- It supports preview on mobile, PC, and offline.
- Users can create interactive prototypes using transition, action, and gestures.
- Users can animate their prototypes.
- It has plenty of built-in widgets and icons to use
- Several customizable templates make the design process faster.
Here are detailed steps on how to make an app prototyping with Wondershare Mockitt.
1. Create a New Project
Open Wondershare Mockitt and sign in to access the main page. Locate and click the "Create Project" button then select the "Blank Project" tab. Enter the name of your choice within the "Project name" field and select the "Mobile" icon. Click the device drop-down icon at the bottom and select an iOS device. Finally, click the "Create" button to start your design.

2. Design the Application
- Add Screens
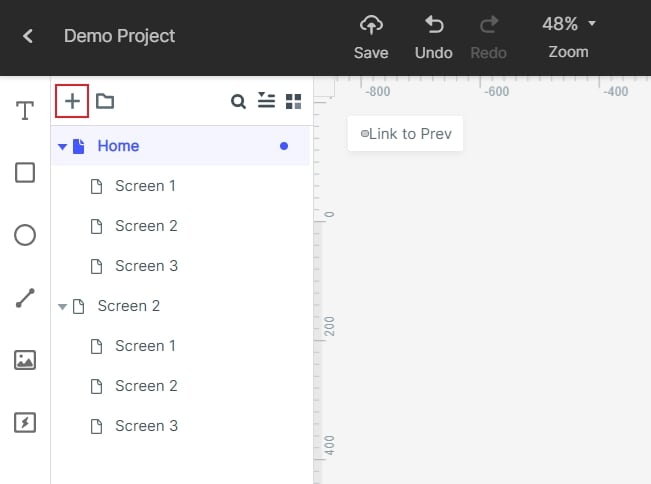
Click the "New Screen" button to add as many screens as dictated by the app.
- Add Widgets and Icons
There are several widgets available on Wondershare Mockitt, including Fast Widgets, Build-in Widgets, My Widgets, and Icons. To add a widget, double-click on it and drag to the canvas then start drawing. The Fast widgets are a bit different as you have to hold the hotkeys after dragging to the canvas. Click on the widget and edit from the Inspector Panel. Drag the edited widget to "My Widgets Library" to save for reuse.

- Add Links between Screens
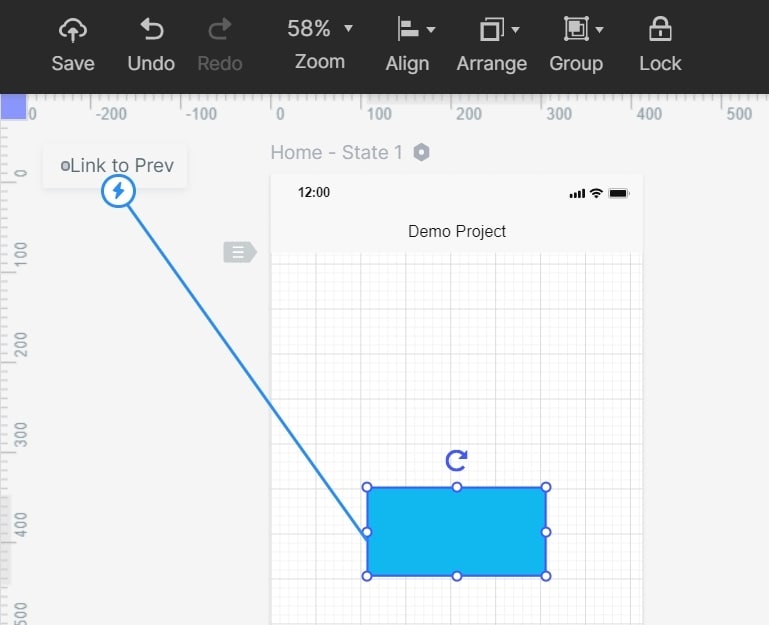
To link one or more screens, click on the desired element/object and drag the circular handle that appears to the right. Release it on the target screen, and a connecting line between the two screens will show the connection. Repeat this process for other screens that ought to be inked.
- Add Notes
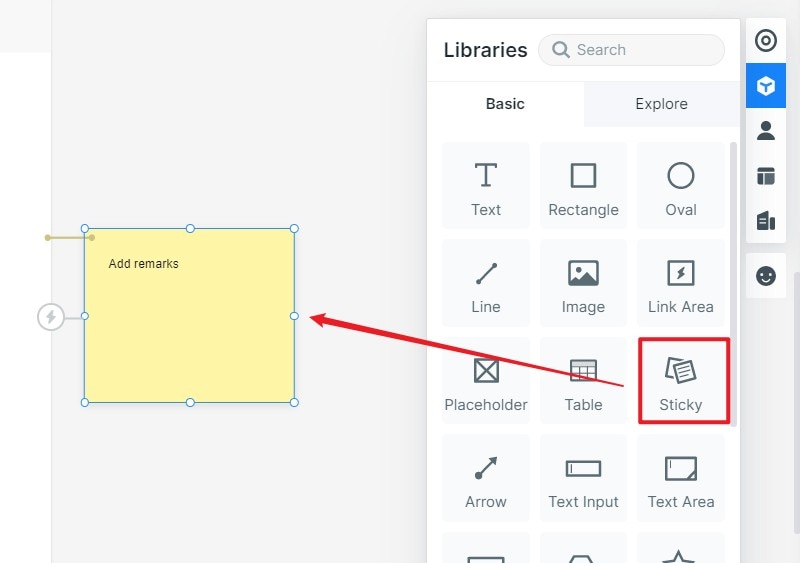
To add notes, we are going to leverage the "Sticky" widget in the "Build-in Widget Library". Select the "Sticky" widget and start inputting text on the sticky note that appears on the screen.
- Create Interactive Animation
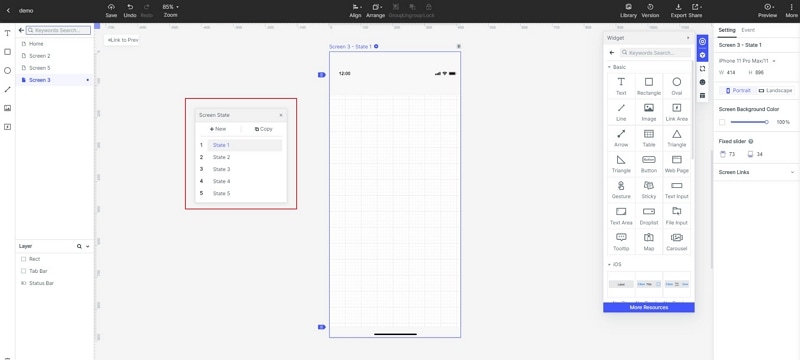
Locate and click the "State" icon. From the subsequent State Panel, select the "New State" button and drag the link icon to the target state. Define your animations on the "Link Panel".
3. Preview the App
Now that you are done with the design click the "Preview" tab and start previewing your app.

4. Share the App
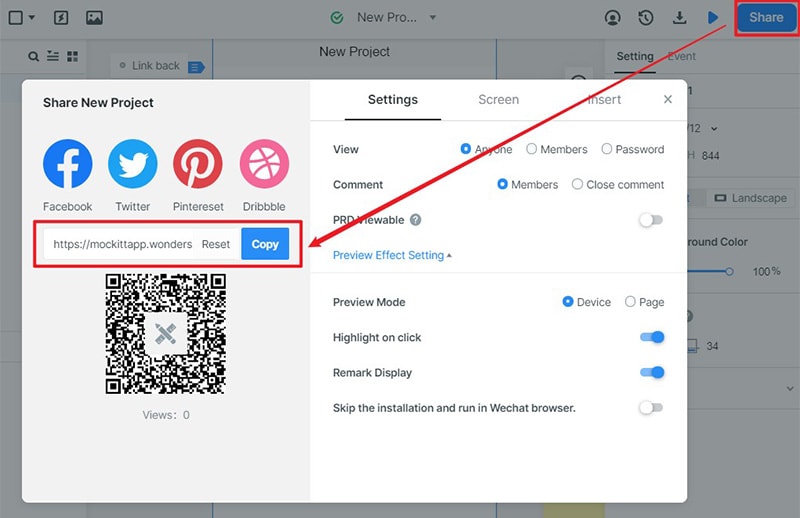
Navigate to the toolbar and click on the "Share" button. You will receive a QR code and a project link. Share these details with the people you want to see your design.
Step 2. Download as HTML/APK
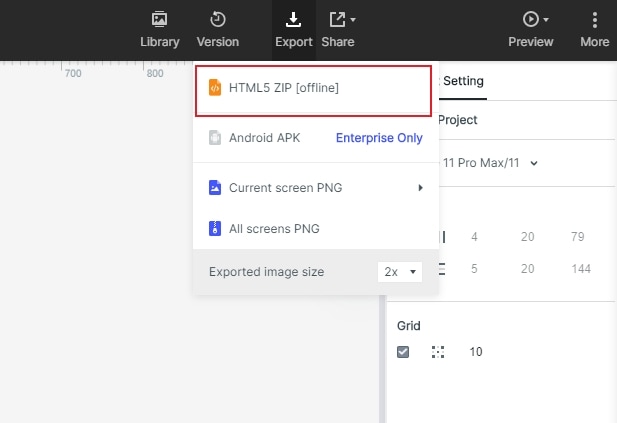
Once your design is complete, the next thing is to download and prepare it for testing. To download your app, click the "Download" button on the toolbar. You will be prompted to choose from several download options given. You can download it as an HTML or APK package by selecting the "HTML5 ZIP" or "Android APK" respectively. The free version does not support these downloads. So you should upgrade to subscriptions.
Step 3. Test the App and Launch it to Google Play Store.
For the HTML5 file, go to the download folder and open the respective ZIP file. Open the HTML index file with the Chrome browser and interact with your app.
For the APK package, locate the file and send it to your iOS device. Now run this file on the iOS device and see how it works.
After you have tested your application on the respective platforms, you can unleash it to users by uploading it to Google Play Store. The following steps illustrate how you can upload your app to Google Play with ease.
Step 1. Sign up for a developer account on Play Store.
Step 2. Navigate to your Play Console then choose "All applications" and subsequently select "Create application".
Step 3. Choose a suitable language and title for the app as you would like it to appear on Google Play Store.
Step 4. Create store listing for your app, content ratings, pricing, and distribution
Step 5. Publish your application.
Summary
As you have seen above, building an app for the iPhone is a plain sailing task. But wait. Why is it so seamless? The answer is a total no-brainer. It is Wondershare Mockitt that made it easier and full of fun. This program simplifies the entire design process, and the novice can create an app without any coding skills. That's remarkably good. So if you were stuck looking for how to create an iOS app, then this tool is your answer. Make it an indispensable tool and reap big with amazing designs of diverse categories.

