How to Develop App for Android and iOS

If you are an app designer, developer, or manager, the knowledge of the process of app development is crucial. The same applies when it comes to developing an app for Android and iOS. Yes, there should be a sequence of steps that ought to be followed to develop a app for a ndroid and iOS. If you are stuck there looking for how to create an app for Android and iOS, then you are fortunate. In this article, we shall walk you through the best way on how to develop an app for Android and iOS
How to Develop App for Android and iOS
Developing a good app for Android and IOS involves a series of steps that require deserved attention. These steps have been tested and have proved important as far as developing an up to par android or iOS app come into play. The following are the common stages about how to make App for android and iOS.
Planning
This stage is often referred to as preliminary analysis. In this stage, you are required to understand and lay down the expectations of your clients or customers. This way, you can create a plan on how you will cooperate and integrate their needs into the app. Define the technical architecture of your Android or iOS app and pick a suitable technology stack. You can identify the android and iOS app development requirements and group them into milestones.
Analysis
Planning is more theoretical, but the analysis stage is more technical. This stage involves coming up with the necessary technical documentation and how to actualize it. This stage also involves identifying the right skills and persons you would require for your app development.
Design
In this process, you want to piece together your ideas to design something visible. Here, you require an appropriate app design app for Android and iOS. Fortunately, you don't have to look far because Wondershare Mockitt is the best design tool for you. This powerful tool makes it easy and fast to design, prototype, collaborate on your project.

This tool has an array of excellent features that turns the entire design experience effective and full of fun. With the several UI assets and Templates, you can design your Android and iOS apps in less time. This is because you just pick a suitable template and customize it to meet your demands. Also, the wide range of widgets and icons allows users to design beautiful interfaces. Just pick a widget or icon and edit to create the best shapes. You can save these widgets and icons in your widgets library and reuse them when you like.
With the Wondershare Mockitt cloud, there is no more worry about uploading and downloading your designs. They are all synced in the cloud, and you can access them across any device regardless of time and space limitations. Invite your team members to comment and give real-time suggestions on how to improve your designs. This tool is suitable for all sizes and types of enterprises.
Main Features of this tool
- It provides several constantly updated UI assets and templates.
- The program has built-in templates and icons that help make the design more beautiful.
- This program supports real-time collaboration and co-editing of the prototypes.
- It provides an easier way to hand off designs to developers.
- It supports preview and testing of the design.
- The cloud feature makes it possible to sync team members and work remotely on the project.
Here are detailed steps on how to make an app prototype
Step 1. Create a New Mobile Project
To start creating your prototype, you need to create a new project. Using your credentials, log in to Wondershare Mockitt and click the "Create Project" tab. From the Create Project window, you can choose to create your project from blank or via demos. Neglect the "create from demos" option and select the "Blank Project" tab instead. Choose the "Mobile" icon from the device icons given on the interface. Supply a suitable name for your prototype on the "Project name" field. Finally, hit the "Create" button to get started with your design.

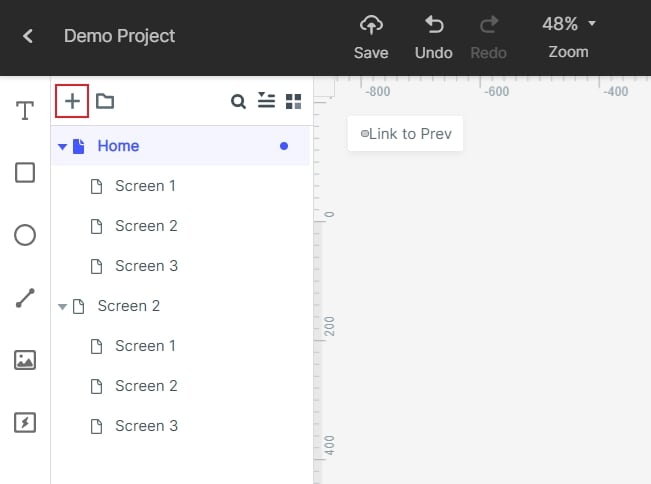
Step 2. Add more Screens
The program will then open the screen of the Android or iOS device you selected. Now add more screens because they are the basis of connections necessary for interactive prototypes. To add a screen, simply click on the "Add screen" button. To avoid any confusion, you should name your screens accordingly. Add as many screens as dictated by your android or iOS app.
Step 3. Add Widgets and Icons
After adding all the necessary screens, you now need to add shapes, objects, and relevant elements to individual screens. The widgets and icons will be key in drawing the desired shapes of these elements. Simply double click on the Fast Widgets and drag them to the canvas. Hold the hotkeys and start drawing your shapes.
You can also get the widgets from Widgets, Build-in Widgets, and Icons library located on the right of the screen. To edit a widget, click on the target widget and use the edit options on the Inspector Panel. When you are through with widget editing, it is good to save them in your widget library so that you can reuse them when you require them.

Step 4. Create Object/Screen Connections
When you are done inserting the necessary elements to each screen, it is time to link objects with the target screen/pages. Click on the object and drag the circular handle to the target screen. You should see a line between the object and the screen implying that the connection is established. Repeat the same process for all the other elements and pages/screens that need to be linked.

Step 5. Preview the Design
Now that you are done with your prototype hit the "Preview" tab, and see how your prototype works. Click the relevant buttons and see whether it is working accordingly.

Development
Development is also one of the most critical steps in creating an app. It is that phase where you integrate your design and the technical requirements of the application. The aim is to make it work on these devices. Technically, an Android or iOS application consists of three essential parts. The first one is the back-end/server technology. This technology involves the database and the server objects that are crucial in supporting the mobile app functionality. If you want to leverage a pre-existing back-end platform, make sure you apply some relevant modifications to incorporate support for your Android or iOS functionality. The second one is the API. It defines the method of communication between the back-end/server-side and the android or iOS app itself. The third critical part is the Android or iOS app front-end. It represents the native Android or iOS app where the user interacts with it easily.
To create back-end, you can leverage any programming language and databases. Native apps are a bit selective. Remember to choose a suitable stack technology depending on the OS platform. Android uses Java or Kotlin, while iOS uses objective-C or Swift programming languages.
Testing
Testing or rather, quality assurance testing is often taken as the last part of the development process. Here, you are testing your app under diverse scenarios and system loads. The importance of testing is that it makes your Android or iOS app stable, secure, and usable. You should test aspects like user experience, functionality, performance, security, and platform. With these tests, you are certain of a quality Android or iOS app solution.
Release
App release, as the name suggests, involves submitting your application to various platforms where users can interact and enjoy it. You can upload them to the App Store for iOS or Google Play for Android applications. Before submitting them to the respective sites, you should understand the requirements as dictated by these sites.
Support
After releasing your app to the users, actively track its performance. Customer feedbacks or reviews is the most reliable source of this analytics. Frequently improve your app and seek support from the end-users regarding improvements they would love to see. If you are deploying a native app, you should move with technology to avoid scratching your heads once left miles away by other applications.
Summary
It is crystal clear that apart from diligently following the design steps, an appropriate design tool is the game-changer. A tool can break or make your Android or iOS app development, and you need to invest well on the same. In simple terms, you need an appropriate app design tool. That appropriate tool is not appropriate if it is not Wondershare Mockitt. It because it gives you every single feature you would demand from an ideal app design tool. Pull a trigger with this tool and get the app design experience you have always yearned for all this while.
