The Best Tool to Save your Cost on App Development
Making a useful app is a fruitful solution to any problem for developers and users. To create such an app and do business with it, one must know how much does it cost to make an app. It is almost impossible to tell the exact value of expenditure. But if you have a rough idea of how much does it cost to develop an app, you can easily create an app. Sometimes it's free of cost, and sometimes the cost of creating an app might stand at $100,000 depending on its complexity.
How Much Does It Cost to Make an App
Honestly, there is a particular way to decide how much does it cost to create an app because its range is extreme. The cost of making an app can stand at nearly zero or millions, depending on multiple factors. The app's complexity, hours are taken to develop, and different developers' different rates are the factors that directly impact the cost of creating an app. To make an idea of the cost, there are some key aspects to look into:
- Category (lifestyle, business, social media, mobile games etc.)
- Devices or Platforms (Android, iOS, Windows phone etc.)
- Design
- Number of pages in UI
- Infrastructure and Features
If we divide the app's complexity into three categories, we can make a rough estimate of how much does it cost to build an app:
- Simple - It can cost up to $5000 - $10000
- Moderate - It can cost up to $20000 - $50000
- Complex - It can cost up to $50000 - $100000
To build an app, technically, one must concentrate on taking the minimum time and make a maximum effort. Working efficiently reduces not only the time is considered but also the cost to build an app as the designers and developers charge by per hour. However, if you can find some freelance developers, it can reduce your cost. An experienced developer can charge up to $50 to $100 per hour, where a new developer charges from $25 to $50 and even less in case of the freelance. The app development cost may differ around the globe
If you can make a DIY approach to make the app, it will help you reduce costs; however, graphic designing and code development should be done by professionals to get the best possible result.
The Best Tool to Save your Cost on App Development
There are several prototyping software or tools to create amazing wireframes for your app. But if you are looking for the best tool which is also free, Wondershare Mockitt is recommended. By following a few steps, anyone can build wireframes online for free with this tool without any expertise.

The steps are given below:
Step 1: Create a New Project
- Choose 'Create Project' to start prototyping after successfully logging in
- Start with a new project and choose the correct device type and name to proceed.
- One can choose from the demo to see examples of work on it.

Step 2: Change Project Size
- If a user makes a mistake choosing the correct device, it can always be changed from the '...' or 'Settings' to its right device such as mobile phones, tablets and webpage/television.
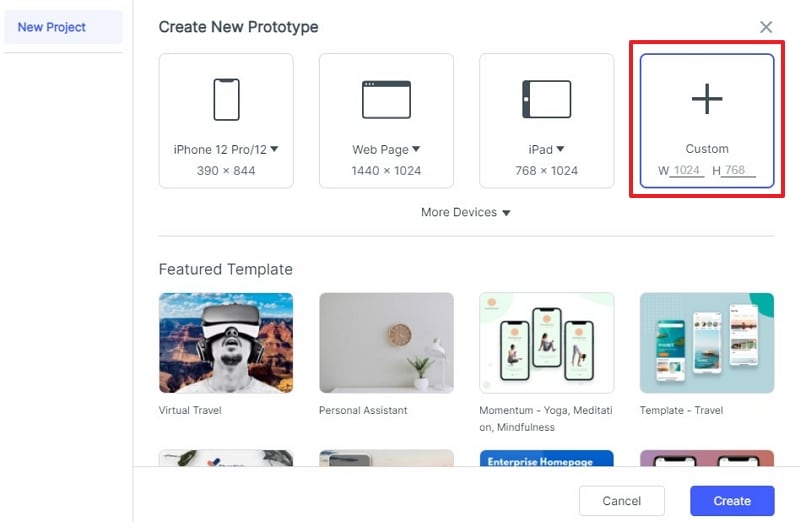
Step 3: Add Widgets and Icons
- There are assets on both sides of the canvas. On the left side, there are 'Fast Widgets,' and on the right, there are 'Build-in Widgets,' 'My Widgets' and 'Icons.'
- All the widgets can be used by merely double-clicking on it or can drag it to the canvas from the panels.

Step 4: Edit and Save Widgets
- To edit a widget, one has to click on it and select its properties from the inspector panel.
- The edited widgets can be saved for future use by dragging to 'My Widgets' or by right-clicking it to 'Add to Widgets.' This creates a library for all the custom widgets of the user's made.
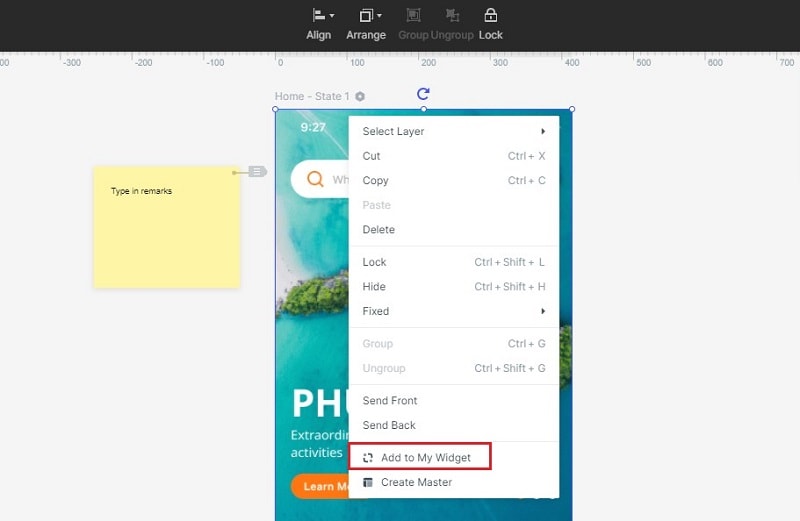
Step 5: Links between Screens
- Select a widget and choose 'New link' from the right panel to set a gesture, action of animation to it.
- Or one can drag the icon to the left panel of the target screen to ads those links.
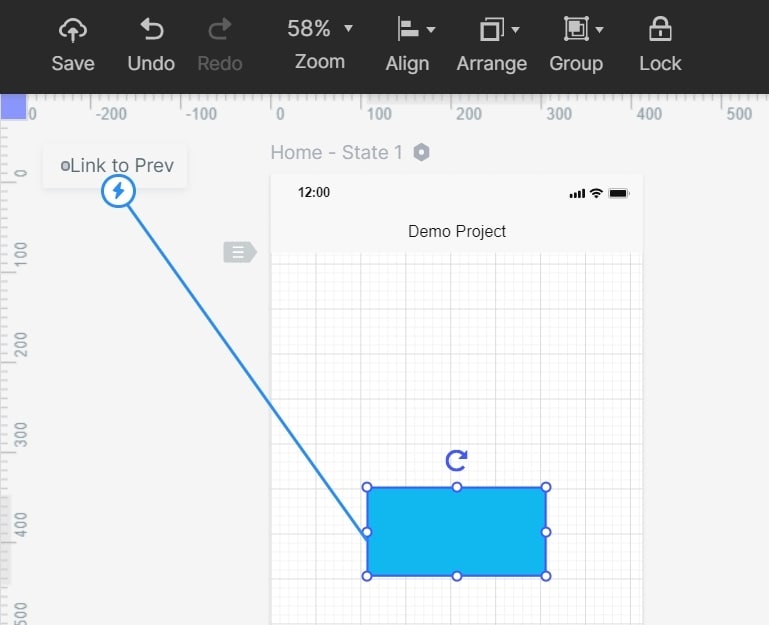
Step 6: Asset Library and Dynamic Widgets
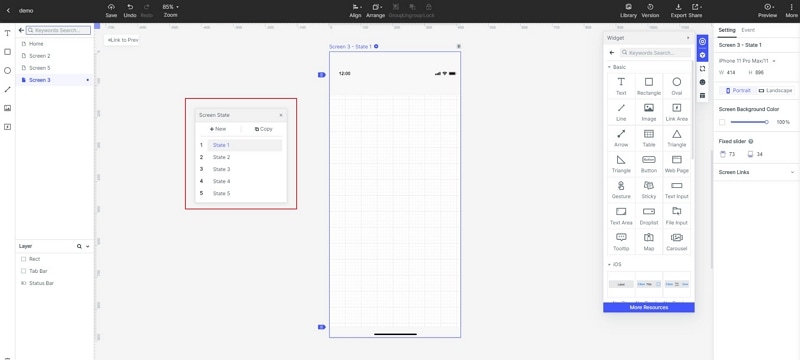
- There are numerous widgets and icons in the asset library for the user and even build-in templates as a demo.
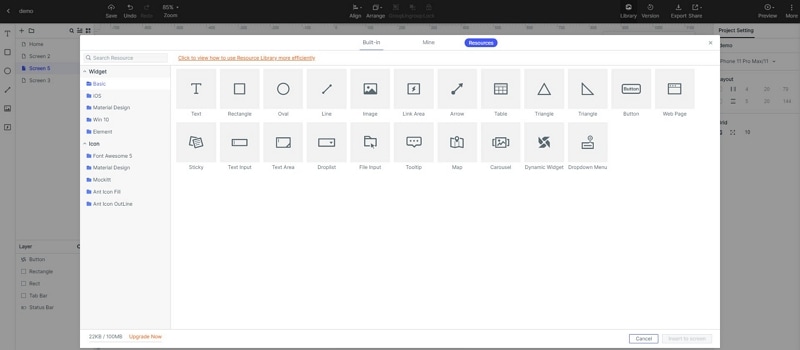
- Dynamic widgets help add interacting animation and manage screen state by changing the shape, size, and colour of an image component present on the screen.
Step 7: Add Audio, Video and Spreadsheets
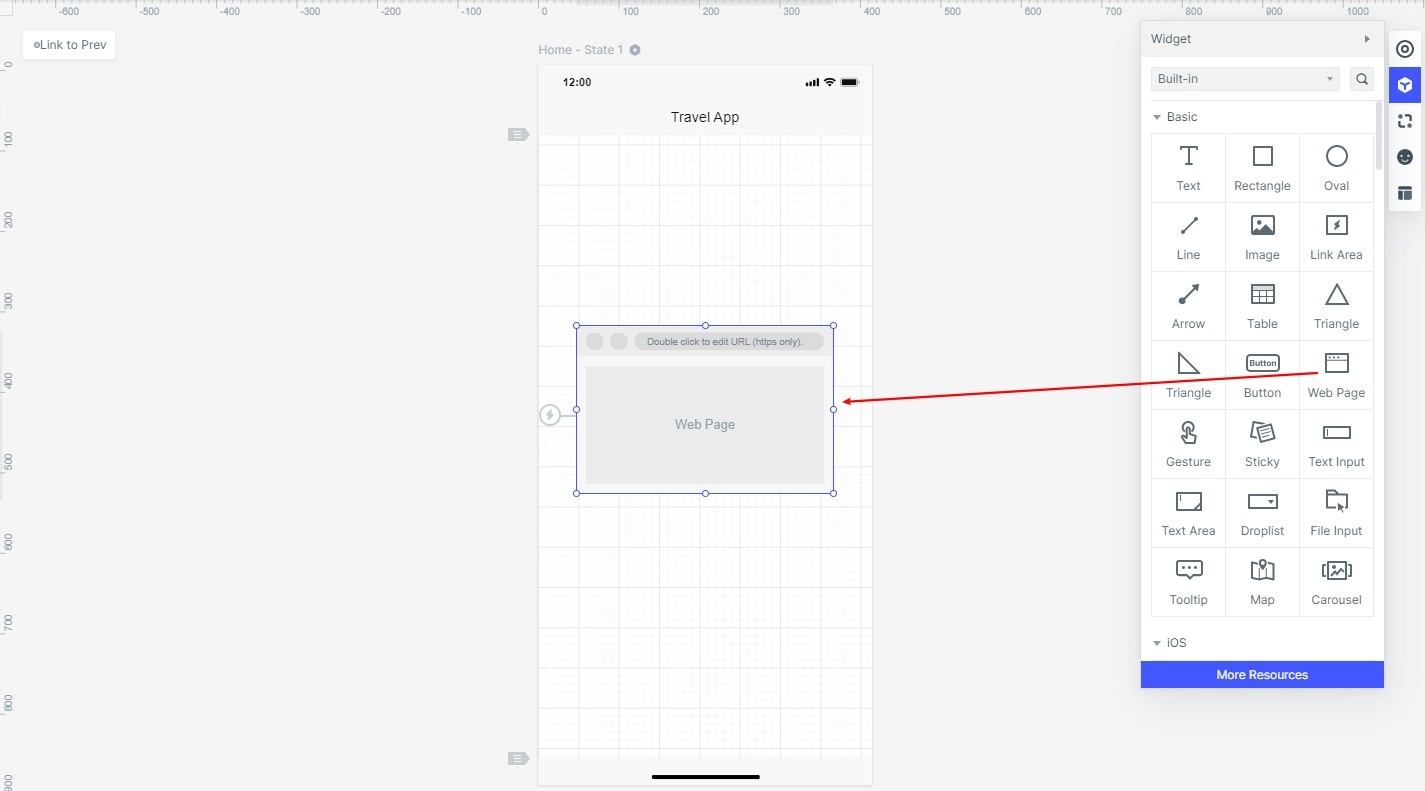
- Audio, video and worksheets can be added by putting its URL link for the particular file and publish it.
Step 8: Preview and Handoff
- After being done with the designs, it is important to preview the prototype through your device to see its outcome
- If it is good to go hand off your wireframe to the developers and get to see your work getting life in no time.
Up to this stage, you can do it for free as Wondershare Mockitt is free for individual users for basic. After this, you need a professional graphic designer and a developer to get the finished product or the ready to launch the app. The option for Enterprise is to create a team with a Designer, Developer and Manager and others. This is a paid option, but this is efficient.
Steve Jobs once said that designing is not what it looks like but how it works. So you can save a lot of money and time that costs depending on your design and approach to it.


