How to Make a Social Media App
In recent years, we have seen a sudden splurge of the need for new social media apps. With all the negatives news being circulated almost on every leading social media platform like Instagram, Facebook, Twitter, etc., people are now trying to learn how to make a social media app easily. There's a rising sense that people need a better way to stay in touch with their friends, and that brings us to the question of how to make a social media app.
Here, in this article, we will talk about how to create a social media app, and which tool to use to create a social media app that will work.
How to Create a Social Media App?
Step 1: Create Prototype for Your Social Media App
To create a social media app, you will first need a tool that will allow you to test the app before you launch it. One such tool that you can rely on is Wondershare Mockitt. The tool offers you a wide range of features, which makes prototyping of apps easy. The collaborative prototyping tool is one of the go-to-tool for UI/UX designers. This tool will allow you to share your design, use different templates to make your app look visually appealing, and collaborate with different team members or clients seamlessly.

Here are top features of this tool:
Multi-Platform Prototyping
The best part about Wondershare Mockitt is that it supports prototyping for multiple platforms, such as PC, Watch, Pad, Android, and iPhone. The tool allows you to customize the prototyping whenever you want to. The tool's aim is to offer you a free designing environment where you can conveniently design the app.
Tons of icons and design widgets
It is understood that you would like the app to be visually appealing and easy to use, that's why Wondershare Mockitt offers plenty of widgets, like icons, material design library, map, video, image, button, text, and more. Yet again, customization options are available.
Drag and drop
No matter what type of mobile app you would like to develop, This tool will let you test it, and design a prototype for it without any hassle. The user-friendly gestures, as well as, transitions will allow you to design the prototype just the way you want. There are animations, different types of gestures, and more readily available for you.
Offline file download
The tool supports different types of exporting IPA/APK/PNG/HTML offline files. This is the reason why it becomes even more convenient for the designer to present the wireframe in multiple environments if need be.
Quick preview and share
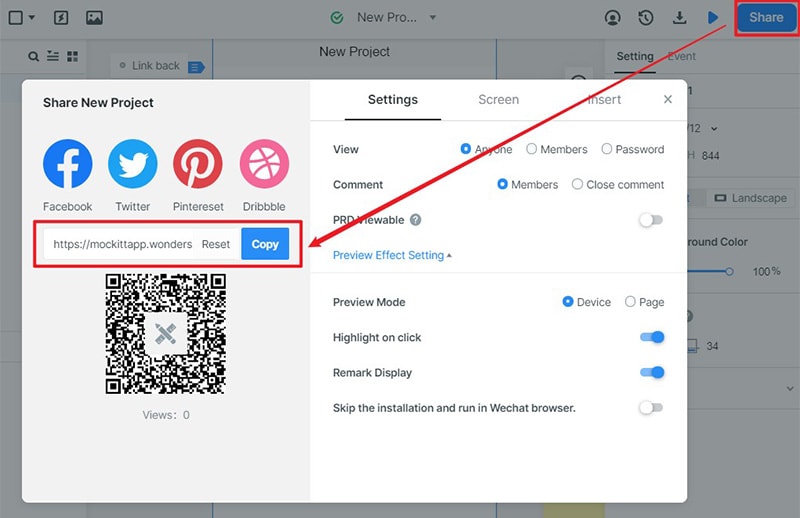
This tool lets you copy the QR code or provide you with a shareable URL, which you can use to share the prototype with whosoever you want to. This way, you can quickly preview the prototype before showing it to your clients and stakeholders. You can share it to get feedback as well.
Collaboration
Whenever you use Wondershare Mockitt, the tool doesn't only let you create a prototype, but you can share and collaborate with other team members to get instant and real-time feedback too. Feedback is necessary for a tool. The critical input you will get from your clients, team members, and stakeholders will help you improve the prototype.
Here are the step-by-step guide to using wondershare mockitt
1. Create a New Project
Wondershare Mockitt lets you create prototypes for any smartphones, be it Android or iOS, Watch, TV, Web, or Pad. You can customize the feature whenever you want to, and to be sure that you are moving towards the right direction when it comes to prototyping, you can share your idea and collaborate with your team to get real-time feedback.
You can customize the prototype just the way you want it. First, you will have to visit the official site of this tool and then click on the "Create" > "Project" option. You will see many options, such as mobile phones, tablets, webpages/TV, Watch, Others, and finally custom. Choose the one that you wish to work on.

If you want to start a project from scratch, then the option that you need to choose is a blank project.
2. Design the App
Add widgets and icons - The widgets and icons toolbar will be on your right toolbar. You can drag and drop them into the prototype that you are trying to create, and don't worry, there are a lot of widgets and icons available.

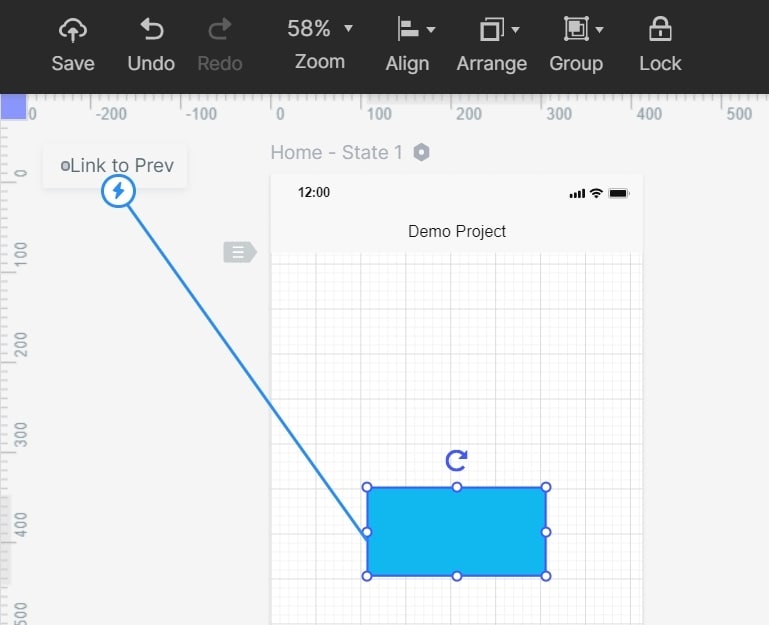
Add links between the screen - To ensure that all the screens are getting viewed by the client, you can add links between the screens too.

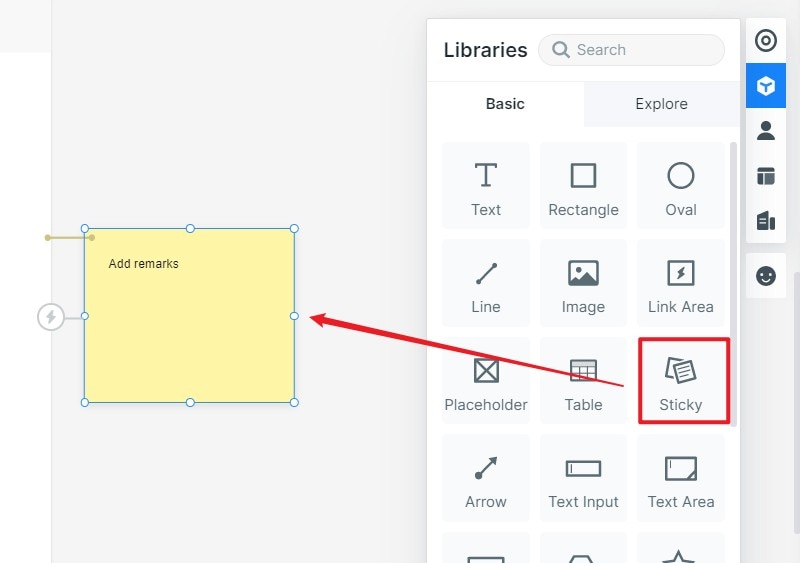
Add Notes - Why not add some notes for the clients too to understand what you have done to the prototype. How it has been created, the features you have added and why.

Create Interactive Animations
Allow the app prototype to look as real as possible. For that, creative some interactive animations, and add them to the prototype.
3. Preview the App/Prototype/Animation
The app has to be previewed first before you get to send it to your client or other collaborators. You can click on the preview option, to see it before sending it to the client.

4. Share the Prototype
Once you are done creating the wireframe for the app, it is all set to be shared with the clients, team members, and stakeholder for their review. Just click the "Share" button and copy the link. Others can see the prototype through the link.

5. Launch the app in the App Store/Google Play
For both the App Store and Google Play, you will have to follow some different steps. Below are the easy steps that will enable you to learn how to make a social networking app for Android.
App store
Step 1: After creating your app on Wondershare Mockitt, go to App Store Review Guidelines once to read all the specifications.
Step 2: Once you are done reading the guidelines, go to developer.apple.com, and create an App ID.
Step 3: App Store Connect will let you create an App Entry, and fill in details such as screenshots of the app, age rating, name of the app, category, and so on.
Step 4: Make an App archive, then go to the Organizer, click on Upload to upload the app.
Step 5: For the last step, you will have to select the app binary, and after filling in all the details, you need to click on the Submit option for review.
Play Store
Step 1: Visit the Play Console.
Step 2: Click on All Applications, and after that, click on create an application.
Step 3: You will have to choose a title and a default language for the app. Think of a name for the app. That name will appear on Google Play.
Step 4: Now, for the final step, create the Store Listing, content rating questionnaire, and then set up the distribution and pricing.
Follow these easy steps for how to build a social media app.
Tips for Creating Social Media App
1. Know your app and the market you wish to target
First things first, you need to know who your target audience is, and what is the purpose of creating a new social media app, when there are already some big players in the industry. You must do a SWOT analysis to have all your answers.
2. Build a prototype
Before launching your app in the market, it is always advisable to test it. You need to see how your app will perform and whether it will be able to stand the competition in the market. For that, use Wondershare Mockitt and create a prototype for the app.
3. Choose the right platform to launch it
If you know who you are trying to target, this part will become easier for you. You need to know whether you will launch your app on the Google Play Store or the App Store. Whether you want to target only Apple users or Android users. You may also lunch your app on both the Stores to cater to a larger sum of audience.
4. Does your app solve a purpose?
Your audience will accept your app if it is able to solve some of the problems that they are already facing with different social media apps. Don't forget that you will be competing with some of the giants. So, you need to be 100% sure before you launch the app.

