How to Make an iOS App
Are you looking for the easiest way to make an iOS app without any coding experience? Well, technology is rapidly changing and is making our work much easier. Coding is not an easy process, and writing a code for an entire iOS app is challenging and hectic. Fortunately, several apps can help you create the necessary blocks and lessen your app making process. In this article, we shall give you a detailed guide on
How to Make an iOS App
In this section, we are going to go through a step by step guide on how to make an iOS app. Go through these steps and be sure to make an iOS application faster than you thought. You will learn make ios on windows soon.
Step 1: Create a Prototype for making iOS App
Wondershare Mockitt is the most popular and powerful prototyping tool for web and applications for all devices, including iOS. The program is equipped with an array of useful features that makes it seamless and effective to create prototypes. Leverage the UI assets, templates, built-in widgets, and icons to create stunning prototypes with speed. This tool is suitable for any size and type of organization. Bring on board the designers, developers, and managers in your organization and co-edit the prototype in real-time. Wondershare Mockitt cloud is another useful feature that syncs your project. You don't have to worry about downloading or uploading any project. Just log in to your account and continue to access your project anywhere at any given time.

Features
- It supports real-time collaboration and co-editing.
- It supports preview and testing of prototypes.
- The cloud feature syncs your project across several devices.
- It offers UI assets and templates to build designs much faster.
- Plenty of built-in widgets and icons makes it easy to create stunning interfaces.
Steps to create a prototype for the iOS app using Wondershare Mockitt include:
1. Login
Visit the web and log in using your account details. To start a prototype, click "Create Project" and then select "Blank Project". Hit the "Mobiles" icon and scroll to select a suitable IOS device. Provide a name for your project in the project name filed then finally hot "Create" project to proceed.

2. Add Screens
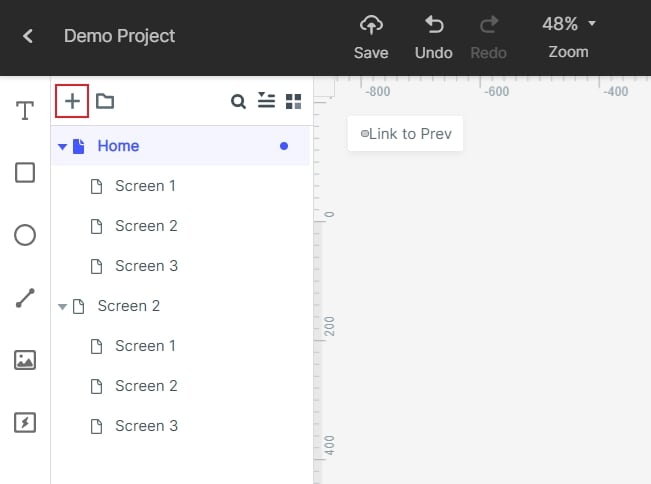
Screens are related pages when you click a button that redirects you to another page. You need to add the number of screens that suit your project. Click the "Add screen" button and provide a suitable name for your screen for clarity.

3. Add Widgets and Icons
To add widgets and icons to your design, double-click on the widgets and drag them to the canvas. Press the hotkeys and begin drawing your shapes. You can also add widgets from "My Widgets" and icons library. Edit the added widgets on the Inspector Panel then drag them to the "My Widgets" library to save and use them the next time you require.

4. Create Connections
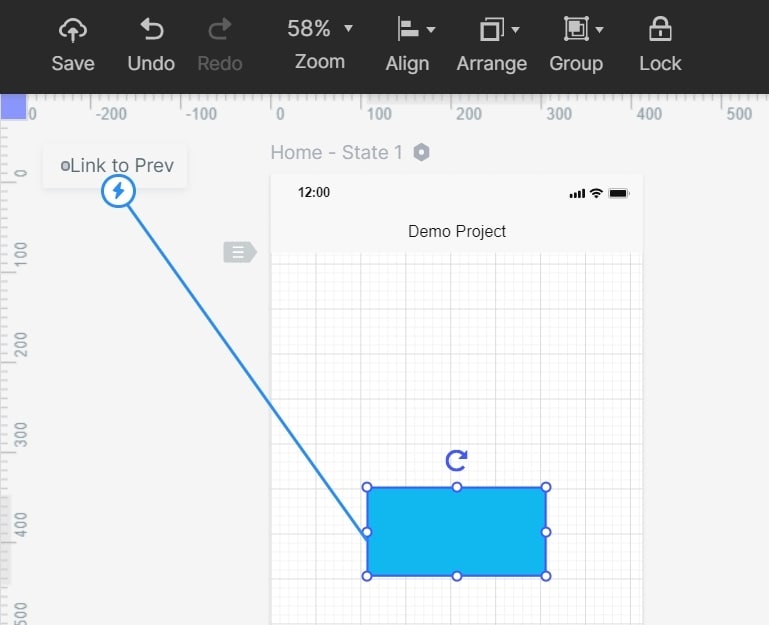
Connections are important in creating interactive prototypes. To link these objects/buttons to a particular screen or page, click each object separately and drag the circular handle to the destination screen. This is the page that the button/object should direct you to when you click it. Choose the respective transitions, gestures, and actions as prompted by the program.

5. Preview and Share
After creating all the relevant connections, click the "Preview" and check whether your porotype is working as desired.

Step 2: Download as HTML/APK
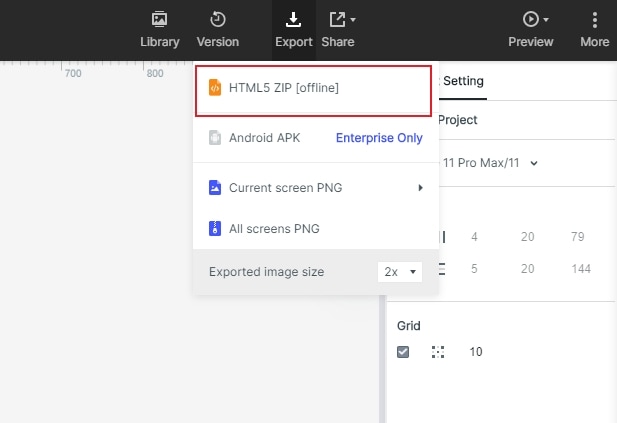
When you have tested and gotten satisfied with the iOS wireframe, it is time to export it to an offline document in a suitable format. To fetch it, click the "Download" button on the top-right of the main window. With Wondershare Mockitt, you can export your project to formats like HTML, PNG, Android APK, and iOS IPA files. Once you hit the download button, you should see a "Download to" window. Select HTML or Android APK. Remember the free versions do not support these offline methods. It would be best if you upgraded to perform this task.

Step 3: Launch the iOS app in the App Store
Now that you have downloaded the app, you have a green light to go and launch your app in the App Store or Google Store. First of all, you should be conversant with the requirements before proceeding.
- Compile your apk or IPA file.
- Create a brief official description for your app in respective languages.
- Create and assemble all the visuals such as logos, screenshots, app images, and video presentations, among others.
- Set app the age restrictions for the app as is required by the app store.
- Fill and complete the mandatory questionnaire, which acts as a baseline for app upload.
- Finally, upload your app.

