How to Create Web App Wireframe Step-by-Step

Creating a web app wireframe can be a tedious task if you don't know how to execute things properly. From choosing the right tools to handing-off the wireframe to the developer, there are many things you have to take care of. Luckily, we have included all the important things regarding web application wireframes development in this article. Here you will get familiar with the best wireframing tools along with a complete comprehensive building process. So if this sounds useful, keep reading.
The Best Web App Wireframe Tool
The market is filled with various wireframing tools. But to get better results, you should always use a professional web app wireframe tool like Wondershare Mockitt. It is a collaborative rapid prototyping solution that helps designers build interactive mockups for various devices. It is a cross-platform tool that comes with numerous built-in gestures, page transitions, and animations.

Mockitt is loaded with icons and widgets that you can directly use in your projects. It also allows you to generate code of your creation and utilize it on other platforms. You can live view your wireframe and make changes without any complications. It simplifies the layout development and you will get all the functionalities required to build prototypes from beginning to end.
Mockitt features a user-friendly interface, so even if you have never written a single line of code, you won't face any issues while using it. This tool also keeps records of your last changes, so you can easily switch back in just a few clicks. Mockitt also allows you to give permission to specific team members and you can even inspect the work done in real-time. All these features makes it one of the best web application wireframe tools.
How to Create Web App Wireframe
Here is the guide on how to create a web app wireframe with Mockitt.
Step 1. Create a Web App Wireframe
First, create a free account on the Mockitt website. Once you do this, it will take you to the main dashboard.
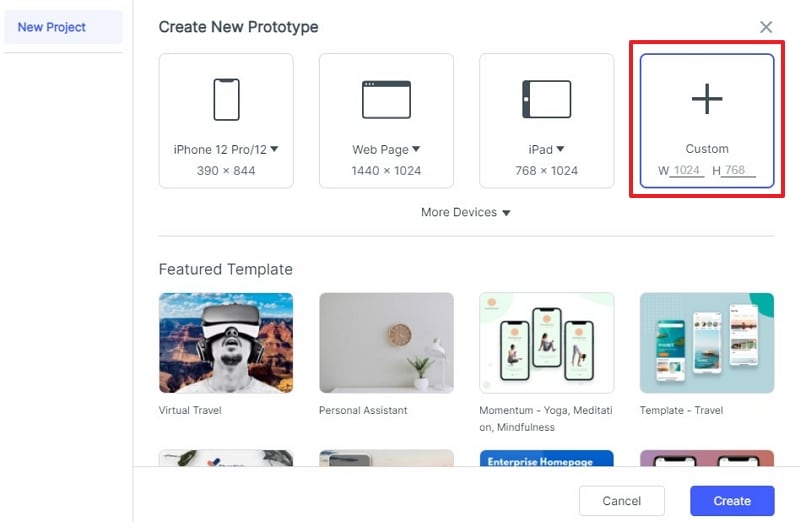
Here you will see a "+ Create" sign and then "Prototype" option. Click on that to move to the device selection page.

Select the device you want to create the wireframe for. Here we are selecting the "Web Page". After this, you will be redirected to the art-board screen where you will get all the widgets and tools.
You can create any type of web app, here we will be creating a fitness one.
Step 2. Start Creating the Web App Wireframe
Add Image to Web App Wireframe
Let's start with the homepage. Here we will start by adding an image. Click on the cubical icon and double click on the "Image" option.
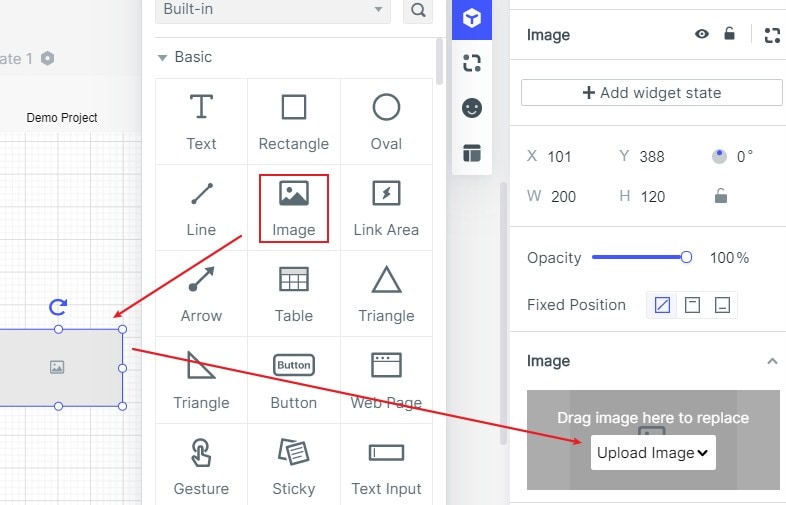
Now extend the image widget as per your preference. To add the desired image, click on the "Image" button on the right side. You can upload your custom file or use it from the in-built library. We are using a custom image. You can also manage the opacity from the right panel.
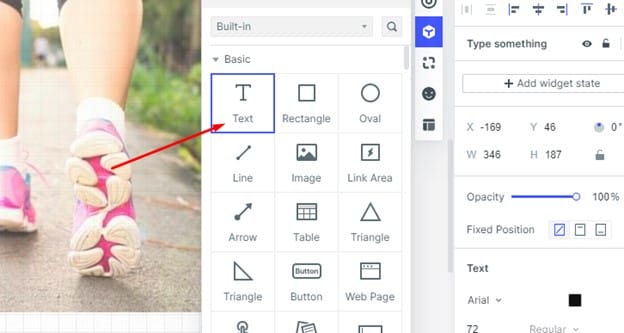
Add Text to Web App Wireframe
Once this is done, it's time to add text. Again click on the cubical icon and select "Text". Extend the widget and write a catchy tag line.
Add Button to Web App Wireframe
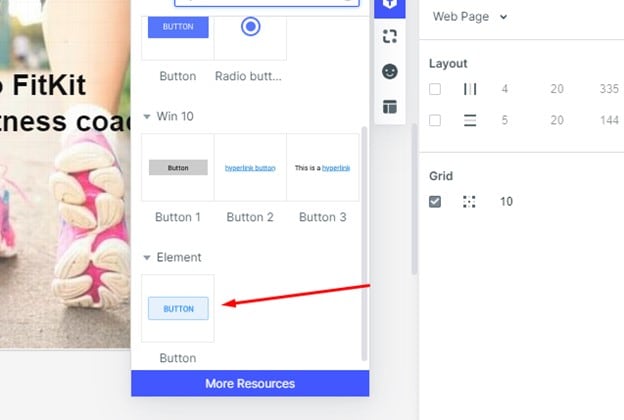
After this, you will create a button to take your users to the next page. Click the cubical icon again and search "button". Choose one that is placed under the "Elements" section.
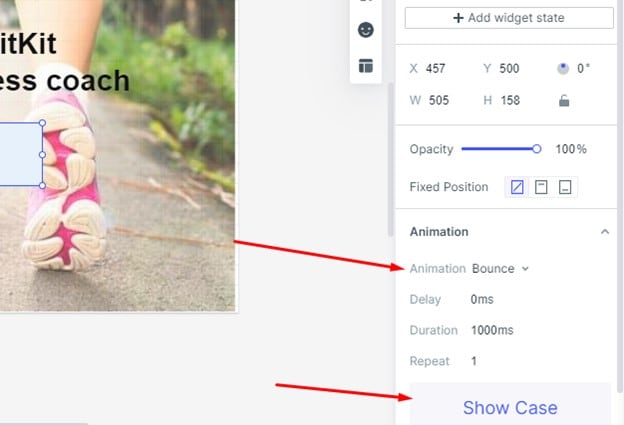
Add Animation to Web App Wireframe
Extend it and give it a name. You can also add animation by clicking on the animation option, which is placed on the right side. On the down side, you will be able to see how that animation will look.
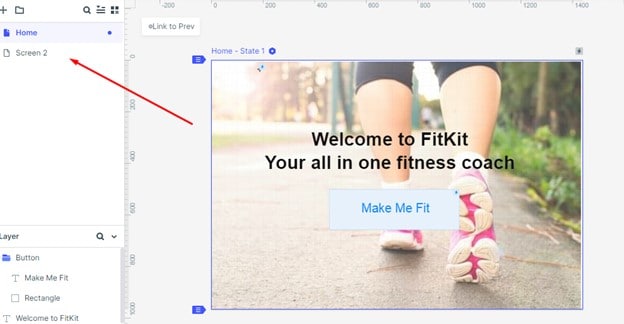
Step 3. Create More Screens for the Web App Wireframe
Now your home screen is ready. It's time to work on the second screen layout of your web app. Simply click on screen 2 on the left side of your screen. It will open a new artboard.
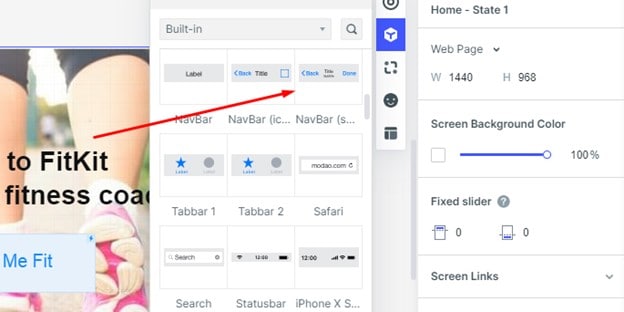
Here you can select a background image or use a solid color. Now click on the cubical icon and select NavBar to add navigation in your web app. Extend it and fix it as per your needs. Here we are using the iOS style.
Now add another image to make the interface attractive. Use the similar process mentioned above. Add text about your web app. Here we are providing the diet plans and workout plans.
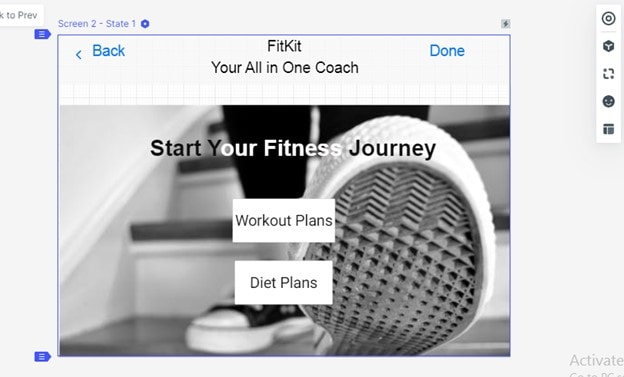
Add the important buttons by choosing the "Button" widget from the cubical box.
Step 4. Make Screen Transition between Screens
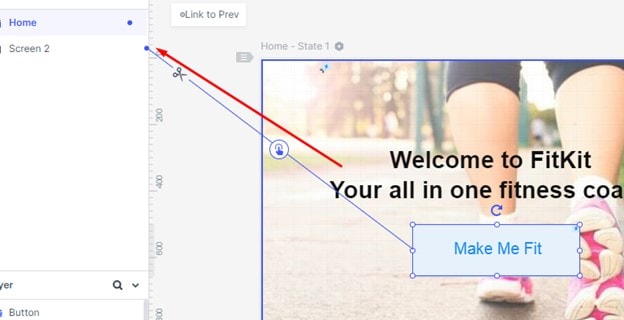
Now you need to link both pages. To do that, go to the home screen and double click on the button you have created there. You will see a flash "lightning icon".

Hold that icon and drag it to the screen 2, which is placed on the left side of the screen.
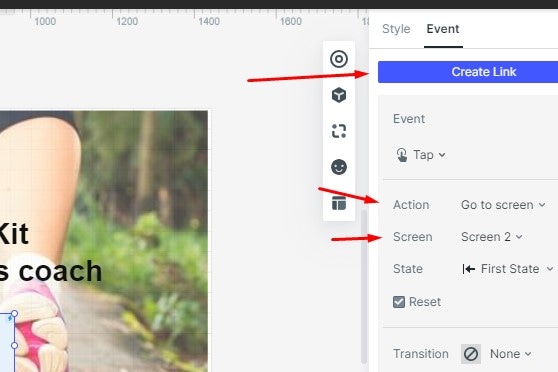
On the right side, you will see the "Create Link" option. Click on that and choose "Go to screen" under the "action" section and the name of the screen under the "Screen" section.
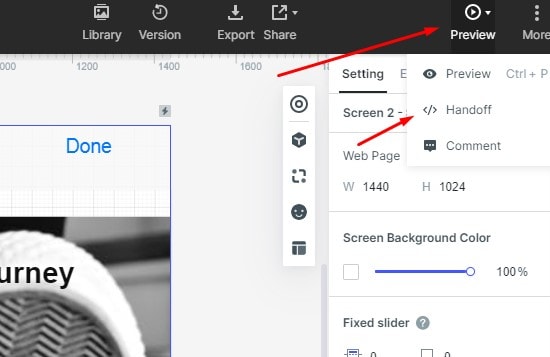
Step 5. Preview, Share and Handoff the Web App Wireframe
That's it your wireframe is ready. You can add more screens and link them together by using the same method. If you want to preview your creation, you can do that by clicking on the "Preview" button. Use the "Hand-off" option to share it with the team and developers.