How to Convert a Figma Design to Webflow

Moving a design from Figma to Webflow to create a website is a common process used by a lot of developers. At times, though, the Webflow Figma combination is not ideal, especially if your styles haven't been preset in Figma before you import the assets into Webflow. However, Webflow and Figma are both excellent design tools, with the added benefit that you can use Webflow to publish the actual website based on your Figma design. Even if your Figma design is a static one, you can add the interactions and animations in Webflow prior to publishing. This article briefly touches on the process of converting a design from Figma to Webflow before showing you a great Figma alternative where you can complete the entire hi-fi prototyping process from within the design tool itself, saving you a lot of time on the design side while keeping everything ready for the development phase.
- Part 1. How to Convert a Figma Design to Webflow
- Part 2. Figma vs Webflow: The Big Differences
- Part 3. The Best Figma and Webflow Alternative
How to Convert a Figma Design to Webflow
There are some preparatory steps that you will need to execute in Webflow before you can import your Figma asset files. Most importantly, you will need to set up a style guide or global styles to make sure there is consistency across your website's pages. The first step shows you how to do that.
1. Start a New Project and Set Up a Style Guide
Go to Webflow and click on New Project, and make sure you have a separate folder for this website project.
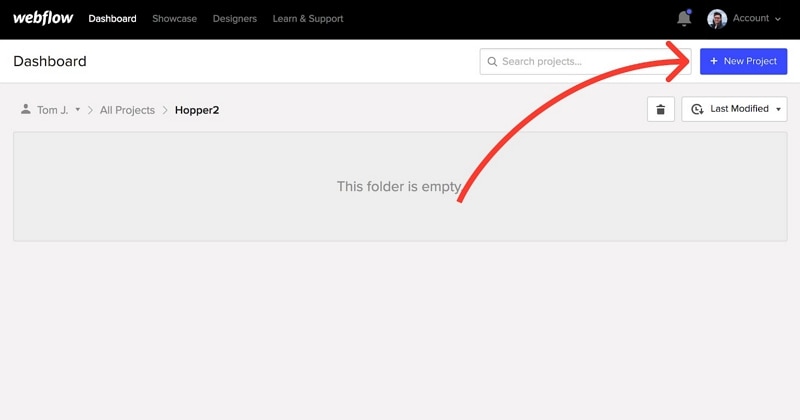
Source: webflow
The reason for this folder and subfolder structure (which we'll see later on when importing assets) is that it is consistent with the way Figma organizes its projects. As such, this is also how the file will be exported, so it's an important consideration.
This only needs to be done if your Figma project doesn't already have a style guide defined for it. For the sake of this exercise, we will assume it doesn't.
To do this, simply clone or copy the base style guide provided here and paste it to your new website on a new page within the project folder.
If you're using a Webflow template, you can even do it on top of that.
2. Style your Base Classes
The next step is quite useful, although optional. Here, you can select any element and go to the selector field, which you'll see on the top right-hand side of your Webflow screen.

Source: webflow
Next, tag it with a name that contains 'All' in the title, such as Body (All Pages). This will allow you to quickly make global edits down the road once you've imported the design.
The global style definitions should match the content in your Figma design files, which is why using the HTML tags template suggested above is necessary. It helps simplify the process and keep your stylesheet light.
3. Custom Colors
The next step is to add custom colors and make them global.
First, if you have a lot of colors to define, it's better to create a color-block div. You can then create a swatch for that color, make it global, and change the div to set another color.
4. Exporting from Figma
The preparatory steps in Webflow are now complete, and you can proceed to export your Figma assets.
Assuming you've marked everything for export during the design phase in Figma, exporting is a simple process.
To export everything, make sure no frame is selected; if you only want a particular frame, make sure the frame that you want is selected.
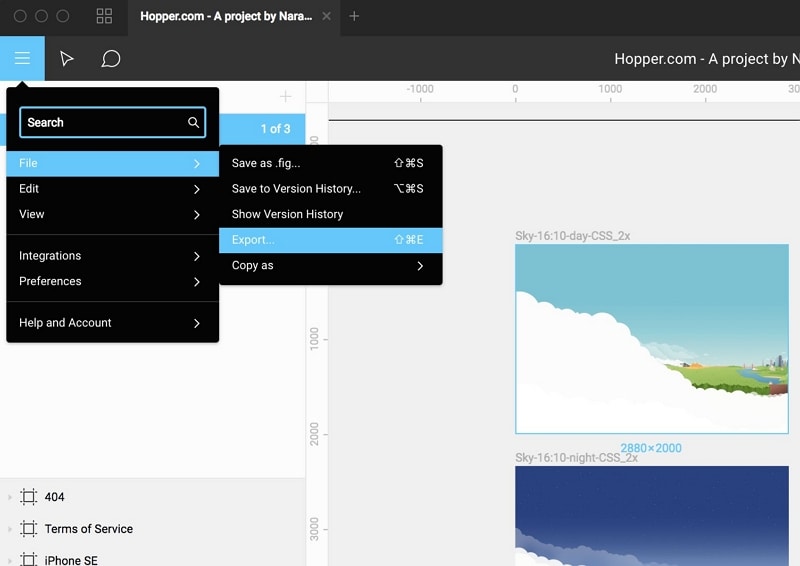
Source: webflow
On Mac, hit Command+Shift+E and on Windows, hit Control+Shift+E to open the Export dialog.
Hit Export again, then locate them in Finder or Explorer and drag them into the Webflow window. You can also do it from Webflow using the Upload button in the 'assets' panel.
If your Figma layers have forward slashes, such as icon/back, then new subfolders will automatically be created in Webflow, as mentioned earlier in the first step above.
5. Replace Frames and Groups with Divs
One useful thing to do in terms of keeping things organized is to use divs to replicate the larger groups and frames from the Figma files.
You can also add a container to each div, as well as assign a class name (without defining the class). The reason is that it will be easier to add anchor links later on.
6. Style your Content
This is probably the hardest part but if you keep generic names for your classes and add a combination of multiple aspects.
For instance, instead of simply naming a class "All H2 Subheadings", you can use "All H2 Subheadings" and "Red Text." This covers the positioning, size, etc. along with the color, which you can change for each set of pages.
7. Create Interactions
The problem with Figma is that prototypes are mostly flat, which means you can't translate rich interactions to the web using Webflow.
Instead, do the interactions from Webflow itself.
You can define interactions on a per-class basis or even create ones that involve multiple elements or classes.
8. Publish and Tweak
The final step is to publish your design and then tweak it for various devices.
Be sure to test it on as many devices as possible to make sure that the design flow and business logic are maintained on any interface.
Of course, this method describes a very straightforward way to convert a Figma design to Webflow to publish your website. You may have other elements like embedded code or custom code, they won't render in Webflow so it's a different process. Nevertheless, the steps above should get you from Point A to Point B.
Figma vs Webflow: The Differences between Figma and Webflow
The biggest difference between Webflow and Figma is that while the latter stops short of actually deploying a website, Webflow is designed to handle that part of web design and development. You can certainly create complex prototypes in Figma, but these are largely useless once ported to Webflow, where you will need to create interactions for static elements.
Another major difference is that Webflow is based on JavaScript. If a user's browser has JavaScript disabled, they won't be able to access the site. On the other hand, Figma is based on HTML and CSS, which is more web-friendly for modern browsers.
The collaborative aspect is also a big differentiator. Figma's online platform allows full collaboration including commenting, while Webflow comments work very differently.
There are also limited breakpoints for different types of devices in Webflow, while Figma doesn't have that restriction.
Overall, if you're directly deploying a design to the web, the Webflow vs Figma question is a moot one because they work so well together. As a design tool, however, both of them leave a lot to be desired. That's the reason we've showcased a great alternative that is also cloud-based but highly collaborative in nature and extremely intuitive if you're a new user or switching from another platform.
The Best Figma and Webflow Alternative
Although Figma might be a better design tool for UI/UX prototypes than Webflow, it's not as good as Wondershare Mockitt, an online UI/UX design and prototyping tool with rich features, build-in asset libraries, and easy prototyping as standard features. And it gives you all this at a much lower price point than Figma.

Here are some key features you can expect to see in Wondershare Mockitt:
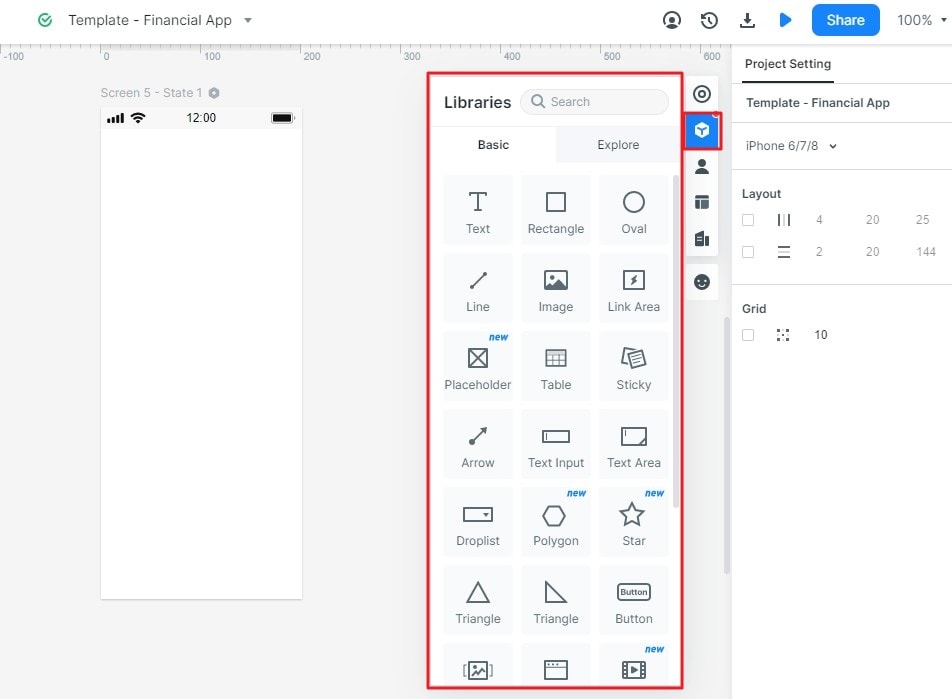
- Assets - A rich collection of components is available at your fingertips. Components can be dragged from the Quick Widgets panel on the left side of the Mockitt interface or the comprehensive and searchable library on the right side. Assets can be customized and assigned a Master status, which is like a Main Component in Figma. Users can also create dynamic widgets that show different states within a single screen.
- Prototyping - Links can be added quickly and edited easily to show various types of interactions. Just drag a link from an asset to its target page and edit the link, and you're done! No complicated process to follow, and basic prototypes can be created in minutes.
- Collaboration - Reviewing and commenting can happen in a real-time environment, and it's super-easy to share designs and prototypes using secure and user-defined URLs or QR codes. The online nature of Mockitt allows you to access your projects from a modern browser on any connected device.
- Handoff - The developer handoff is especially smoother when you use Mockitt. Your designer doesn't have to worry about code and your developer won't have to worry about design.
How to Design a Website
Mockitt is an intuitive tool for UI/UX design and prototyping for multiple devices and platforms. The ready-to-use assets are complemented by a robust collection of templates for web design, and there are additional UI kits and other resources to give you everything you need to design a modern website. Here's the process, simplified:
1. Create an Account and Start a New Project
You can use an existing Wondershare ID or create a new one. Begin with the free plan, which gives you 3 projects with 20 screens each.
Start a new project and define the device parameters, which will lead you to a fresh screen.

2. Start Designing your Website Interface
You can quickly drag and drop the widgets and assets you need onto the screen to create the layout of the website. Keep adding additional pages as required, and create a layout for each of them. It is also very easy to create page states to show transitions.
3. Prototype your Website Design
To show interactions and dynamic functionality, link an asset to its corresponding target page. Once the link has been established, edit it to add a gesture, transition effects, and animation.
4. Share Your Design
After designing the website's pages and creating interactive elements, click the "Share" option. This will give you multiple choices, where you can pick how you want to share your web design - whether offline or online.
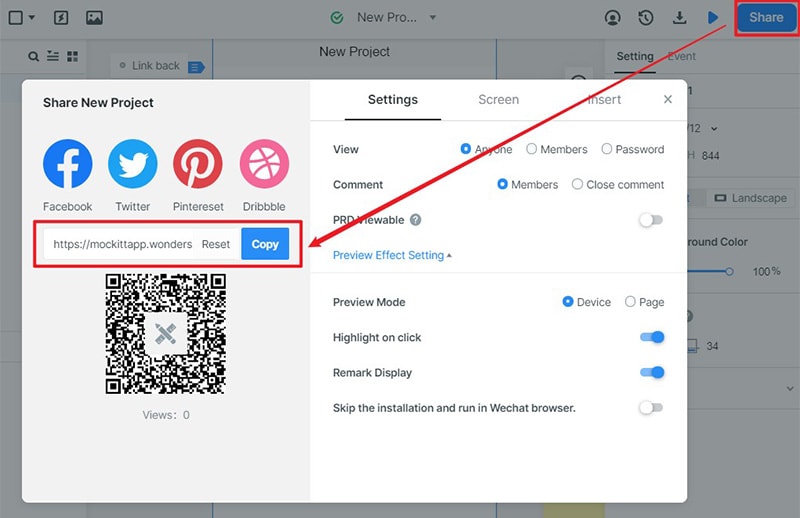
Collect feedback via these share links and see them as you make changes in your design.
5. Hand Off Your Design to the Developer
There's not much for the designer to do. Once the developer has access to the projects, they can come in and inspect the code, and download all asset data they require for the development phase.
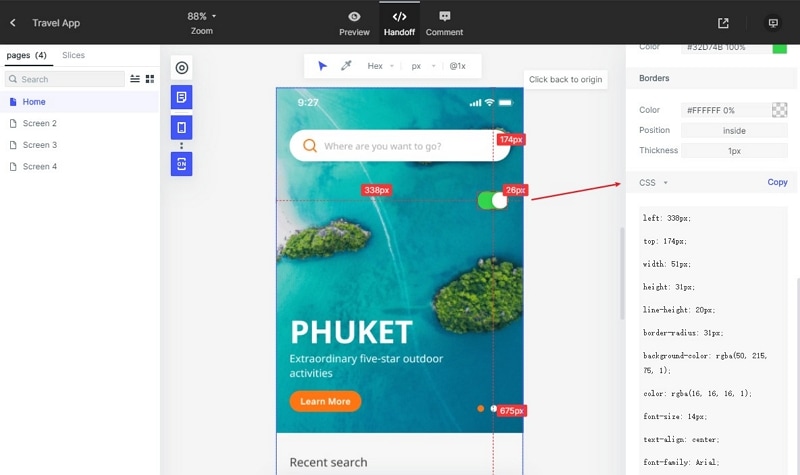
The files they download will already have styles and classes organized and defined according to the grouping and framing used in the design.
In many ways, Mockitt is better than Figma because of its ease-of-use and affordability, but it's also better in terms of bridging the gap between design and development. As such, it is a very compelling choice whether you're a one-woman design team or a large design division in a multinational corporation with locations all over the world.
