How to Use InVision to Create Prototype?

- Part 1: Steps on How to Create Prototype in InVision
- Part 2: The Best InVision Prototype Alternative
- Part 3: How to Create Prototype with InVision Alternative
The craft prototype can greatly help in building an interactive design for your business without any problem. You can also craft sync to publish your design directly to invision prototype where you can share your ideas can get the feedback within few hours. Its numerous features allow you to add interesting factors to make your design superior from your competitors and avail long term advantages of the business. If you are using it for the first time then this guide can greatly help in building your designs on invision prototype.
Steps on How to Create Prototype in InVision
The below steps is a guide to how to use invision to create prototype.
Step 1: Create a Project
- Click the Craft Sync button
- As you click the sync button a module will be there on your screen, click anywhere inside the text box and choose the option Create Prototype.
- Enter the unique prototype name.
- Select the device type
- Click the option publish
Step2: Creating Links for Your InVision Prototype
- Choose the artboard group or layer and press the C button.
- Bring your cursor on the new artboard and you will like the hotspot to trigger.
- Select the type of link, gesture and artboard.
- You can also check the box Maintain scroll position after click.
- Select the option Add Link.
You will the arrow going from your original artboard to your desired artboard.
Step 3: Removing or Editing Links
- To show hotspot, hit X.
- Move to the original screen and select the link circle
- After making desired changes press the Save icon.
To delete the Link
- To show hotspot, hit X.
- Move to the original screen and select the link circle.
- Select the option, Remove.
To delete multiple links
- Select all the artboards or layers from which you want to delete the links.
- In the sketch menu bar select the Craft menu, hover over Prototype and hit Delete Selected Hotspot.
Step 4: Previewing the InVision Prototype
After creating your design on invision prototype, you can preview your art.
- Click the Craft Player icon.
- In the player modal, scroll, click and interact with prototype according to your need.
Step 5: Syncing the InVision
- After creating the design to publish it bring your cursor on the tool panel in the right click the Craft sync icon. As soon as you hit it a Craft Manager Dialog will open.
- In the box click the Select or create a prototype field, after that enter a name to select the prototype button and select the device.
- If you are creating a new invision prototype click the blue Publish button. If you want to sync changes to a previous design hit the blue option Update button.
Step 6: Share Your Invision Studio Prototype
After syncing your design and artboard with the Craft Sync open your prototype in InVision to add collaboration as well as create a public share link.
The Best InVision Prototype Alternative
If you are facing difficulty in working with InVision prototype then you can also use its best alternative known as Wondershare Mockitt . It has more features than InVision and allows you to create your attractive design without any problem. Given below are its additional features.

- Designs: the software is loaded with various built-in designs that can be drag and dropped for creating the interface more attractive. You can also add your own desired images just by dragging it to the screen. It also offers 9 gestures along with 17 screen transition effects.
- Asset Library: The widgets and icons of the software can be simply used in prototype to make the design quickly. You can also customize your widgets according to your needs. It also allows you to share your assets with your teammates to offer consistency in your design.
- Presentation and review: its full screen presentation mode is very helpful that allows you to whiten or dark full-screen demonstration to highlight your proposal. You can also share it with other just be hitting a single key.
- Multi-member collaboration: the best thing about the software is that it allows your teammate to edit the design according to their needs and preferences easily.
- Cloud editing: the software can be used on different browser that reduces the need of installing or updating the version it allow you to make your prototype directly from browser. You don't need to save the changes and editing anywhere. You can do it from any system just by logging in the same account.
How to Create Prototype with InVision Alternative
Given guide of the software can greatly help in making your prototype attractive and impressive without any problem and inconvenience.
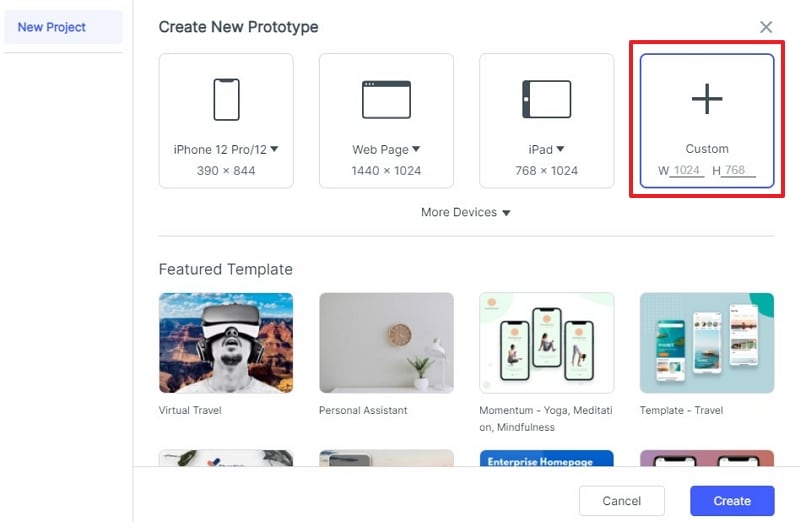
Step1: Create a Project
After creating the account on Wondershare Mockitt official website, create a project and select a device you want to work on.

For editing the shape and size of your project click "..." and then visit its setting.
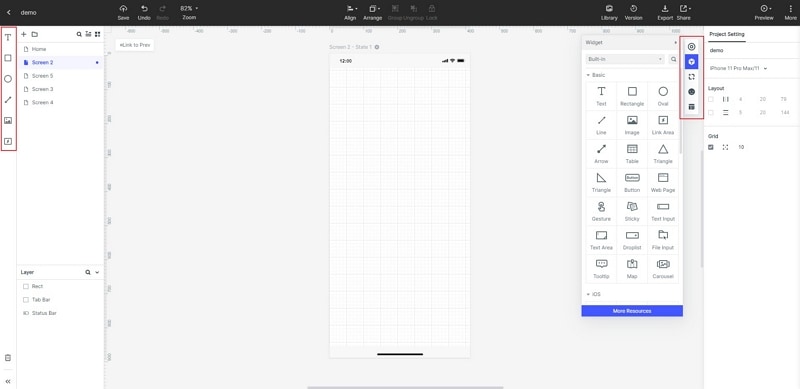
Step 2: Adding Widgets and Editing widgets
For adding widgets you can simply click on the left side of the screen and implement your desired one from the fast widgets. You can directly drag and drop the widget or double click on in to add in the canvas.
You can also add some Build-in widgets, My widgets and Icon given on the right side.

Then you can directly edit the widgets by changing its properties in the Inspector Panel.
Step 3: Saving Widgets for Future Use
You can save the widget for future use by adding it to "My Widget" option in the library. This could be done by dragging the "My Widgets" option or by selecting "Add to Widgets"
Step 4: Adding Links Between the Screens
To add the link between the screens select the widgets and click "New Link" option in the panel on the right. After that set the action, gesture, target state and screen as well as animation for the desired widgets.

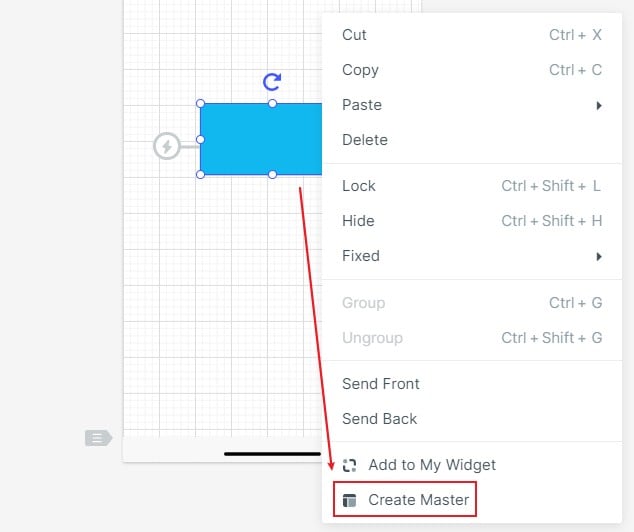
Step5: Converting Widgets into Master for Bulk Editing
Select the widget by hitting the right click to "Create Master". As soon as you click on the option it will get saved into the master library.
For changing the master setting bring your mouse to the edit option.
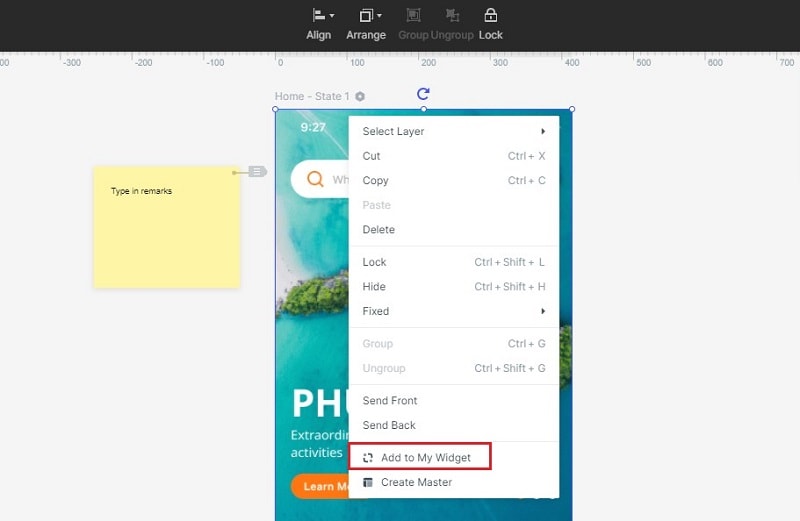
Step 6: Adding Notes for Widgets and Design
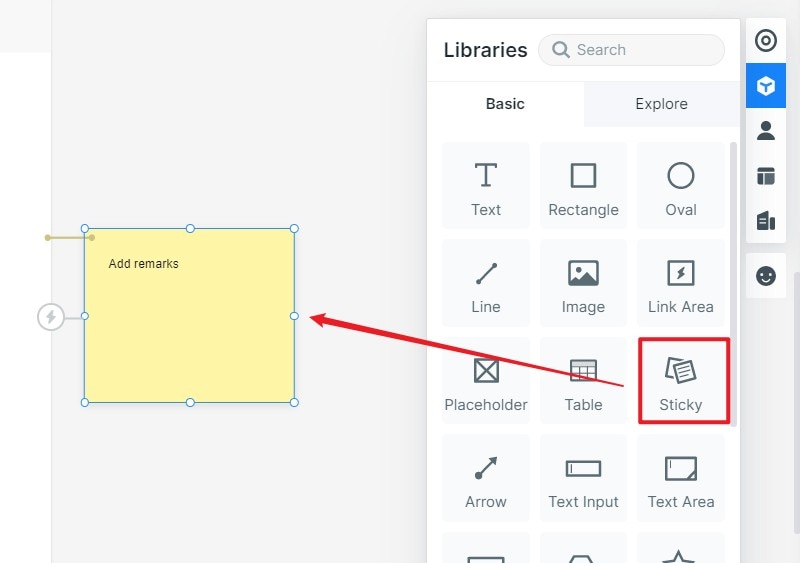
You can add the notes by just clicking the "Sticky" option in the widget library.
After doing that you can enter the text in the Sticky that you can see easily.
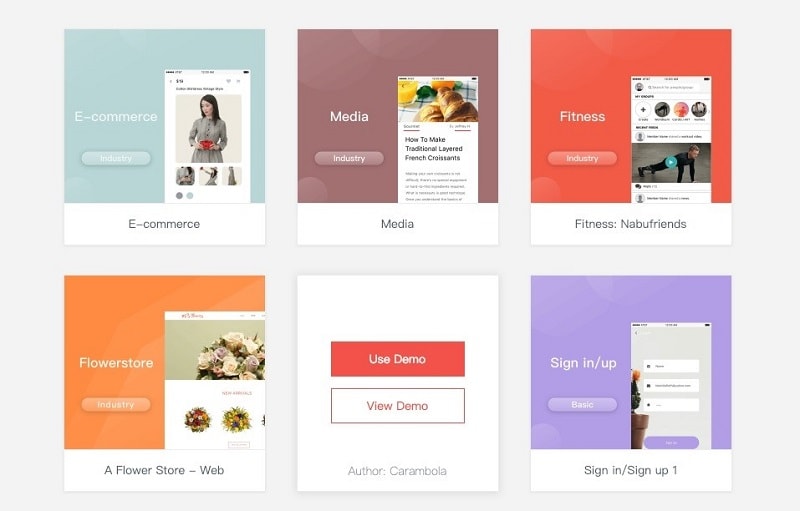
Step 7: Using Screen Widgets from Templates
You can also use in-build screen widgets by clicking "UseDemo" to enter the project.
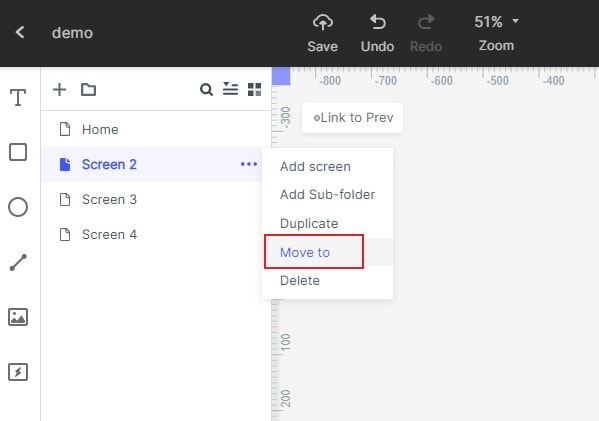
To use screen in the template bring your mouse to the screen list and click on "Move to" to the target project.
To use the widget in the template hit the right-click to the widget and select "Add to Widgets" and it will get saved in my widgets library.
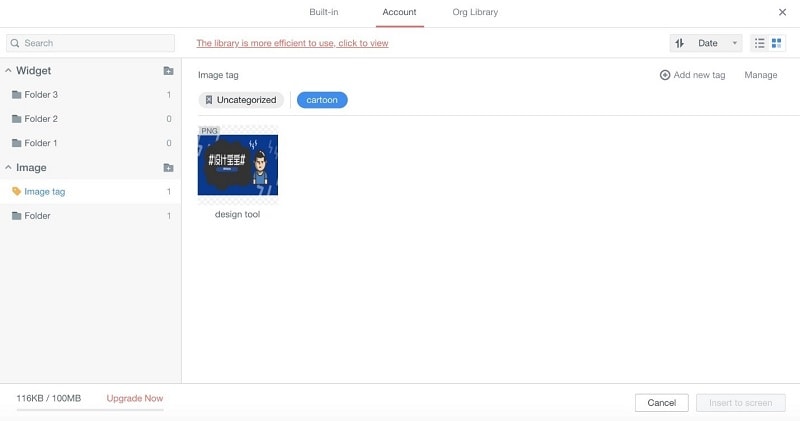
Step 8: Managing the Assets Library
You can add, delete and create folder easily in the software without any problem. To add the image in the canvas you can simply drag and drop or select the image by label to the blank area.
Batch management can be done by pressing shift or ctrl key to select multiple widgets or images.
Step 9: Adding Interactive Animation to The Project
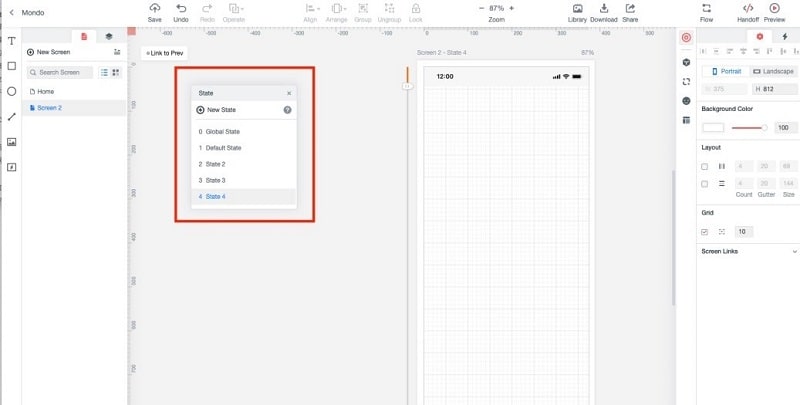
Screen state can be used to add interactive and engaging content in the project easily. It also allows you to change the shape, size and color of the image.
Step 10: Preview Your Prototype Project
After you finish the prototype design, you need to test whether your prototype is working as you need. Hit the "Preview" button and interact with your Android prototype. For preview on a mobile, click the "Share" button and get the respective link and QR code.

