How to Create UI/UX Design with Adobe XD

Creating a UI/UX design with td2Adobe is not a mind-cracking assignment. However, you need to be up to speed on how to do Adobe UI design if you are to create an amazing design. Adobe XD is no doubt a powerful design and prototyping tool, but scores of users still find it challenging to navigate. So if you are stuck in limbo on how to create Adobe UI/UX design, we are here to help you cross the bridge and cease the worry. In this piece, we guide you through how to create UI/UX design with Adobe XD.
- Part 1. How to Create UI/UX Design with Adobe XD
- Part 2. How to Create UI/UX Design with Adobe XD Alternative
How to Create UI/UX Design with Adobe XD
Step 1. Open Adobe XD to access the home page. Here, you will see artboards for popular screen sizes, including versions of iPhones, iPads, and Web, among others.
Step 2. Just pick a suitable preset from the options given to use for your UX design. If the choices given do not meet your need, there is an option to create custom artboards as well. To create additional artboards, click the "Artboard tool" on the left window pane. You should see the "Property Inspector" on the right of this window. Select the target preset and apply it.
You can also import ready-made artboards from Illustrator or Photoshop. Just click the "File" tab and select the "Import" option. Follow the on-screen instructions and import the target artboard.
Step 3. If your artboard isn't the right size you want, you have all the freedom to manage it accordingly. You can resize, rename, rearrange, and duplicate as you like. To rename your artboard, double-click on the name and enter your name of choice on the name field. To resize the artboard, simply drag the circular handles on the edges of the artboard to the desired sizes.
Step 4. After you have finished managing your artboard, it's time to start designing it. The design process involves adding visuals, text elements, background colors, and scroll effects. Use the drawing tools to create custom elements for your artboard. You can also import elements like images and icons from your device using the "File" > "Import" option. Click on the Text tool to apply texts and format. If you want to change the background color of your artboard, select the "Fill" option from the Property Inspector, and apply a suitable color.
To create repeatable elements, click on the element, then select "Repeat Grid" and drag the element to repeat the number of times you desire.
To add horizontal or vertical scrolling, click on the artboard and select a suitable scrolling option under the "Scrolling" drop-down button. Use the marker to extend the artboard.
Step 5. Once the artboard design is complete, hit the "Download" button to view how your UX design looks like.
Would you interested in Zeplin VS Adobe XD? Click and learn more about Zeplin Adobe XD Comparision: What is Different.
How to Create UI/UX Design with Adobe XD Alternative
Wondershare Mockitt is an outstanding UI/UX design tool with tons of amazing features. Wondershare Mockitt has an intuitive interface that is easy to navigate irrespective of whether you are a newbie or an expert. The program offers plenty of templates that you can customize and design effectively. The good thing is that these templates and UI assets are constantly updated and suitable for diverse industries. Also, use plenty of widgets and icons to make your designs eye-catchy. Use transition effects and transform your static screens to dynamic ones with ease. Wondershare Mockitt is also an amazing collaboration program. You can share and receive feedback about your design in real-time. With the cloud, your projects are always synced regardless of your geographical location and time.

- It supports real-time collaboration and co-editing and thus.
- The handoff specs allow users to hand off the design to developers with ease.
- Users can preview their designs on mobile, desktop, or offline platforms.
- The cloud features syncs all your projects, irrespective of location, and time.
- It offers plenty of widgets and icons to make appealing interfaces.
- There are several templates and UI assets suitable for different industries.
How to Create UI/UX Design using Wondershare Mockitt
Step 1. Create a New Project
Log in to Wondershare Mockitt with email, then select the "Create" tab to create a new project. Provide a name for your project and choose the size you want to create.

Step 2. Design the Application
- Add Widgets and Icons
You can add Fast Widgets, Built-in Widgets, My Widgets, and Icons. For Fast Widgets, simply double-click on the widget of interest, drag it to the canvas, and press the hotkeys to draw your design. For the other widgets, simply drag them to the canvas and start drawing. Use the Inspector Panel to edit the widgets.
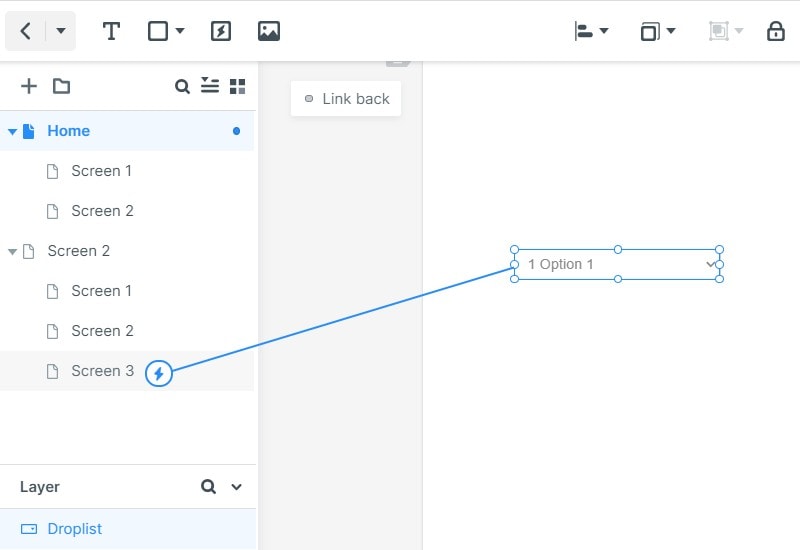
- Add Links between Screens
Hit on the target object and drag the circular handle to the destination screen/page. Define the gesture, action, and target.
- Add Notes
Click on the "Built-in" Widget Library, Choose "Sticky", and start adding notes.
- Create Interactive Animation
Click on the "State" icon beside the Inspector Panel. From the pop-up State Panel, choose the "New State" option. Drag the link icon to the target state and start adjusting the animation settings to create the desired animations.
Step 3. Preview the App
To preview your design, go to the toolbar and hit the "Preview" button. Now interact with your design.

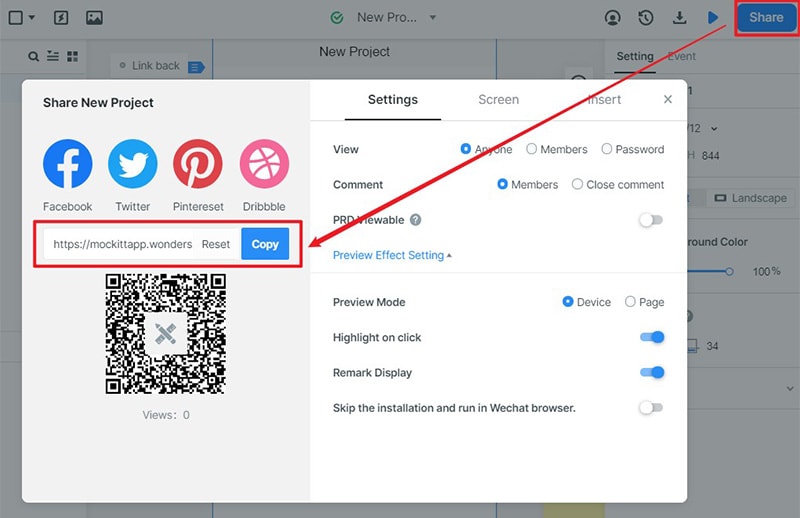
Step 4. Share the Design
Locate and click the "Share" button. Share the received QR code and project link with your friends.