How to Design the Adobe XD Drop Down Menu
Are you wondering if there is a way to create drop-down menu using Adobe XD? The answer to this is yes. The Adobe XD drop down menu allows you as the user to pick on items from a dropdown menu in Adobe XD, and they come in various options to choose from.
This piece of writing will enlighten you on how you can make an Adobe XD drop-down menu step by step. You can use this tool to make the drop menu you want. But we will also introduce another Adobe XD alternative - Wondershare Mockitt that you can use to create your dropdown menu and customize it to your preference.
- Part 1 : How to Create Drop Down Menu with Adobe XD
- Part 2 : How to Create Drop Down Menu with Adobe XD Alternative
How to Create Drop Down Menu with Adobe XD
You are in the position of creating a drop-down menu with Adobe XD as your prototype. We are going to show you how this process is done, and we will also show how you can choose values from your Adobe XD drop-down menu, which will permit you to navigate to other areas within the prototype. If you are willing to learn the process of creating Adobe XD drop-down menu, please follow the steps that follow below:

How to Design the Adobe XD Drop Down Menu
- On a new Adobe XD drop-down menu prototype web, from the top right, drag a widget of Text Table. Move to the palette of properties and rename the ID of the Text Table to "Main-menu".
- While still in the properties palette, decrease the text table row number to one. You should also make sure that the number of your columns matches the options that your main menu will contain. For example, ours have four columns that correspond with four in the main menu options.
- On your text table, type in a value in each of the cells, for instance, tour, pricing, home, and features, and you can customize the text table style according to your preference.
- On the canvas, drag a second widget of the text table, and put it on the below cell of the text table of the initial text table. Move to the palette with the properties option and remain the cell to "Menu_items_1" this is because this cell of the text table will be the one holding the subtitle of the menu for the option of the main menu.
- On the same properties' palette, decrease the columns of this Text Table to one, and you can now customize the row numbers to correspond with the main menu option sub-menu items number. You can have three rows, like in our example. You need to type in the values in the cell of Text Table and then start to customize the font style to meet your preference. Then you can reposition the remained cell in step 4 that is the "Menu_items_1" to be directly under the main menu option.
- Repeat phase four and five to ensure that your Text Tables has items of the sub-menu "Pricing" and "Features" main menu choices.
- Add another screen to your adobe xd drop-down menu prototype by moving to the option with the Screen palette and double click on the ""+" symbol. After this, rename the screen following the primary item on the sub-menu of the main menu choices. Add another additional screen; let us call it the third screen for every item on the sub-menu of the main menu choices.
Would you interested in making Adobe XD crop image? Click and learn more about Steps You Should Follow To Make Adobe XD Crop Image Simple.
How to Create Drop Down Menu with Adobe XD Alternative
Apart from the Adobe XD drop down menu prototype, another good alternative prototype for designing a drop-down menu is Wondershare Mockitt. It is a design and prototype tool that is supported. This tool is very intuitive and easy to use. There are plenty of widgets and icons in the tool and you can simply drag-and-drop. All of these are cloud-based and you can simply share with others by a link.

Steps to Create a Drop Down Menu
Step 1. Create a Project
When you click on "Create" button, you will see there are several options, including "Prototype" "Design" "Flowchart" and "Sketch Import". If you want to do vectoring editing design, you can create a design poject and if you want to make a prototype, you can create a prototype project. Now I will take prototype project as an example.

Step 2. Drag a Drop Down Menu Widget into Your Canvas
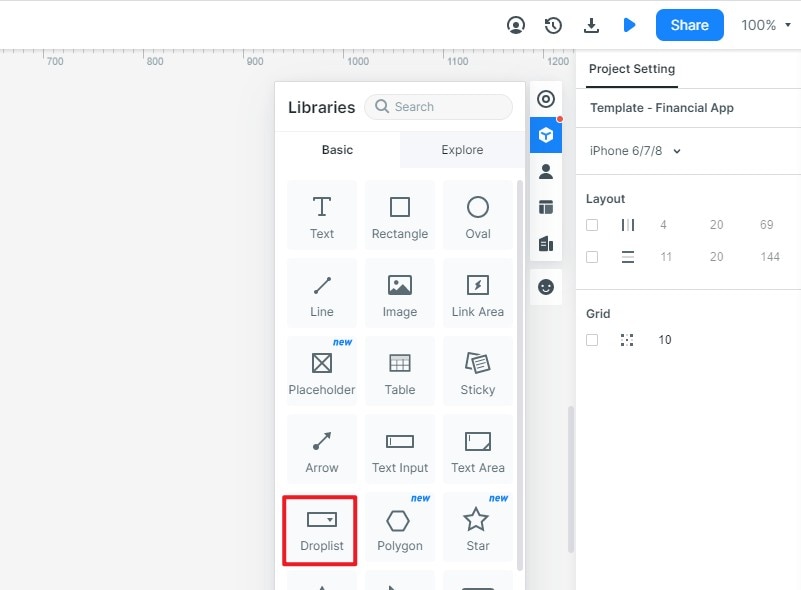
In the resources "Libraries" toolbar, you will find the "Droplist" widget, you can double click it or drag it into your canvas. You don't need to draw a drop down menu from the beginning as Mockitt offer the component already.

Step 3. Edit the Drop Down Menu
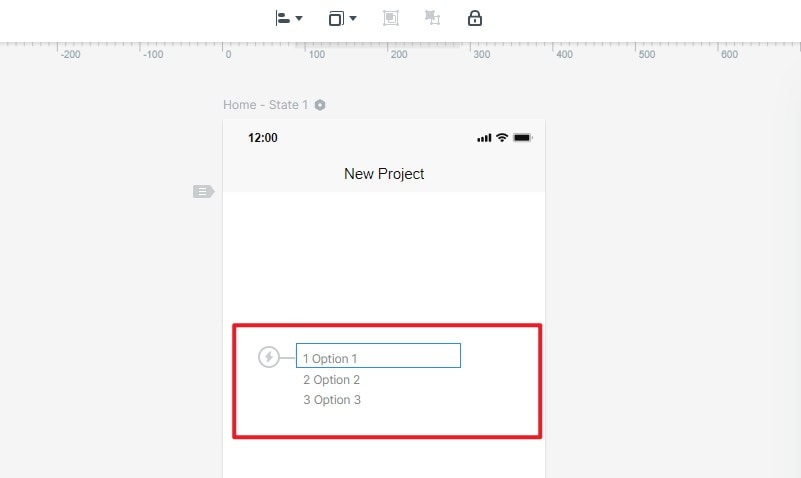
Now you can edit the drop down menu. You can add or remove drop down list, change the text for the list by double-clicking the droplist widget.

Step 4. Preview Drop Down Menu like Real
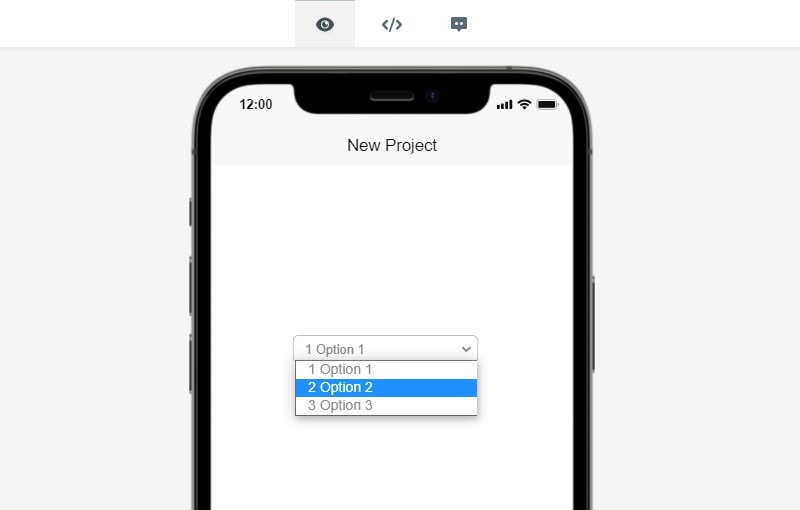
Then you may click the "Preview" icon and then enter into the preview mode. Then you can check the final effects of the drop down menu.

