Look, We Know and Study Adobe XD.
- Get to Think Afresh about Adobe XD.
- Ways to design and Prototype in Adobe XD.
- Adobe XD vs. ? - What Makes Adobe XD Different?
- Essential Tips for Adobe XD.
Wondershare Mockitt is the best altenative to Adobe XD:

How to Export Adobe XD to Website with Adobe XD Alternative
The field of design and prototyping demands creativity. The new age designers love to focus on the creative aspect of their job. They want to do away with the technical hassles of converting their designs to website codes and HTML. Adobe XD easily allows its users to convert Adobe XD to website, which leads to the construction of HTML. This also enables a seamless handoff to developers. While Adobe XD is a fantastic tool that lets you create website designs, we also explore an alternate tool which may empower designers with even more flexibility and capabilities.
- Part 1: How to Export Adobe XD to Website
- Part 2: How to Export Adobe XD to Website with Adobe XD Alternative
How to Export Adobe XD to Website
Adobe XD is a very powerful tool for designers, developers and even amateurs for creating wireframes, prototypes, and designs for digital products. Adobe XD boasts of the best-in-class features, keeping in mind collaboration between teams and clients. With Adobe XD, users can easily export Adobe XD to website even though the design may comprise of custom designs, styles and dynamic elements. We hear your next question- How to turn Adobe XD into website? Here is a quick guide that answers all your questions -
- Launch the Adobe XD software and create a design or prototype as per your requirements.
- Once your website prototype is ready, click on the menu button located in top-left corner of the software.
- Select the ‘Plugins’ option and click on ‘discover’ from the dialog that opens up.
- Search for the adobe XD plugin export to web and install the plugin. Open the required project you want to export to HTML. Select the Adobe XD artboard you want to export. Now, head to the plugins panel and choose the ‘Export Artboard’ option from the Web Export plugin settings.
- Add a name to the file for the Export artboard and select the folder you wish to save the file in. You can choose the dimensions of the HTML by inserting values in blank spaces. You can also ensure various scaling techniques for projects to scale properly. Additional settings like auto-refresh, centre vertically can be configured by checking the boxes next to the corresponding option.
- Once the settings are finalised, click on ‘Export down’ at the right-bottom and you are done. You have successfully converted XD to web flow as an HTML file.
Would you interested in converting files of Adobe XD to Photoshop PSD? Click and learn more about How to Convert Files Of Adobe XD to Photoshop PSD.
How to Export Adobe XD to Website with Adobe XD Alternative
It is no doubt that Adobe XD is a fast and high-quality tool. However, more and more designers now prefer zero installation, cloud-based tools. Designers prefer tools that can just be accessed via a web browser anytime and on any device. When you are in the process of designing a website, it is likely that you will be required to demo your web design offline and eventually handoff the designs to your development team. Wondershare Mockitt is one of the most highly recommended online tools which fits the bill. In Wondershare Mockitt, you can design prototypes easily without any coding knowledge and with a single click. This is indeed one of the main advantages of using Wondershare Mockitt over adobe XD plugin export to web. Abundant widgets/icons are available which are customizable.

Now the question is - how to export XD to website with Wondershare Mockitt. Here’s how -
1.Create a new project
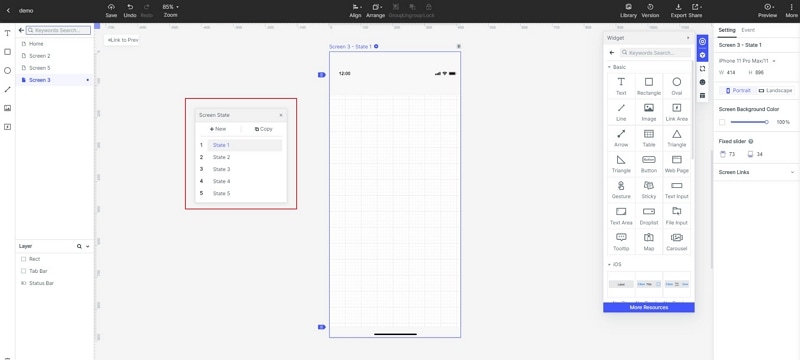
Once you login to Wondershare Mockitt, you can get started by creating a new project and choosing the form factor and device type for your website.

2.Design the website
You are now all set to start working on your wireframing canvas.
- Start designing your website using the built-in widgets and icons. You can add them to the canvas by dragging them to the canvas or double clicking the widgets. Don’t worry, you can easily edit the widgets as you please. You can also save your widgets for reuse.

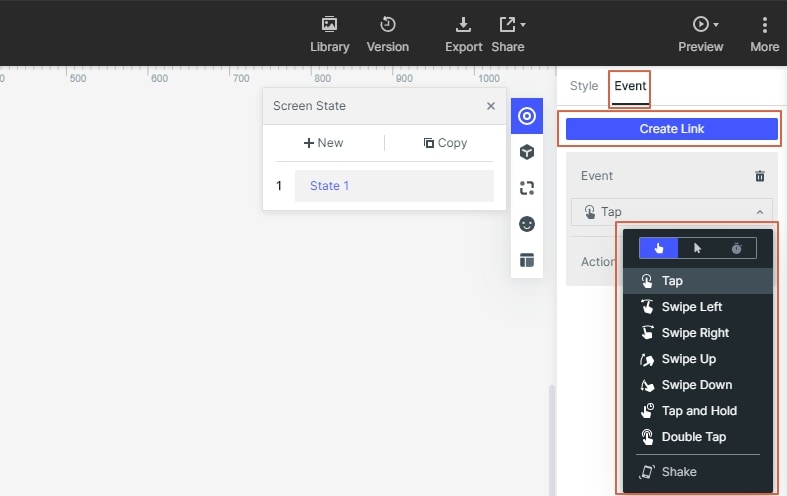
- Now that you have brought in widgets and icons to your board, you should have the website pages ready. However, they are all in isolation and it’s time to link them together. You can choose the widget and click “New Link” or drag and drop the link icon to link pages.

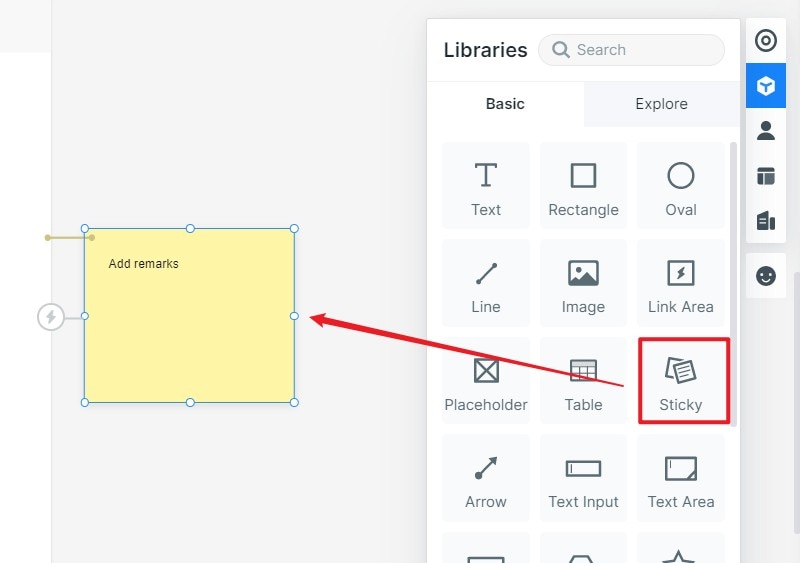
- Add notes. While a lot of your designs are usually quite intuitive, it helps to add some quick notes explain your design further. Especially when you are working in a team. Simply use the “Sticky” in the built-in widget Library and add a description.

- Create interactive animations. The dynamic widgets help you create animations which provides a more intuitive experience for the viewer.

3.Preview the website
Once you have designed the app it is time to see how your website looks. By clicking on the ‘Preview’ button in the tool, you can see your website in action.

4. Export the website
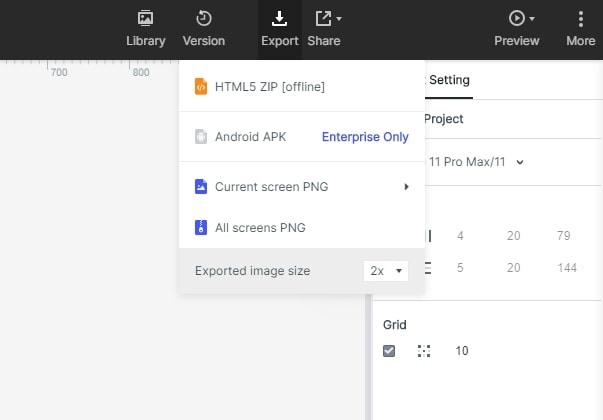
Wondershare Mockitt really simplifies exporting XD to web flow in that you do not need a separate plugin or add-on to export to HTML. Click on the ‘download’ button on the right side of the main toolbar to export the current project demo file. While exporting you will be provided the option to export as HTML compressed package, PNG images, Android APK file and iOS IPA file. Since, the current focus is website, you must export to HTML compressed package. Once downloaded, you must extract the compressed package and run the index.html file using a Chrome browser to demo your website offline. In order to ease handoffs to developers and provide them with the exact CSS and web element specifications, you can also make use of the Sketch plugin which will speed up the design to development workflow.

In summary, Wondershare Mockitt is a great alternative if you are looking to convert from adobe XD to website. It is an industry grade tool and is extremely reliable in terms of the web flows generated. Several designers have acknowledged how this tool has really simplified the HTML generation and hand-offs for them. So, next time you find yourself designing a website, you know where to head to!
