How to Create Web App

A web app refers to a program or software you can access easily using a web browser. It has frontend developed using languages such as Javascript, HTML or CSS that are supported by major browsers. Before you create web app you should know that it is cloud hosted and is highly scalable. It can also be used in various platforms and can be tested with automated tests. Unlike in the past, it is easy to build a web app with advancement of technology and tools. This article shows you the steps on how to create a web app. You also learn how to build web application using Wondershare Mockitt.
How to Create Web App
It is not hard to create web application. All you need to do is to know the necessary steps to follow and the right tool to use. Here are steps to follow when creating web app. Before looking at the steps let's look at the requirements to make a web app.
Requirements:
To make a data centric and interactive web app, it is necessary to understand several things including.
- Backend language such as Ruby and Python that control how your app operates.
- Web front end like CSS, Javascript and HTML that determines the feel and look of your web app.
- DevOps such as Jenkins and Githubs for hosting or deploying your web app.
Here are the steps on best way to create web application
Step 1: Look for idea
Before you create web app, you should understand what you want to create and your objectives. The goal may be to give someone a solution or even solve your own problem. Go for an idea that interests you so that you remain motivated from the start to the end of the web app creation process. Some of the questions you should ask yourself include:
- How much time you will spend.
- What are your interests?
- What applications do you like using?
- What interests you in these applications?
- What benefits will the web app offer?
Step 2: Perform market research
Perform a thorough market search to find if there are other similar products and opportunities available. This helps ensure you come up with a product satisfying the market. If there is similar product, ensure yours is unique from the others and showcase yourself as an innovator. During the research be sure take note of your target market and explain to them about your idea. This helps you get validation from your prospects. Check for google trends, apply the right SEO tools, leverage social media and take part in local events.
Step 3: Define your web app functionality
After validating the market, define the functionality of your web app. Ensure you only define functionality that offers solutions to current market problems. Allow it to have basic and simple functions that delight target users. Some of the functionalities include those that allow users create accounts, retrieve forgotten passwords, change passwords, create new contacts, upload new contacts, filter or label contacts as customer, associate or lead and others. Get more creative because functionality is what makes or break your web app.
Step 4: Sketching web app
Create a sketch of how you want your app to look. As you do sketching, consider buttons, navigation, forms, branding and all other interactive elements. Create different versions of your app and take note of how your web app functionality affects its overall design. Take notes to help you clarify and understand why you have created particular elements at a certain stage.
Step 5: Planning your web app workflow
Plan your web app workflow by putting yourself in the shoes of your target users. Take time to try other similar web apps offered by your competitors. Focus on the workflow as you check what is good and what is bad about these products. Create various workflows for your web app by taking the following factors into consideration.
- How users sign up.
- If user get verification emails.
- How users login.
- How users change passwords.
- How user navigate through the app.
- How users change settings and others.
Write all the pages your web app will have and states of the pages.
Step 6: Wireframing or prototyping your web app
Now turn the sketches into a prototype/wireframe. In short wireframing involves designing a blueprint of your web app. On the other hand, prototyping takes the wireframe higher by adding more interactive display. To get the best wireframe/prototype you should use Wondershare Mockitt which is the best tool in the market. The tool has a simple and easy interface that allows you to create interactive prototypes. Mockitt has a rich library fill of icons, widgets and templates that helps you create user friendly designs. There are built in libraries for templates and assets that allow for quick prototyping. The tool also allows you create own libraries to add customization to your web app design.

Step 7: Seek early validation
With prototypes/wireframes describing your web app, showcase them to the world so that you can get constructive feedback on where to improve or what to remove. Target your friends, intended users, other app developers and others who can give you constructive feedback.
Step 8: Architect and develop your database
Now that you and other people know about the functionality of the web app, its look and the pages needed. It is time to think of the information to put in the database. Here you have to think of the data you want to store and what your target users should do. This is what determines the kind of database you need to run your web application. There are various types of databases including SQL and document database. Know how to separate the data to enhance privacy.
Step 9: Develop the frontend
Frontend refers to the visual elements of your web app. Develop it using CSS, HTML and JavaScript.
Step 10: Build the backend
Backend manages your information. These are the servers, databases and all other things that users cannot see within a web application. As you build the backend, you can choose between single page application or multiple page application. The major role of the backend should be to authenticate users, offer HTTP end points for your frontend, authorisation and serve the frontend. With a single page application, the backend serves the static frontend files. When selecting your backend you should choose what you are familiar.
Step 11: Host your web app
Hosting is the way you run your web app on a certain server. Here are steps to follow.
- Purchase a domain
- Set up/buy an SSL certificate
- Select a cloud provider. Look for a provider who provides everything you require.
Step 12: Deploy your web app
This step involves how your web app gets from your source control on your device to your cloud host. You can start by deploying directly from your computer.
Wireframing and Prototyping to Build a Web App
For the best results as you wireframe and prototype to create web app, you should use Wondershare Mockitt. The tool allows you to complete the design work without coding. It has an easy and simple interface that makes it simple to use. As you wireframe or prototype, you just need to drag and drop the element on the design canvas. The tool also has libraries rich in widgets, icons and elements that make the prototyping/wireframing work easy. You can easily collaborate with your team members and it also makes it easy for you to present your web app efficiently. Besides, you can preview your prototype and make the right changes before launching it.
How to do create a web app wireframe and prototype with Mockitt
Step 1: Initiate a new project
On Mockitt, click "Create" and then "Prototype". Assign name to the project. In this case name it web app. Select the device you are creating the web app from the options provided.

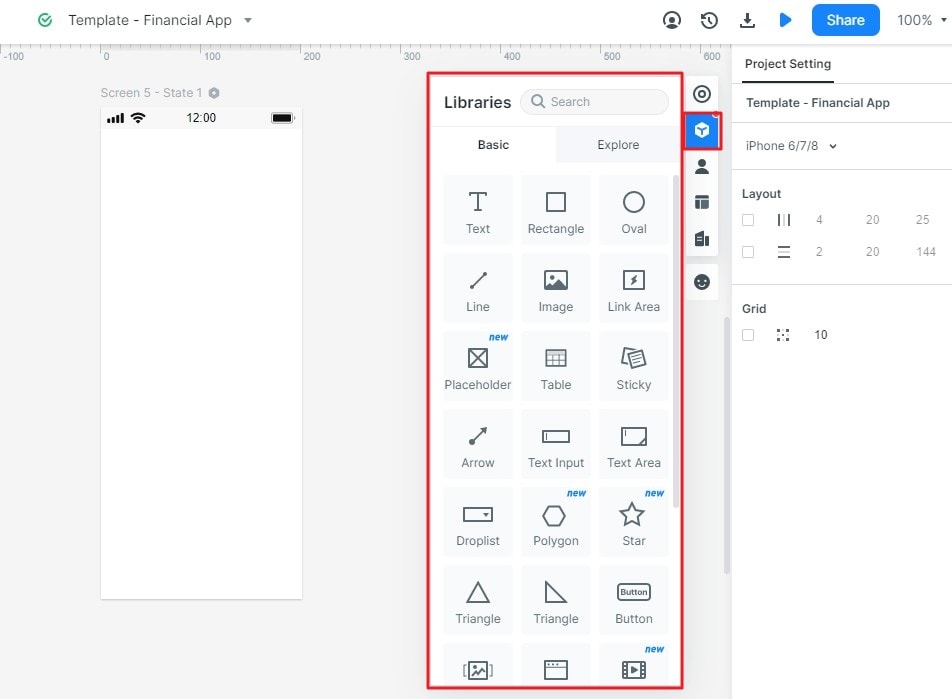
Step 2: Choose the design elements
Click the "Built-in" widgets icon where you get all the built-in widgets you require for your web app prototype design. Simply drag and drop the widgets into your canvas.
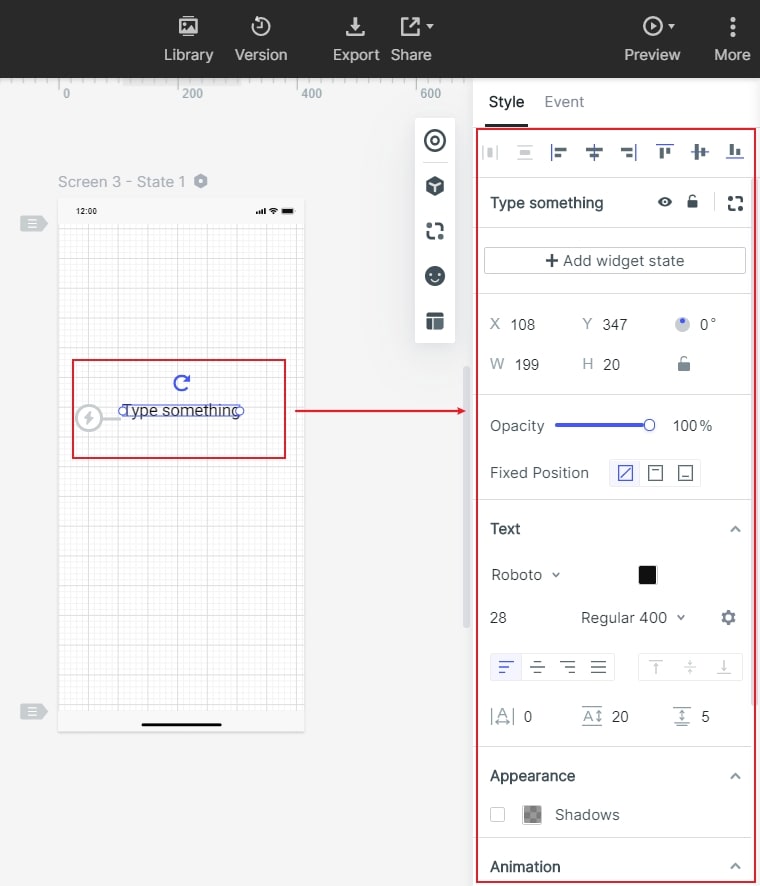
Step 3: Apply the elements in your prototype
Add the elements to the design canvas by double clicking or through drag and drop option. To give them the right dimensions, go to "Style" toolbar in the right-side, where you find the features you need for your prototype design. To give more explanations about your web app design use the "Sticky" feature to add notes.
Step 4: Preview your prototype
Click "Preview" to have a look at the prototype to confirm it has the look and feel you want. If you want others to preview click "Share" to generate a QR code or sharing link. You can use feedback given by others to make the necessary changes.

