How to Create a Web App Prototype
Creating web applications through normal web applications is complex and requires top-level expertise. However, the advancement in technology has seen a rapid development of web app prototypes that makes it extremely easy and fast to create web application prototypes. Although there are many good web app prototype tools, you need to use the right one. In this article, we will give you a crystal-clear guide on how to create web app prototypes using the appropriate tool - Wondershare Mockitt.
The Best Web app prototype Tool
Wondershare Mockitt is a powerful all-in-one prototyping tool. This amazing program is easy to use, fast, and affordable. Whether you are a newbie or an expert, be certain to navigate with ease. The prototyping steps are few and simple and so you don't have to hire an expert.

Mockitt has a plethora of templates to choose from anytime. This helps saves you the time and energy you would have used to design them from scratch. Besides, you have a pool of widgets and icons to choose from to make your prototype more appealing. The good thing is that you can save them in your own library then reuse them any time you need. You can select widgets depending on the type that ranges from iOS, Windows, built-in, basic, material design, and element among others. Mockitt is also a powerful collaboration tool as users can sync with team members across diverse devices irrespective of time and location.
- Mockitt offers plenty of templates that suit diverse industries.
- There are several widgets and icons to create beautiful interfaces.
- It supports real-time collaboration and therefore, team members can edit projects on the same page, share feedback, and comments in real-time.
- This program allows users to create interactive and animated prototypes.
- With Mockitt, users can test their prototypes directly on the program.
How to Create a Web App Prototype
Step 1: Create a Project
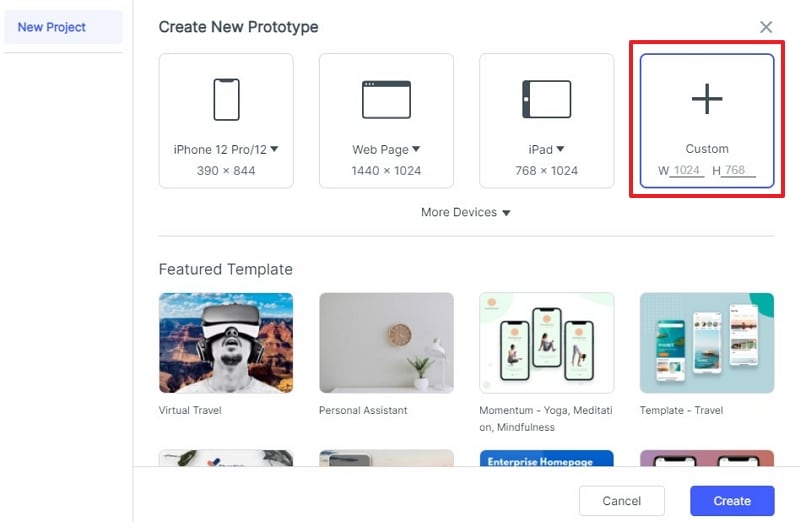
To start with, go Wondershare Mockitt website and log in using your credentials. Once logged in, locate and click the "Create" button followed by "Prototype".

You will be taken to a new page to fill in the project details like your project's name and the desired canvas size/template. You can also create a project from demos or customize it for specific devices like the iPhone.

If you want to edit the project's details, simply hover the cursor over the project and choose the "Settings" option. Change the project's details such as name, size, and type then hit the "Save" button.
Step 2. Insert Widgets and Icons
Widgets and icons are going to make your website look appealing. You can add Fast Widgets, Build-in Widgets, My Widgets, and Icons.
- For the first widgets located on the left window pane, simply double-click, drag, press the hotkeys, and start drawing.
- For the other widgets located on the right side, click their respective icons to access them then double-click them and drag them to the canvas. To select categories of widgets, click the "Build-in" drop-down icon and choose specific categories of widgets you want to use.

- Drag the desired widget like text area, sticky notes, buttons, sliders, drop-down buttons, and radio buttons among others depending on your need. You can also drag and suitable image (for your webpage) to the canvas background from the source folder then resize to meet your need.
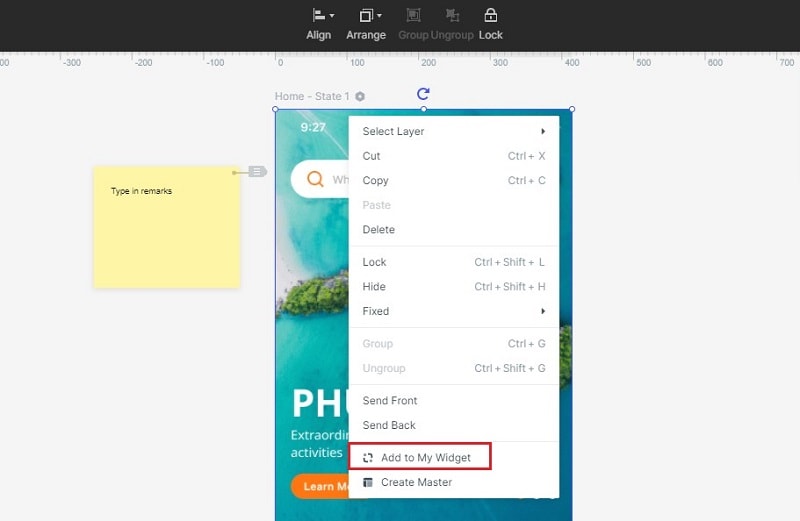
- To save the widgets for future use, simply drag them to the "My Widget" library or double-click and select "Add to My Widget".

Step 3. Create Interactions
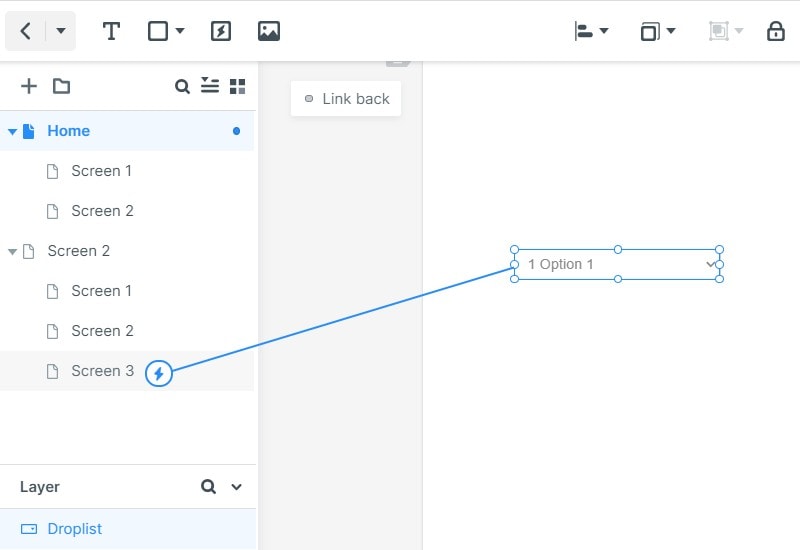
This process can be accomplished in two different ways. One way is to select the widget and navigate to the "Link Panel" at the right. Hit the "New Link" option and choose desired gesture, action, destination screen, and animation. The other way is to click the widget, drag the arrow icon on the left of the widget to the target screen then set the desired gesture, action, and animation on the Link Panel.

Step 4. Add Notes to Your Web Prototype
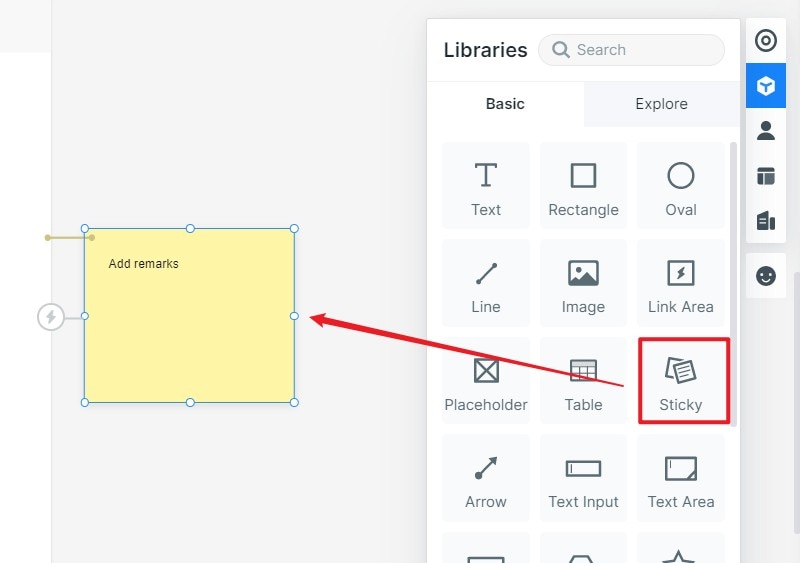
Select the "Build-in" widgets, choose the "Sticky" widget and drag it to the canvas. Start typing text inside it.

Step 5. Preview and Share
Click the "Preview" tab and interact with your prototype. If satisfied, hit the "Share" button to receive the QR code and project link. Share these details with your friends to see your prototype. You can change the visibility settings as well.

Step 6. Hand Over to Developers
The developers can click the "Handoff" button, and copy the respective CSS code.

Conclusion: As you have seen above, Wondershare Mockitt transforms the way you create web app prototypes. The collection of amazing features, ease of use, and flexibility make it a complete web application prototype package. Leverage this tool today and take your web prototyping experience to another level.

