What is Xamarin Android and Is It Good for Development
In a survey done in 2014, almost 85% of people want to see the apps on their mobile devices rather than any web browser. That's the reason why the demand for Android and iOS application development has increased so much in the past few years. Xamarin Android is the open-source .NET platform for creating Native Android Applications.
The NET developers get complete exposure to available Android SDKs through Xamarin Android. You can develop Android apps fully native in nature through Visual Studio using C#. Apart from this, Xamarin Android app is used for Android UI development. In this article, we will talk more about Xamarin android, so if this sounds useful, read along.
- Part 1: What is Xamarin Android?
- Part 2: Is Xamarin good for Android Development?
- Part 3: The Best Design Tool
What is Xamarin Android?
Xamarin Android app is a great cross-platform open-source .NET-based application that developers from all over the world use to build applications. The main advantage is the reusability of the base code. Xamarin. android application gets compiled from C# language into Intermediate Language or IL. It then compiles through Just In Time (JIT) to a native assembly.
This happens whenever the application launches. The Xamarian Android app runs side by side with Android Runtime or ART virtual machine. The whole thing happens within the Mono Execution Environment. The Android.* and java.* namespaces get .NET bindings from Xamarin. Then the same namespaces get called into the Mono Execution Environment.
The Mono runtime is written using the C# language. You will be able to use System.IO or System.Net or any other .NET class libraries to gain access to any of the underlying Linux OS facilities. Xamarian.Android developers can access many features in the OS by calling into the common. They can get open-source code from their community in Xamarin Android Github.
Is Xamarin good for Android Development?
Yes, Xamarin Android App Bundle is good for Android development. It has a lot of advantages that the developers could use to their benefit.
- Coding
Since the codes are reusable in Xamarin, it reduces efforts from Developers writing the same code over and over.
- Time to Develop
Android Development is easier with Xamarin due to the advantage of the Native UI & code sharing feature.
- Components
Xamarin Component store helps developers add high-end components from IDE. The integration between Xamarin and Visual Studio enables the use of Charts, Graphics, UI Controls.
- Forms
Xamarin Forms allow the building of UI design for various platforms using the XAML platform.
- Libraries
Xamarian libraries enable developers to write their app logic and transport it anywhere. Developers can create portable class libraries to share across platforms.
- Native Experience
Xamarian provides access to native APIs and gives a native app-like experience.
- Reduced Cost for Development
Quick application development and easy testing process reduce a huge amount of time and effort from the developers resulting in cost savings.
The Best Design Tool
If you are looking for a simple yet powerful design tool, then you should consider checking Wondershare Mockitt . It is an online rapid prototyping tool that allows you to create everything from working prototypes to rough wireframes. It is a browser-based tool, so you can start creating prototyping immediately. Mockitt also saves you previous progress records, so if you even lose your work, you could backup it easily. It offers a wide range of elements that can be used directly by dragging and dropping.

Here is the detailed guide on how to use Mockitt:
Step 1: Create a prototype and choose the size.
Go to the Mockitt website and sign up for an account. Then open the dashboard and click on the 'Create > prototype' option. Now on the next window, you will see various device options. You could either create a custom size and go with the pre-existing devices.

Step 2: Add Widgets to the canvas
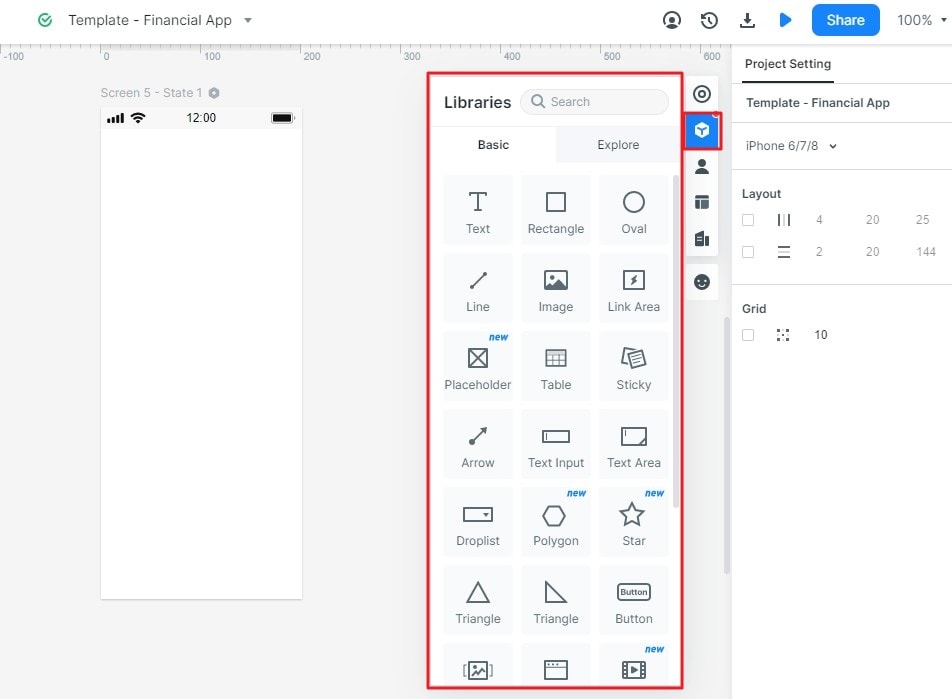
Now you will be redirected to the main artboard. There you will see a cubical box on the right side of the screen. Click on that to access all the widgets. To add them to your canvas, you just have to drag them on the canvas area or you could just double-tap them.

Step 3: Add State Interactions
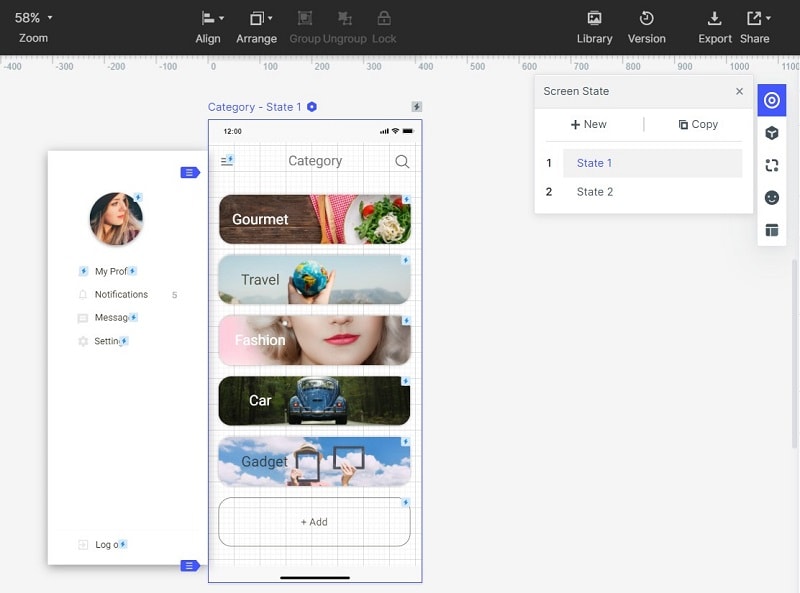
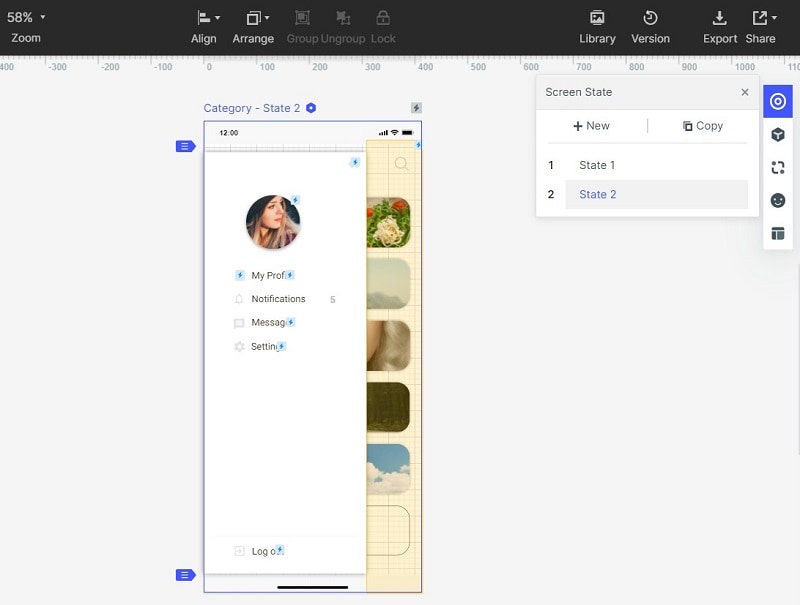
To add interactions, you will have to use the state feature. On the right side, above the cubical box, you will see a state option. Click on that and it will open state settings. Now simply create state 2 and add your components to that artboard. Now go to state 1 and select the main component. After this, click on the flash icon and drag it to state 2. This will link both states instantly.


Step 4: Preview Your Prototype like Real
To preview your prototype, you just have to click on the preview option. You can easily find it on the top right side of the screen.

Step 5: Share Your Prototype for Feedback and Comments
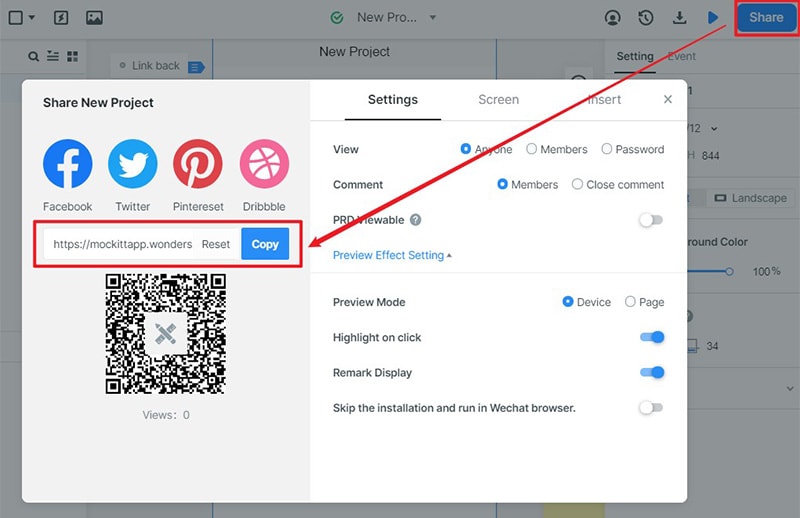
Now once you are ready to share your prototype, simply click on the share button, which is placed right before the preview option.


