How to Use the Figma Auto Layout Feature to Create Smart Designs

A while back, Figma introduced an auto layout feature in the tool to create dynamic designs. As the name suggests, this Figma layout feature can automatically expand or shrink different components as we would design. Since it is an extremely beneficial feature, it will let you create smart layouts in Figma by saving your time. In this post, I will let you know how to make the most of the Figma auto layout feature.What is Figma Auto-Layout
- Part 1:What is Figma Auto-Layout
- Part 2:How to Apply and Work on Auto Layout in Figma
- Part 3:The Best Figma Alternative
What is the Figma Auto Layout Feature
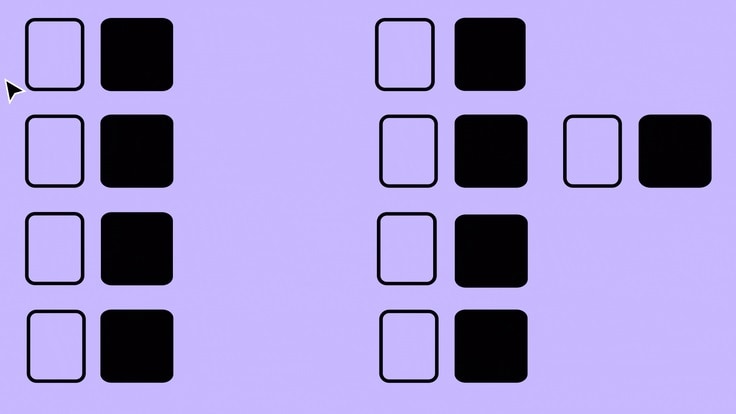
Auto Layout is a dedicated feature in Figma that can be applied to components or frames in your projects. Once the auto layout feature in Figma is applied, it will let the frame and its components fit dynamically (shrink or expand).
As you would work on a complex design, the Figma layout feature will automatically accommodate the components in the best possible way. Ideally, the Figma auto layout feature can be implemented in the following manner:
- You can add the auto layout feature to new or existing components
- It can be implemented to an entire frame to create an interface
- You can also manually make a list to adopt auto layout in Figma.
- It can help you create buttons and text fields that can expand or shrink as you design.
While working on the smart layout in Figma, please note that auto layouts would have their padding, strokes, radius, and other properties that you can customize as well.
How to Apply and Work on Auto Layout in Figma
Now when you know the benefits of the Figma auto layout feature, let's learn how to work on it. I have considered a simple example of implementing auto layout in Figma, but you can further explore the feature and apply it in your designs the way you like.
Step 1: Add Design Elements and Components
To begin with, you can just launch the Figma interface and add any component to your canvas. You can use the inbuilt feature of Figma to add multiple components if you want.
Step 2: Enable the Auto Layout Feature
Once you have added the components, just select them, and right-click to get their context menu. Now, just click on the "Add Auto Layout" option to implement the feature for any component or frame.

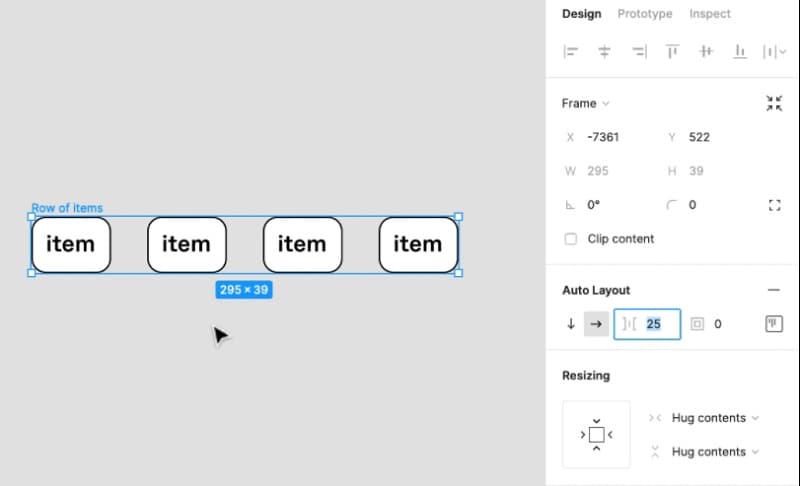
Step 3: Customize the Figma Auto Layout options
Once the Figma auto layout feature is enabled, you can view its dedicated options on the sidebar. If you want, you can use the arrow icons to adjust the placement of the components and find numerous other options here.
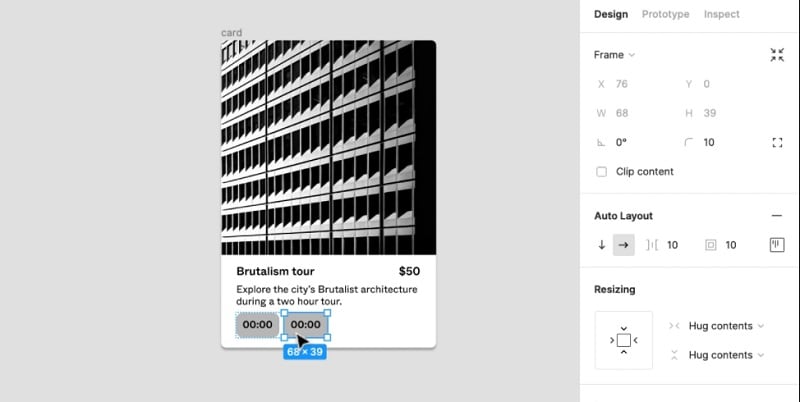
In case multiple objects are selected, you can go to the spacing field in the smart layout section in Figma. Here, you can manually enter the spacing value to shrink or expand the frame.
Apart from that, you can also adjust the padding options from the Figma auto layout section. There are different preset options that you choose or can do it manually as well.
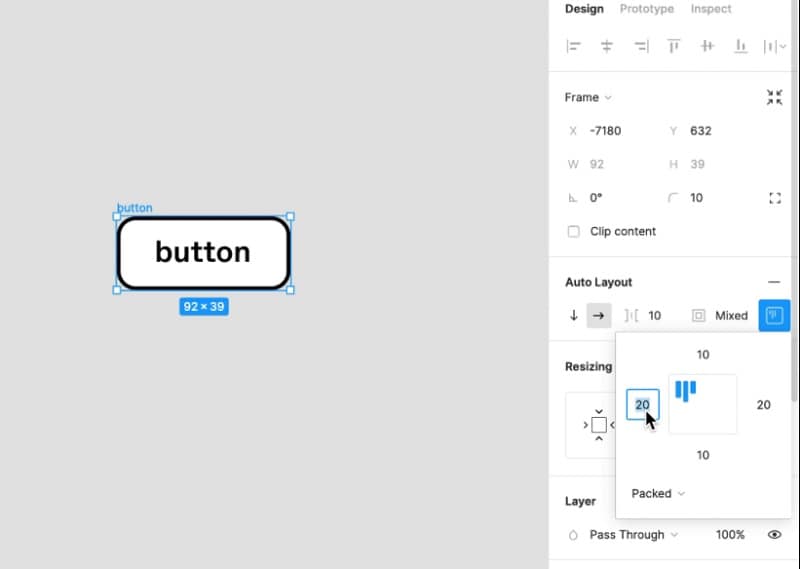
In the auto layout section in Figma, you can also find options to align, resize, and redistribute your components. The section can also be used to just remove the Figma layout feature if needed.
The Best Alternative to Figma
Since using the Figma auto layout feature can be complicated for beginners, you can consider trying Wondershare Mockitt instead. Developed by Wondershare, it is one of the most extensive and user-friendly designing tools that you can try online (or offline). Mockitt also has a master widget feature that would let you inherit its properties to other components to save your time.

- With the Master widget tool, you can easily modify the linked components. The other components would automatically inherit the changes made in the master widget.
- On Mockitt, you can also find an extensive library of vectors, icons, and even ready-made templates.
- There are options to include transitions, animations, and other dynamic components to make prototypes with high fidelity.
- Using its collaborative features, you can work together with your team, and even get a preview of your designs.
- There are also features to instantly share your work with others or export your designs in different formats.
You can start working on the master widget in Mockitt and save your efforts in the following way:
Step 1: Start working on your project
To begin with, you can just go to your Mockitt "Personal Space" or "Enterprise Space" and click on the "Create" button. Choose to create a new project and add a screen to work on your canvas.

Step 2: Add Master Widgets
There are different ways to use the master widgets in Mockitt. Go to the floating sidebar on the right and select "Master" (the fourth option). This will display various master widgets that you can drag and drop to the canvas.

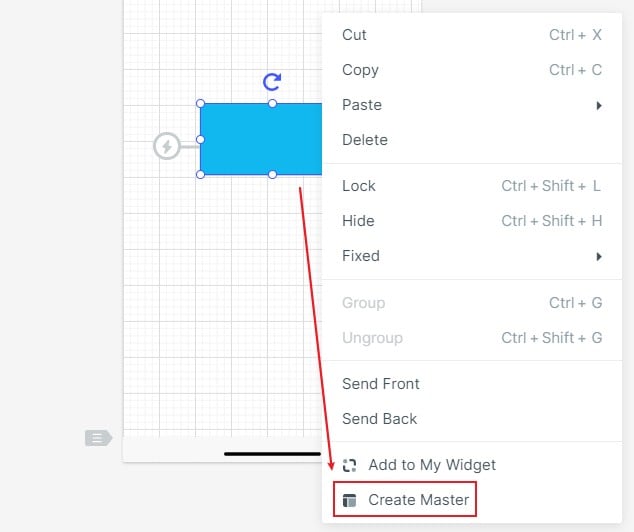
Apart from that, you can find numerous other components and widgets in Mockitt that can be included in your design. You can select any component, right-click, and choose to make it a master widget.
That's it! You can now hover your mouse on the master widget to get the edit option and can link other components to it as well.
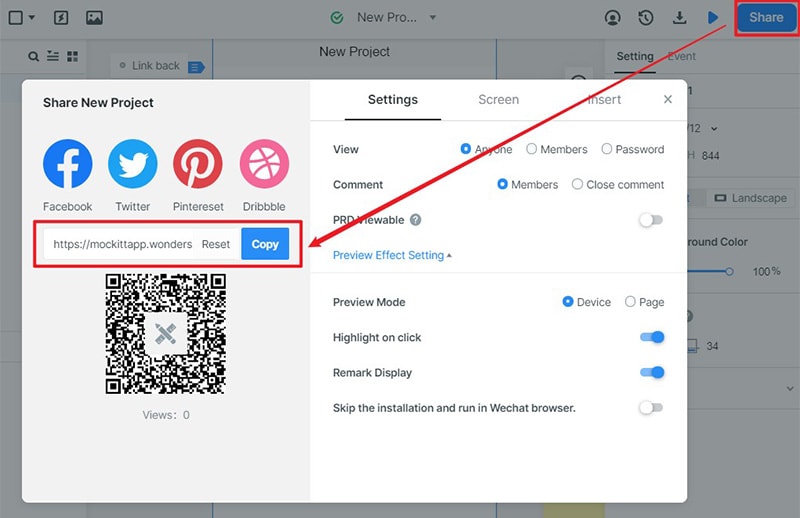
Step 3: Preview and Share your designs
With the help of the master widget, you would be able to come up with stunning designs in less time. In the end, you can go to the top panel to get a preview of your designs or click on the "Share" option to generate its shareable link or a QR code.
Now when you know about the Figma auto layout feature, you can certainly give it a try. Since the Figma layout features can be complicated to use, a simpler application like Mockitt can be explored. The application is equipped with a wide range of designing features and won't need any technical experience to be used. It also lets us create master widgets to save time and efforts in designing.
