Top 5 Free Icon Resources for Figma
Designers have made icons a comfortable pack to Figma components. They have made them scalable and seamless to use in Figma. It has also made icons for Figma seem beautiful and modern. You do not have to import a non-Figma file format. There are many icons to choose from, and you can use them to speed up projects. In Figma icon sets, not many free resources are available. In this article, you will learn about
- Part 1: How to Use Icons in Figma
- Part 2: Top 5 Figma Icons Resources
- Part 3: The Best Figma Alternative
How to Use Icons in Figma
1. Accepting File Formats
Figma Icons allows you to import image file formats, e.g., PNG, JPG, GIF, SVG, Sketch, and Figma. When you have many icons, they will be presented in Sketch or Figma formats.
2. Import Icon Files to Figma
Getting icons for Figma depends on the type of file you are using. Imports in Figma occur in File Browser Window. Here, you will see the list of all your Figma documents. Imports also occur in Canvas, i.e., open Figma document. When importing an SVG or PNG icon, drag-and-drop it directs into the canvas.

Source: iconfinder.com
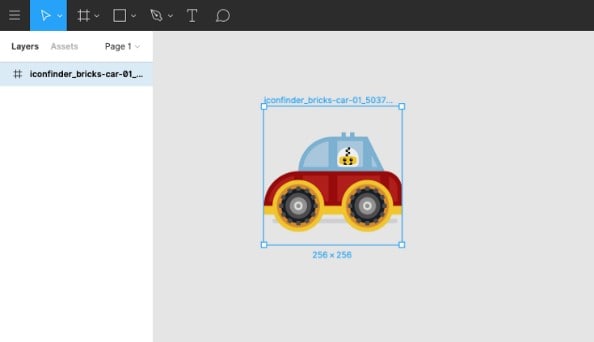
When you import an SVG, it will appear in a frame.

Source: iconfinder.com
When you have a Figma file, importing will be at the File Browser window. You will either drag-and-drop your file or click the "Import File" icon.
3. Resize an Icon in Figma
To resize your vector icon, hold the shift button and drag one of the corners. Adjust the size in the properties panel to get the pixel precision.
4. Recoloring Figma Icons
In Figma icons, changing color is easy. First, you have to import the icon in SVG format. Click on the icon you wish to change the color and recolor in the Fill section. Color can be set in HSB, HSL, HEX, CSS, and RGB.
5. Keep Icons Consistent Across your Design
In larger design in Figma, you will use some UI elements like buttons and icons. You can lose track of each icon. Figma has components that will help you in making adjustments.
Figma components can be reused. They allow changes to be made. Components can be created from layers, groups, and frames. When changing an icon to a component, select the icon in the layers panel. Click the "create component" icon.
Top 5 Figma Icons Resources
1. Elastic UI Kit
It is available for free. It is well structured and has many components and a beautiful interface. Elastic UI kit gives people the chance to get Figma icon free. These Figma icons resources are great. They help when you need ideas or Figma material icons for projects. They are not full-fledged methods when solving high-level problems.
2. Building Blocks UI Framework
Because of Building Blocks, your design will have all the required elements that are important to design UI quickly, efficiently, and with the best quality. Building Blocks UI Framework has patterns and clarified templates. They help in understanding how to use UI elements efficiently.
3. Clarity UI System
It is provided by VMWare. This Figma Icons Library has components that are helpful since clarity UI has elements like alerts, buttons, data grid & tables, form controls, labels, navigation, progress bars, tabs, etc.
4. Bootstrap 4 GUI
This resource includes a collection of components like buttons, Navigation bars, Forms, Alerts, Labels, Dropdowns, inputs, etc. They help you design faster.
5. Open peeps
This is a fancy resource for icons for Figma. It works like building blocks for apps and websites. All the illustrations are vectors. This excellent Figma resource is useful in product states or product illustration, marketing, creating personas, user flows, or storyboarding.
The Best Figma Alternative
Wondershare Mockitt is the best online prototyping and collaboration tool. It helps in making wireframes and prototypes for interactive apps. Over 2 million people have started using Mockitt to enhance their productivity and project implementation. This is done through co-editing and co-managing of projects.

Step-by-Step Guide on How to Create a Prototype in Mockitt
First, you have to sign up then register for the free plan. Follow the following steps:
Ⅰ. Create a Project
Click the "Create" > "Project" button to start a new project. This will reveal a new page and you can customize the size for your project canvas.

II. Add Widgets to Your Design
Now you can drag widgets from the right library to your canvas. Or, you can double click the widget to add. There are many built-in widgets in the library, and if you want more you can click the "More Resources".

III. Prototype Your Design
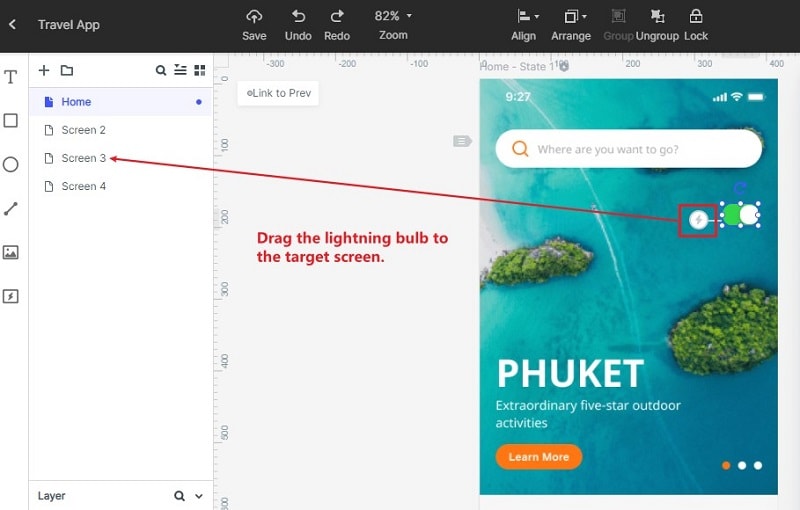
You can add gestures that make your screen interactive. It is simple, and you need drag the lightning bulb to the target screen. And you can also select the gestures for the interaction.

IV. Preview and Share the Prototype
If you want to make a presentation to others, you can click the "Share" button and copy the link. Others can open the link to preview your work. There are many preview modes and you can preview the like it is real.

V. Handoff to the Developers
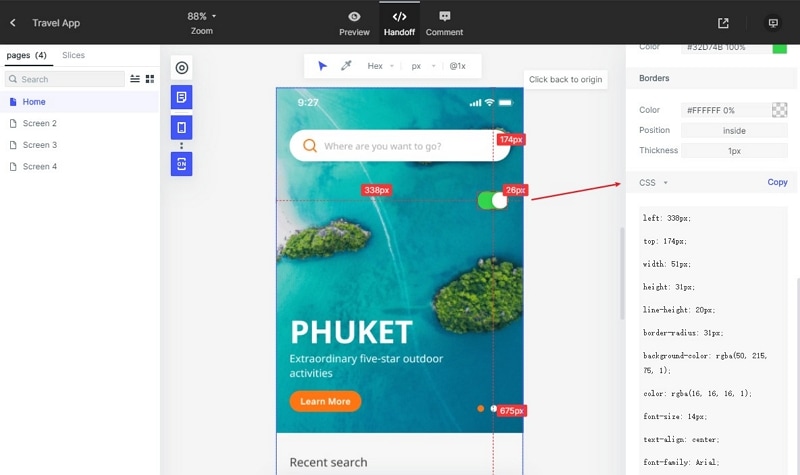
You can handover the design directly to the develop team and they can generate code directly. You can also download all the HTML code.


