How to Use Figma Material Design

Figma material design is a great deal in popular apps like Sketch and Adobe Experience Design. It is free for individuals (a small subscription fee may be required). It is web-based. You can download an app for desktop. Material design Figma offers both UI & Prototyping, unlike others that only use design. It has robust vector features too, and keyboard shortcuts are available in a UI design tool. This article will talk about tutorials on how to use Figma material design, the best alternative, and what is material design.
- Part 1: How to Use Figma Material Design
- Part 2: The Best Figma Alternative
- Part 3: What is Material Design
How to Use Figma Material Design
Step 1: Login Figma Account
Open a free Figma account. This way, you will see and be seen by others. Your teammates will be able to interact with you.
Step 2: Start Material Design in Figma
Design tools can be intimidating for beginners. It may seem like Greek, but with continued practice, you will be a pro. When learning material design for Figma, what you see is what you get.

Source: snipcart.com
The Topbar
Tools are only shown when you need one. Viewers can only access documents through "read-only". You will not be able to change anything. Using the toolbar, you can go to the dashboard, select the pointer or comment tools. You will be able to see the document’s name in the middle of the screen.
You can see those who are present in the document and ask them on what they are working on. The share button displays a popup to see those who have access to the doc. You can also invite them to join.
On the right of the top bar, you will either run prototype to open a new tab or play with display options for better browsing experience.
The Left Sidebar
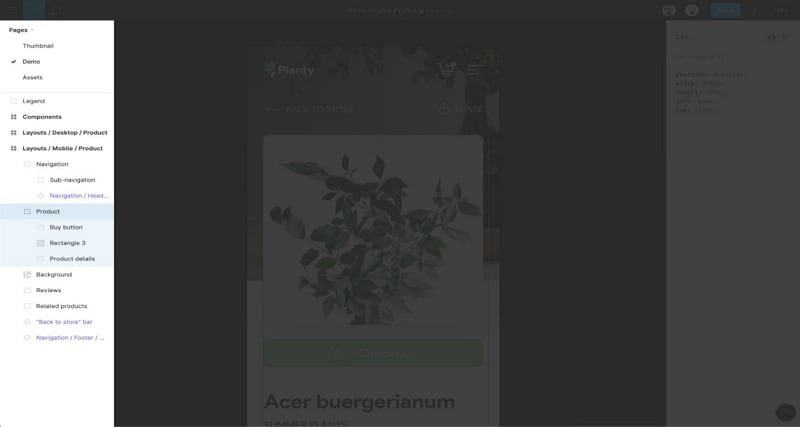
Here, you will see the "pages list" and the "layers list" element. Figma documents can be broken into small pages. It is useful when designers do not overload documents. To organize documents better, arrange them into pages.
If you cannot click on a particular element to export it, it is easy to find it here.
Source: snipcart.com
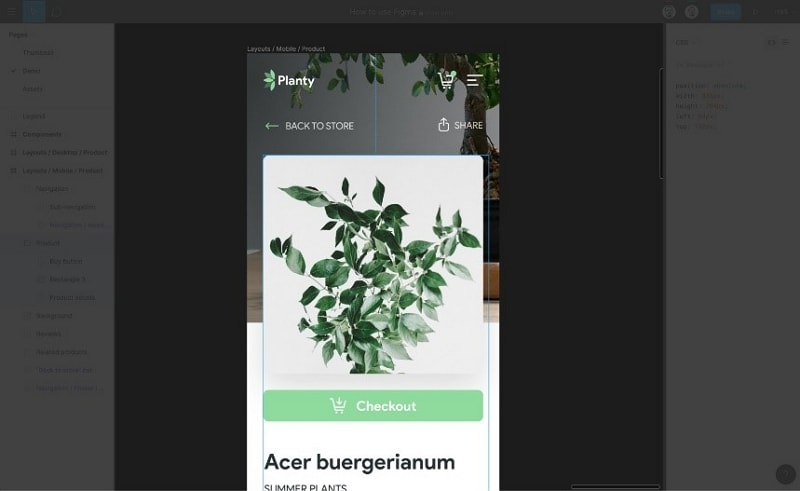
Step 3: The Canvas
Most of the work is done here. You will browse artboards and design, measure spaces, and dimensions, click on icons to export, and comment.
Source: snipcart.com
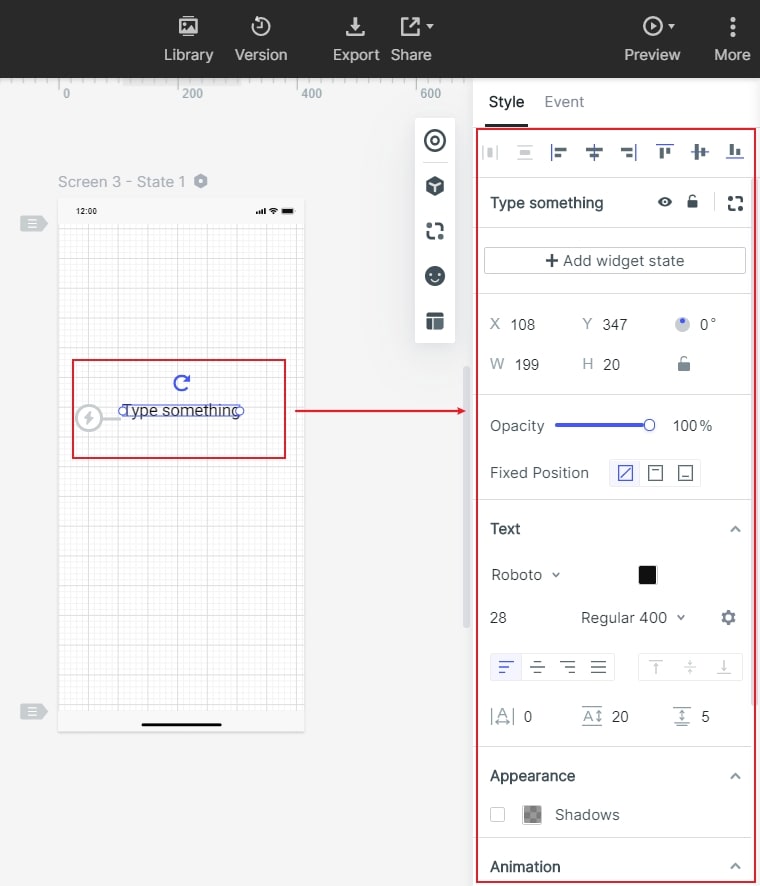
The right sidebar
When you select any element, you will see a CSS interpretation. Dimensions, coordinates, background, color, font size, and weight are available when selected. There are only two different views: copy/paste CSS line or the values.
Inspect the document
When you are working with a designer, you will have to do some front-end stuff. Your work will be precise and consistent with the design. Figma material design kit will allow you to get designs and measure them to get the exact values.
Display grids
To show/hide grids in Figma, click ctrl+g in macOS and Windows. First, you have to ad grid to the selected frame.
Export assets
Click on any element, go to the sidebar on the right, and you will see an export button. Choose the format you wish to export your asset in.
The Best Figma Alternative (Wondershare Mockitt)
Wondershare Mockitt has material design kit for you to use. Some of the advantages of Mockitt over Figma are: it is friendlier and straightforward for beginners. You only drag and drop the widgets. This will make beginners finish a prototype rapidly in 10 minutes. This software is cheaper compared to Figma.

It is even available for free for beginners. The following is a step-by-step guide on how to use material design in Figma:
Ⅰ. Create a Project and Set the Size
Create a new project by clicking the "Create" > "Project" button. Then select the size for your project, you can choose mobile apps, web, tv etc.

II. Design Quickly by Drag and Dropping Widgets
There are many widgets in the built-in library, including image, button, rectangle, line, arrow etc. You can double-click or drag them into your canvas. You can also change the properties of the widgets, like the colors, font size, background etc.
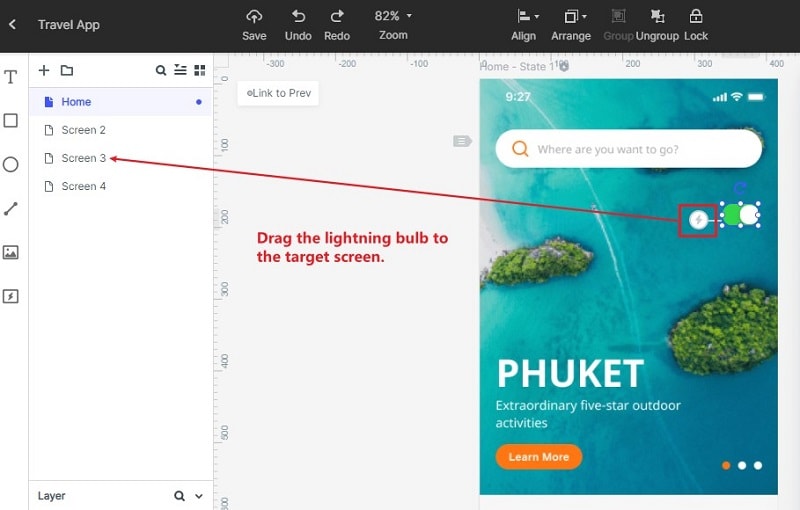
III. Make your Design Interactive
If you need add interactions to your design, you can simply drag the lightning bulb beside the widget to the target screen. It will make your design interactive.
IV. Preview your Design
After you finish designing your project, you can click the "Preview" button to see the real effects. You can also share the project to others and they can open your design by the link.

Tips: What is Material Design
You may think material design has something to do with interior design. It is not too far from that. There are many differences between the physical and digital world. Google is trying to bridge the gap for a more relatable UI design process.
Material design is a design language created for Google Android. It mainly focuses on touch-based material design for Figma. Material design also predicts the same ideas into web design.
Google material design Figma was made for Android to create a good foundation for user interfaces. The material design focuses on physical materials. Google material design Figma considers digital material created with pixels. Users can tap, swipe, or pinch the fabric and moves according to user interaction.
Mobile interfaces are created from layered material objects like rectangular bars or circular buttons.
Every piece of material is thought to be a separate object inside the digital world. An app that has a white background uses a full-length piece of material that is white. A blue navigation bar is stacked on top using various materials. A user can interact with various pieces of materials like they were real objects.
Material design is a language that covers motion, depth, and fundamentals of light, content hierarchy. It is not a material design UI kit Figma or a collection of interface elements.
Device Independent Pixel is used to measure each material object. DIP is a measurement unit which is physical and can be converted to inches or millimetres based on screen size. Designers will be allowed to create interfaces which are independent of a particular screen resolution. Figma material design uses a DIP in measuring height, width, and depth of material. Digital material is real and has a 3-dimensional coordinate system; X, Y, and Z axes as portrayed in the image below.
Layering material objects can create a sense of depth. Content lays the material flat. The depth is created by the use of light that will cast a shadow at lower material in the hierarchy. The vital source of light flows down from the screen. This will make objects closer to the screen; they will cast a darker shadow. Most of the design elements are still flat, but they use subtle shadows to differentiate between material depths.
