How to Create Balsamiq Mockups

Most designs start on a simple scale, although we all assume they require complex coding and extensive digital interface. Developers use many UI/UX designs to outline their ideas, and a Balsamiq mockup is one of them. Whether you are already a designer or not or you are currently aspiring to be one, you probably hear the word mockup being tossed around a lot.
Mockups are full-sized design models used for product presentations and other purposes. They are an innovative way to bring ideas to life. There are several means to make them. However, depending on your skills and time, one of the ways is to use dedicated graphic software such as the Balsamiq.
Part 1: How to Create Mockups with Balsamiq
The Balsamiq mockup is a software tool used to sketch out user interface for websites, webs, desktop and mobile applications. It is a highly graphical user-interface, mockup building application. Over the years, there have been many versions and it has gone through different upgrades, the most recent being the Balsamiq Mockup 3. Balsamiq Mockup has both sketch and pre-existing elements which make it faster to create designs.
One of Balsamiq's major advantages is that it allows a very quick creation of wireframes to communicate concepts and show ideas to people without them really having to go into the details of the design. The following is a step-by-step guide of how to use Balsamiq Mockups to create a web application:
- Step 1: Visiting balsamiq.com: There is a web and a desktop application. The tool also comes with a 30-day free trial after which you will have to purchase a license.
- Step 2: Creating a mockup: Upon opening the application, there is a blank page by default which allows the user to create whatever designs they want. You can create additional screens with the symbol marked with a + with a red box.
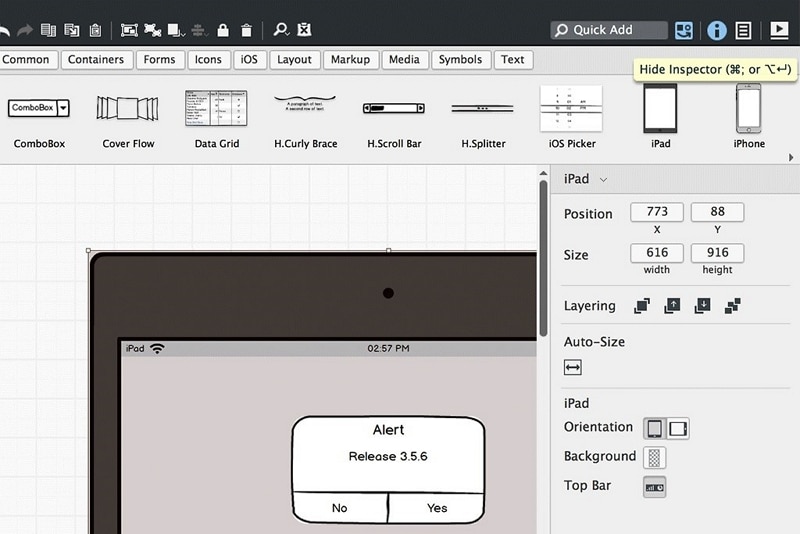
- Step 3: Features of the tools: There is a project properties icon on the top right corner where you can set the overall properties of the project. These range from descriptions to skin to font and colours. Balsamiq is user-friendly and explanatory so it gives different options for the skin, sketch, and wireframe, which are very important icons to note and use before any project is started.
- Step 4: Creating the screen: There are so many different elements and combinations that you can go with and Balsamiq has created templates for all of them. There are also 'links' via which you can link up another mockup, web address, or go back in presentation.
- Step 5: Saving the mockup: There is the option for exporting a single screen as a PNG image. However, if you want to export the project as an interactive clickable wireframe, it is also there.
Part 2: The Best Balsamiq Mockups Alternatives
While Balsamiq is the go-to tool for making speedy and sketchy mockups, it also has a lot of limitations. First of all, Balsamiq is best used for creating wireframe designs. Wireframe designs are blueprints that are mostly useful for helping designers think and communicate on the structure or website that they are building.
That is where the Wondershare Mockitt comes in. It also allows its users to do mockups easily and fast. It works on Windows, Mac, Linux as well as web browsers. That is, technically, it works everywhere. With the drag-and-drop functionality, there is little time to do complex coding. Wondershare also provides guidelines in every tool you use and has over a hundred icons.

Moreover, it gives room for real-time collaborations which will enable you to share your prototypes with other team members by adding them to your project, a feature that is not available while using the Balsamiq Mockup. And as regards pricing, Mockitt is a cheaper alternative, with different plans to suit different budgets and even bundle savings on plans.
This tool allows you to showcase the functionality of your prototype and feedback for your work. The feature makes the entire process of creating web apps easy even for beginners. Below is a step-by-step guide on how to use Mockitt:
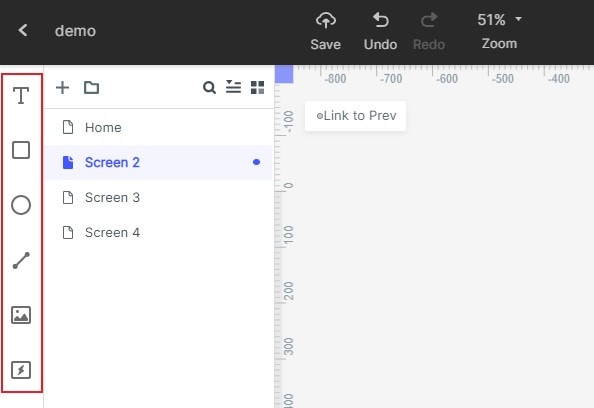
Step 1: Create a new project
After logging in, just tap the "+Create" icon and then choose "Prototype" option to begin the prototyping work. If you want to design a blank project, select the correct device type and name it. There is also an option to change the size of the web app.

Step 2: Add or edit widgets to your web application mockup
Fast widgets are on the left side and they can be added by double checking, dragging, and drawing. The widgets can be edited by clicking each and changing the properties on the inspector panel. You also have the option to save your widgets for future purposes.
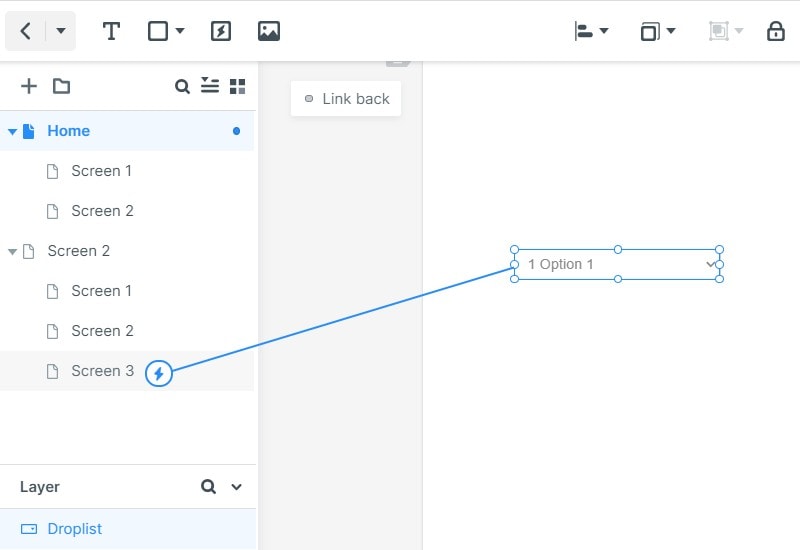
Step 3: Adding links between screens
Links can be added by clicking between screens and choosing a widget. 'Click new link' can be found in the link panel of the right side of the page.
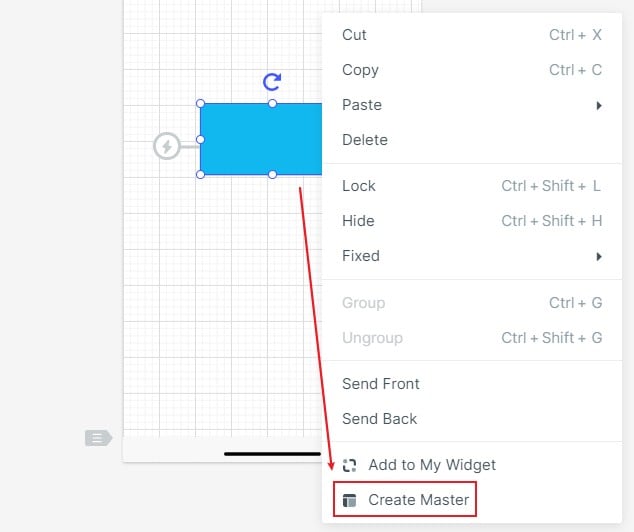
Step 4: Create a master to batch modify widgets
With Mockitt, creating a master and changing the properties is easy. Just right click to create master and it will be saved in the master library where you can always edit it.
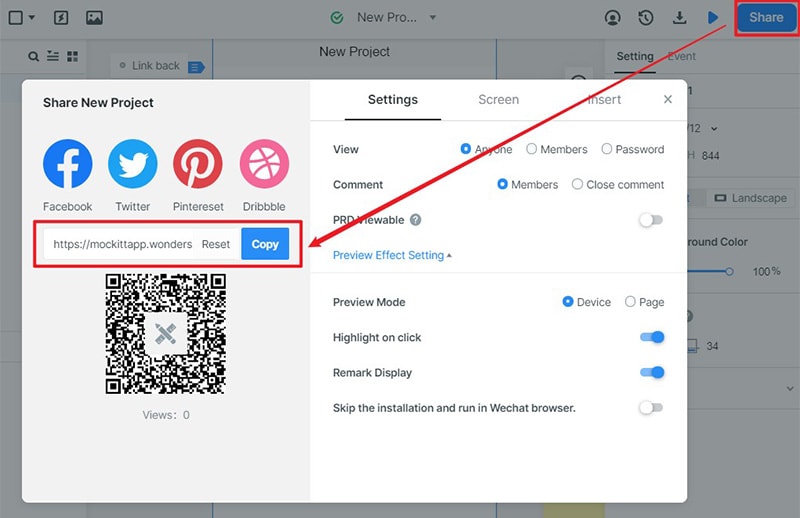
Step 5: Export or share your project
You can choose to either export or share your project. You can also choose to either download it or export it. To share it, copy the link directly and select the pages to share.
When looking for an easy-to-use, user-friendly interface, the Wondershare Mockitt can always be counted upon to provide fast and easy mockups with finished prototypes.
