How to Use Balsamiq Wireframes for Desktop
Are you a UX designer looking for a tool that gives you freedom to design low-fidelity wireframes and prototypes for desktop screens? Balsamiq is a tool that can help you in that case. Designers across the globe use Balsamiq wireframes for desktop to help them create various design interfaces.
When you are designing the screens of an application for desktop, you need to make sure that the software you are using is supportive of such a design. If the interface does not fit a desktop screen, you can't place the buttons and other widgets properly.
- Part 1. An Introduction to Balsamiq Wireframes for Desktop
- Part 2. A Better Alternative to Balsamiq Wireframes for Desktop
How to Use Balsamiq Wireframes for Desktop
If you want to use Balsamiq desktop, you will have to download its application first in your personal computer. You can find the link to that application on the official Balsamiq website. When you have downloaded Balsamiq for desktop, you can easily follow a simple pattern to design each one of your Balsamiq mockups for desktop.
It involves signing up for an account with Balsamiq desktop and moving on to choose your role and purpose behind the creation of those designs. Then you can choose the screen for which you are designing an interface and apply that as the first screen of your first design project.
You can always add more screens to the same project. With the help of Balsamiq for desktop, you can enjoy freedom of design in every way. It allows you add all types of widgets to the desktop screen that you are designing.
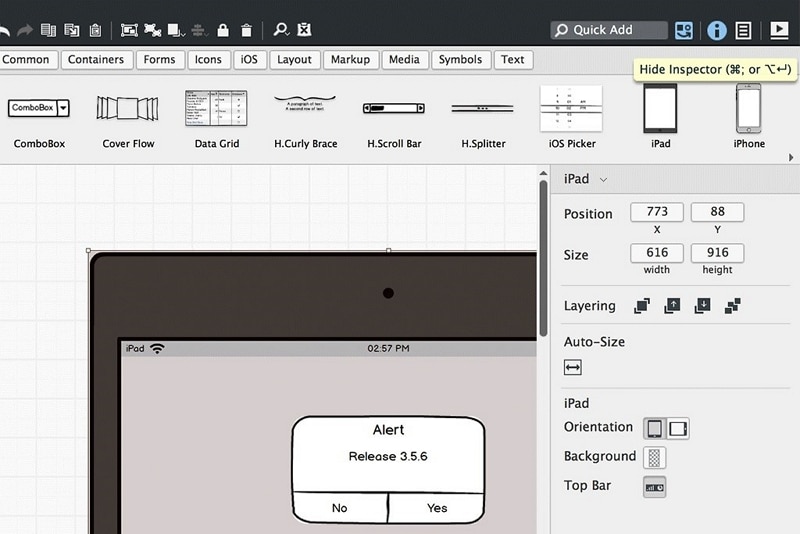
You can adjust everything from fonts and colors to the sizes of the widgets that you are using. Creating a uniform user experience throughout the interface is an important part of the process. You need to make sure, for example, that the sizes of OK and CANCEL buttons match.
Any screen that presents various options to the user should keep the sizes of their buttons equal. Similarly, the color scheme should be uniform, and you should align everything properly before finalizing the design. Balsamiq wireframes can help you do all of that.
Creating viable low-fidelity mockups is the key to creating perfect UX design that meets the needs of the users. For certain applications, you need to present them with screens that radiate neatness, cool, and calm. In others, you have to choose something that induces joy and excitement.
How to Use Balsamiq Wireframes for Desktop Alternative
While the market is crowded over popular tools like Balsamiq desktop, you can always resort to an improved alternative that suits your needs better. That can help you reduce the overall cost of your designing while improving the usability.
Wondershare Mockitt is one such platform that offers a highly easy-to-use interface for UX design. It is also cheaper than the more popular options like Balsamiq wireframes for desktop. There is nothing missing in the UX design interface offered by Mockitt, and you can create amazing mockups with it in a very short time.

It also has some unique features like advanced screen transition options that you can use to leave a better impression on the viewers. Mockitt can offer you a more professional prototyping experience compared to alternatives.
Step 1: Sign Up & Beginner's Guide
First of all, you need to create an account with Wondershare Mockitt. Access it online or download its desktop application to sign up. Sign up with your email account and choose a strong password to protect your privacy.
Secondly, Mockitt takes you through a beginner's guide that helps you understand how you can use different widgets and buttons on the design interface that you can see.

Step 2. Create a Prototype Project
Create a new project by clicking on the "+Create" on the left top corner after you are redirected to your dashboard. Then then click the "Prototype" option.

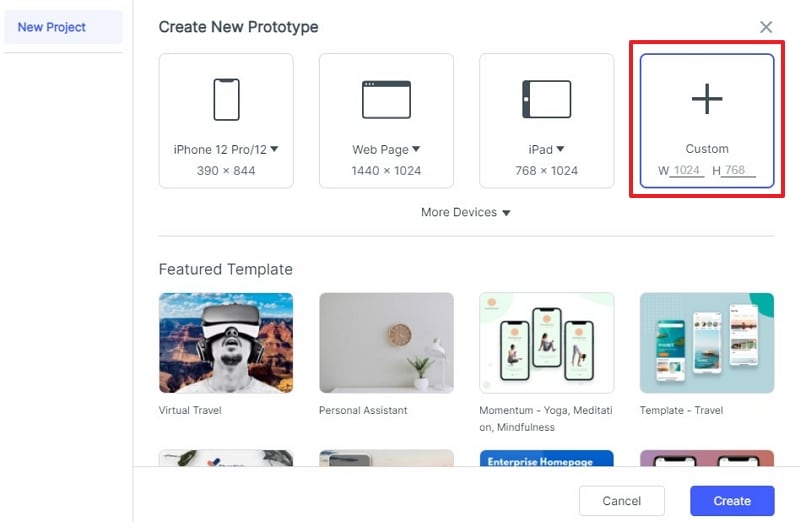
Step 3. Select the Size for Your Canvas
You can choose any screen size and orientation from the list - there are popular smartphone screens as well as desktop screens included in your options. If you are creating a design for desktop, you can choose a desktop screen and have the size and orientation of your canvas adjusted accordingly.
Step 4. Start Designing Your Prototype
Scroll through the various widgets displayed in a rectangular window on your screen to find the ones you want to use. Drag and drop the required widgets to their desired places on your screen.
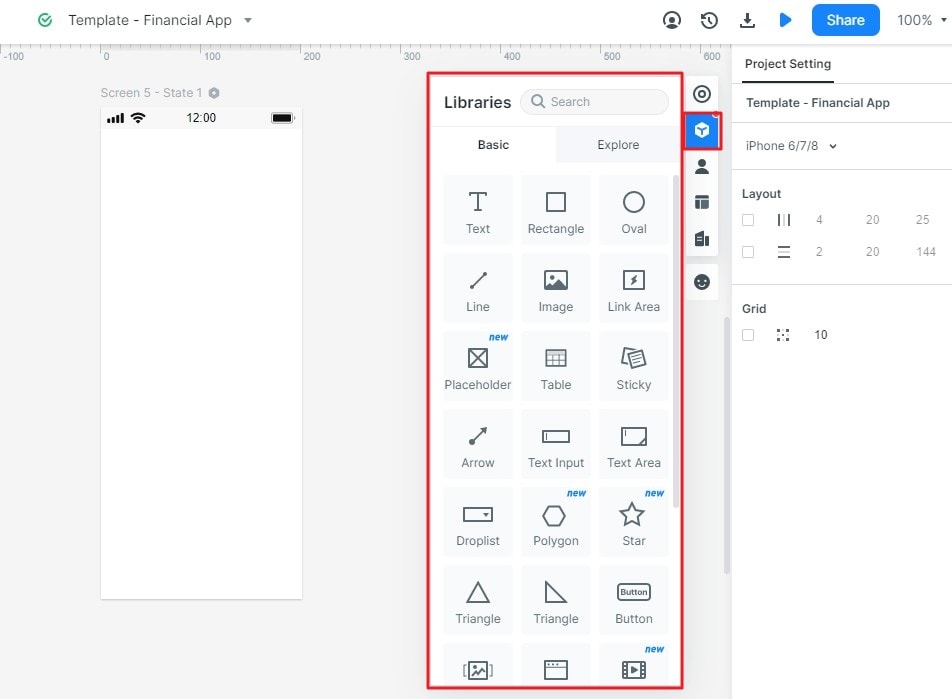
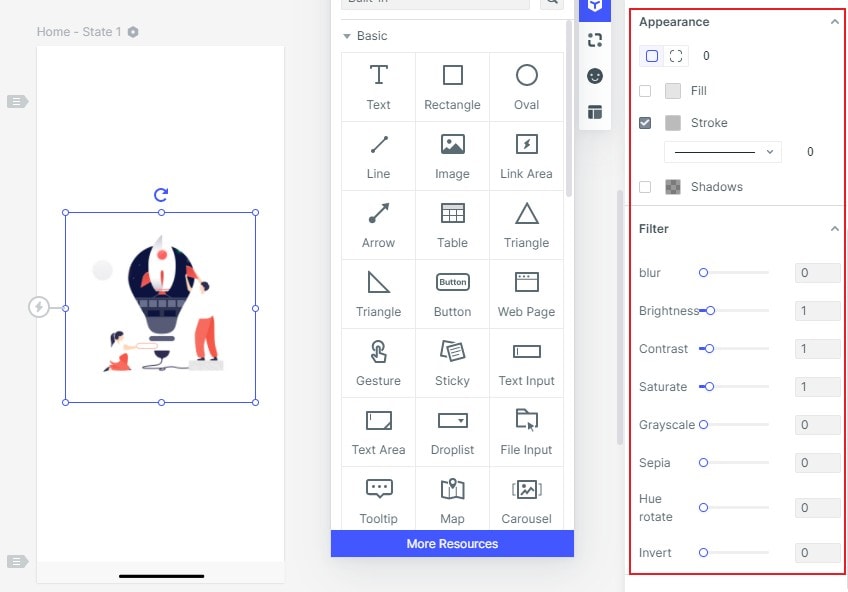
Change their fonts, sizes, alignments, and images to ones that you want to use with your design.
Step 5. Make Your Design Interactive
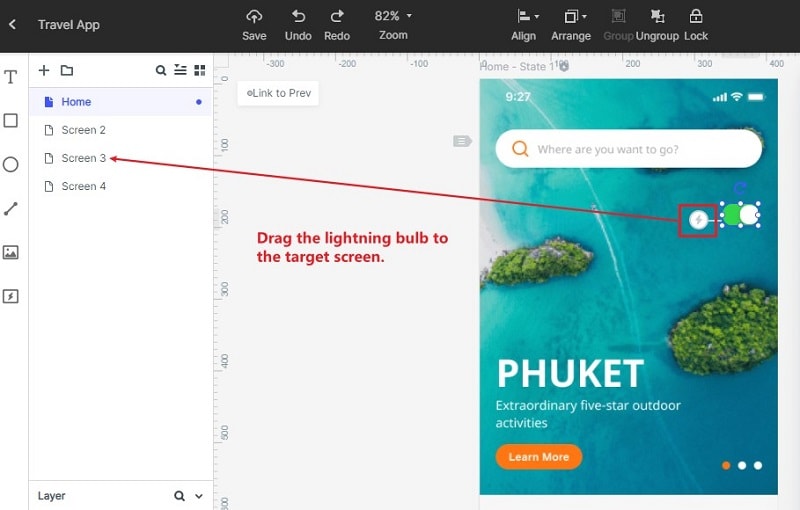
You can find a plus sign on the top left corner where you can add new screens in your design. To make your design functional and practicable, you can link different screens to each other. For example, when the user clicks on the OK button in your current screen, they should be taken to the target page.
Step 6. Preview and Share Your Project
You can preview your design in various different modes - with a real device frame, as a long page, or in "PRD" mode that shows you the whole design.

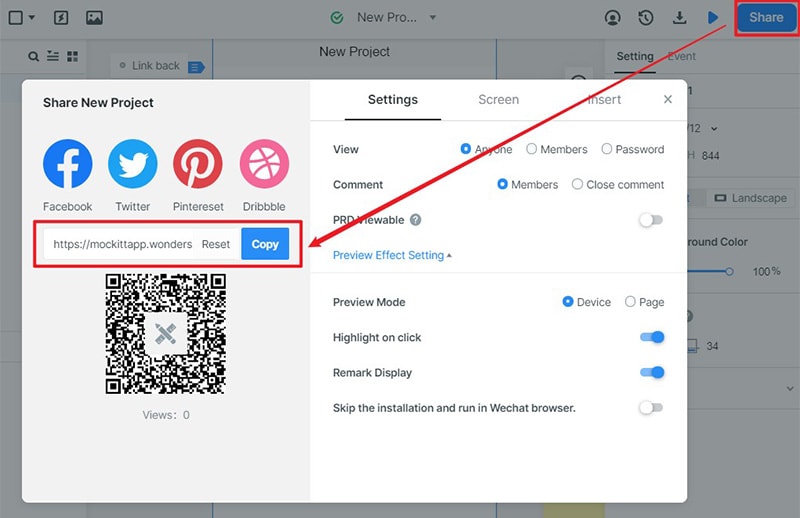
You can get a link to your new design and share it among your colleagues and other contacts to get their feedback on what you have created.
When you have finalized your design with feedback from friends and colleagues, Mockitt helps you generate the code to handoff your design to the developers through the "Handoff" mode.


