What is Interaction Prototyping and How to Create Interactive Prototypes
If you have been working with UI or UX designing, then you must have heard of terms like dynamic or interactive app prototype. While working on interaction prototyping can be tough at first, it would certainly yield better results in the long-term and save time in development. Without much ado, let’s learn the basics of interaction design prototyping and how you can make an interactive prototype in minutes.
Part 1: What is Interaction Prototyping
You might already know that a prototype depicts the overall structure and function of a product for its target platform. Based on its level of resemblance to the real product, it can be identified as a low, medium, or high-fidelity prototype.
Therefore, in interaction prototyping, our aim is to work on a high-fidelity prototype that would include various dynamic elements. To do interaction design prototyping, we take the assistance of various transitions, establish links between different pages, set states and events for several design elements, and do other high-end dynamic changes. That is, the design elements interact with each other, just like an actual product would.
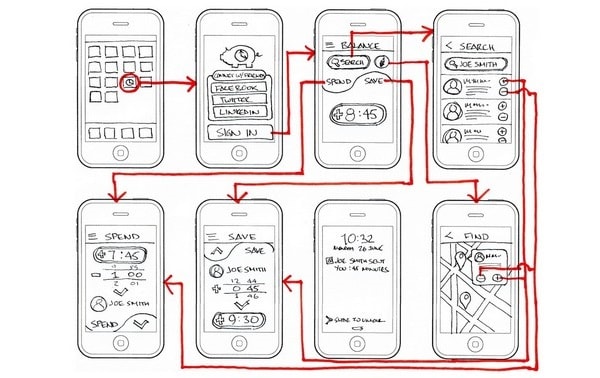
Source: Interaction Design
In this way, the result of an interactive app prototype looks similar to the actual product. While it might take more time to work on interaction prototyping, it can have the following benefits as well:
- It will give a closer look at the actual product, letting you render it and learn from the user’s experience.
- You can directly submit the interactive app prototype for development and save a lot of time and effort.
- It can be used for product testing pre-development and help you improve your design with the given feedback.
- You can easily use an interactive prototype to pitch to your investors and explain the working of your product before its development.
Part 2: How to Work on Interaction Prototyping
Since interaction design prototyping can be extremely beneficial, you can use a professional tool like Wondershare Mockitt. It is a user-friendly and intuitive application that can help you work on interaction design prototyping without coding or technical hassle.

- You can find tons of dynamic widgets and other ready-made design elements that you can drag and drop to your prototype.
- Mockitt will let you connect different screens, set triggers and states for various elements, and even include animations and transitions to your designs.
- The application is ideal for collaboration as it supports Olympic Games Cloud with 128-bit SSL protocol security.
- You can easily use an interactive prototype to pitch to your investors and explain the working of your product before its development.
- You can assign different permission to your colleagues, maintain numerous history versions, and directly export CSS files for your designs.
To work on an interactive app prototype using Wondershare Mockitt, you can follow these instructions.
Step 1: Set up a new project
To start with, you can just launch the desktop or web application of Mockitt and log-in to your account. Just click on the “Create” button to start working on a new prototype and set a preferred perspective.

Step 2: Add screens and other widgets
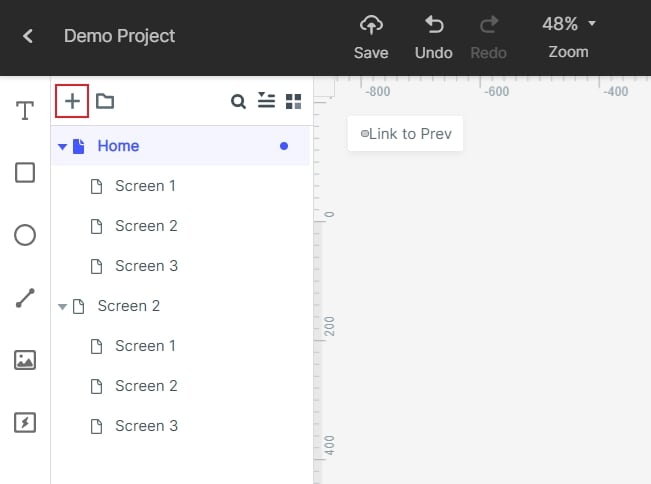
Once you get the working canvas, you can click on the “+” button from the side to add a new screen. You can move or delete different screens for your prototype from here.
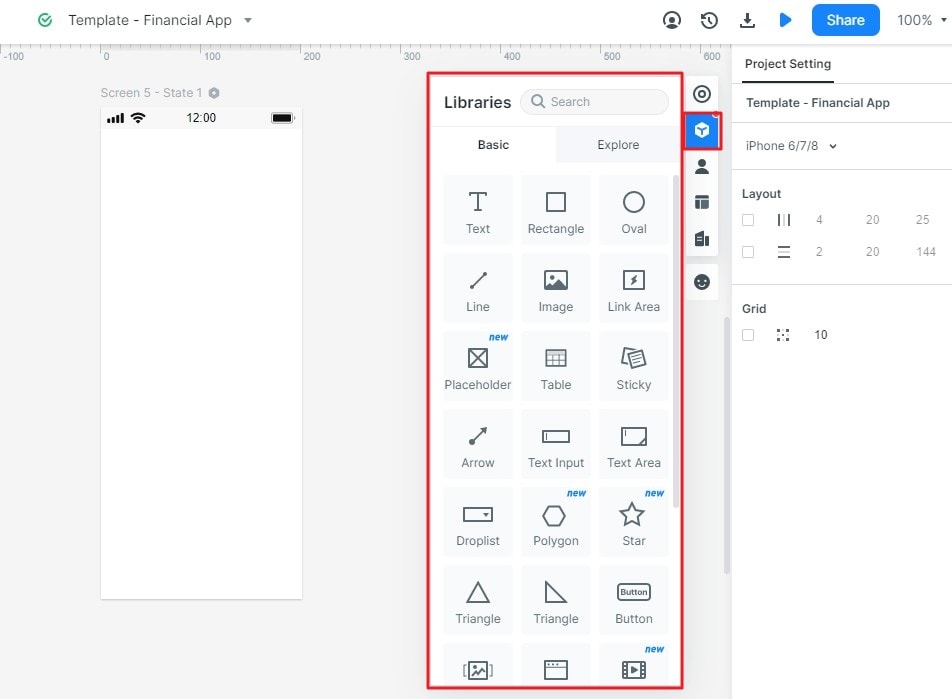
On a floating window from the sidebar, you can find all kinds of basic widgets. Simply select any widget of your choice and drag-and-drop it to the canvas to start working on your prototype’s design.
Step 3: Work on interaction prototyping elements
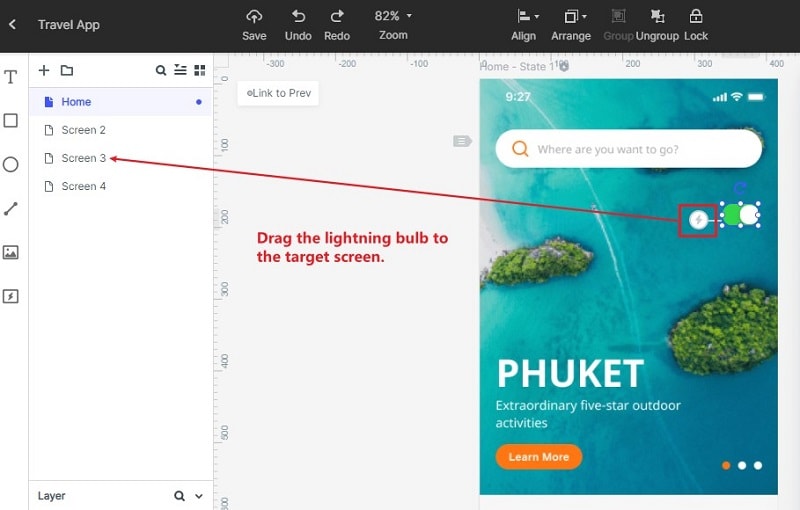
There are tons of interactive elements that you can use and customize in Mockitt. For instance, you can just drag and drop the link element anywhere you want. Click on the bulb icon and drag the link to the target screen to connect it.
After linking the elements, you can go to the sidebar to explore their properties. Here, you can set up different events, actions, and states for the element.
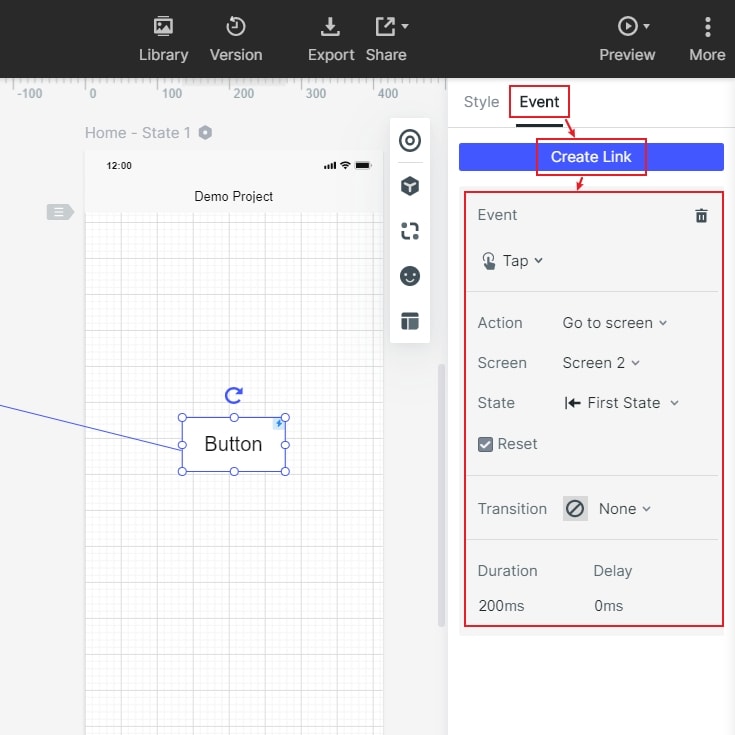
Other design elements also have a “State” property that you can explore from the sidebar to set up different interactions.
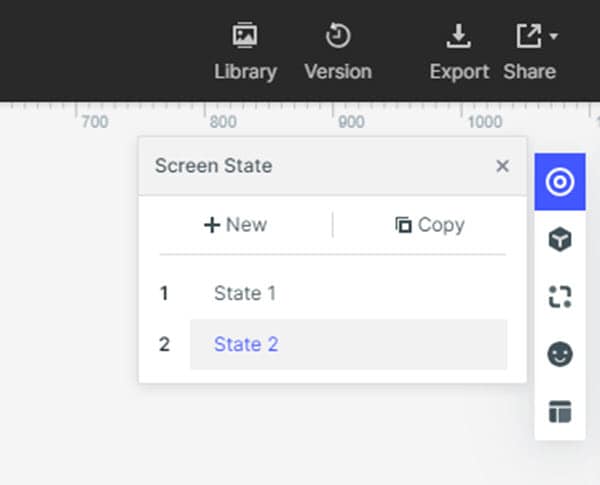
You can further go to the “Preferences” option from the sidebar and choose to make the interactions visible or not.

Step 4: Preview your interactive prototype
After working on the overall interaction design prototyping, you can click on the “Preview” button from the top and check how it would be rendered from a user’s perspective.

Besides that, you can also explore the “Handoff” option to directly export your design into different formats and send them for development.
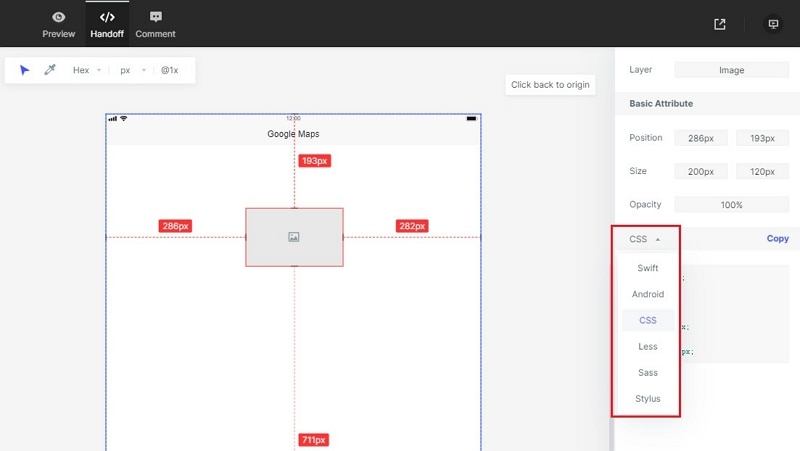
By now, you would be able to work on interaction prototyping pretty easily. If you also want to work on an interactive app prototype for any platform, then I would recommend using a tool like Wondershare Mockitt. Having a wide range of features, it will let you create high-fidelity web, desktop, or mobile prototypes without much effort.

