What is Microinteractions and Micro Interactions Examples

Micro interactions are one of those revolutionary trends in the world of UX design that have become the ultimate quality standard. An application that engages users with various UX micro interactions is one that eventually dominates the market.
Manipulating user feelings and experiences in different ways can help designers improve the response that they get from users. Users must be kept in the loop regarding any activity that they are pursuing.
- Part 1. What are Micro Interactions
- Part 2. Micro-interactions Examples
- Part 3. How to Create Micro-interactions with Mockitt
Part 1: What are Micro Interactions
When you unlock your phone, what is the most important part of your screen that immediately grabs your attention? The notification bar and notification panel – obviously. Do you know why?
The reason is that it is that part of your screen which tells you what is happening, what has happened, and what is going to happen. That engages you and keeps you aware of your digital environment.
The tool that it uses to do that is called a UI "micro interaction." It can range from a simple phrase telling you that somebody has liked an image to a video's cover image and title, urging you to check it out.
Both of these things are a crucial part of the UX design of a certain mobile application. That part is called a UX micro interaction – a small digital gesture that was aimed to pique you, inform you, make you open that application and spend some time using it.
Part 2: Micro-interactions Examples
Let's start with a rather basic micro interaction example. When you try to unlock your phone by entering the wrong pin code or password, the phone would suddenly buzz, and the row of filled dots would go red.
Sometimes, the row also vibrates right and left to tell you that NO, that is not it. You have entered the wrong password. Correct it. Now, that is a micro interaction UI that your UX designer used to convey an important piece of information to you.
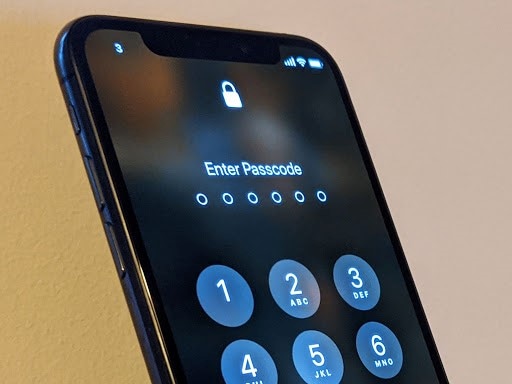
He could've just notified you of it by showing you two words – wrong password. But he didn't rely on that only, he used several visual and auditory signals to get the information across to you. That improved it, right?
It made it more interesting for you, and you noticed that the entered password was wrong, more easily and quickly.
Similarly, when you are waiting for something to load, you might be presented with a curious set of colorful shapes or cartoons engaging in a cute activity that represents loading. That is also a charm used by the UX micro interaction designer backstage to keep you waiting for the results of your command.
Lastly, another UX micro interaction that you often encounter is when different commands are replaced by symbols that you can click on. For example, the word cut is replaced by a tiny scissor icon and delete is replaced by a small dustbin icon. Other shapes are used for copy and paste commands.
That also conveys the required information to you and helps you interact with the system in a more user-friendly way – keeping you in a loop.
Part 3: How to Create Micro-Interactions
Wondershare Mockitt is one tool that UX designers across the globe can use to create these curious micro interactions – like FIGMA micro interactions. It is basically used to create low fidelity mockups or wireframes for the designs that are later translated into high fidelity user interfaces and screens.

For example, you can create various screen transitions with Mockitt during prototyping. Transitions are a form of UI micro interaction that can be used to keep users engaged and interested. To create one of micro interactions, you can follow the given steps:
Step 1: Sign Up an Account
To start designing UX and UI micro interactions, you need to access the website online or download its application. The first step is to sign up for an account with the help of your email and name. Finally, the platform will take you through a demo to make sure that you know how different functions work. It teaches you how you can use different widgets and buttons displayed on your screen.

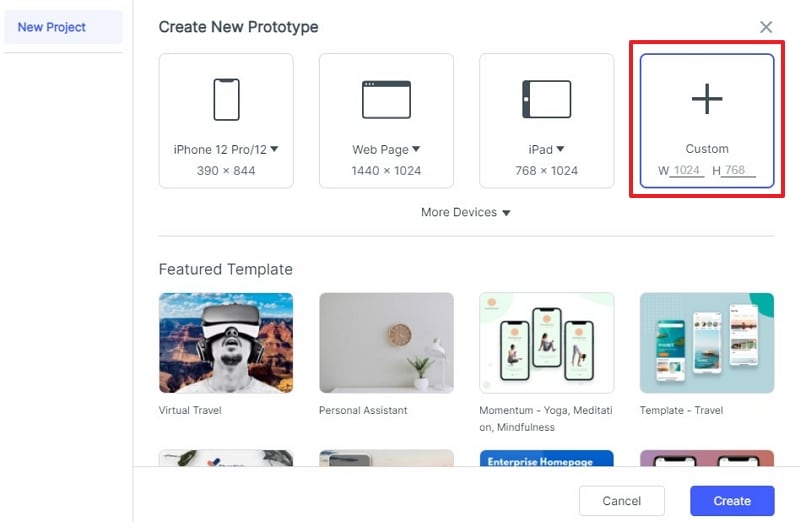
Step 2. Create a Prototype
Create a new project by clicking on "Create" on the left top corner after you are redirected to your dashboard. There are several options, then you can choose "Prototype".

Step 3. Choose the Size for Your Canvas
You can choose the orientation or sizing of your canvas according to the specific screen for which you are designing – it can be a Samsung S7, an iPhone, a MacBook, anything.
Step 4. Start Designing Your Prototype
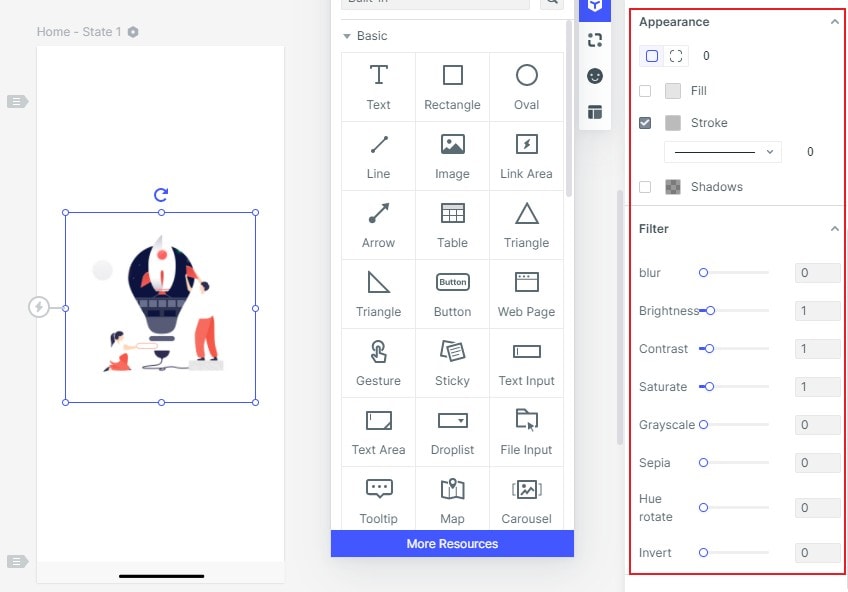
Go through the various widgets displayed on the screen to find the ones that you need to use in your screen. Drag and drop the right widgets to their individual places on your screen.
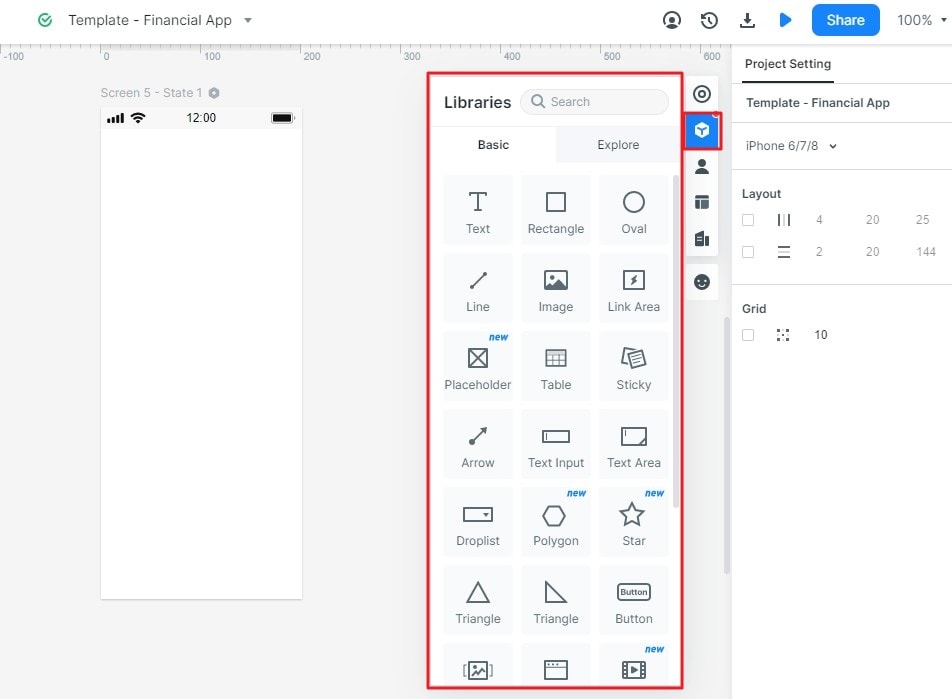
Change their fonts, sizes, alignments, and images to suit your design.
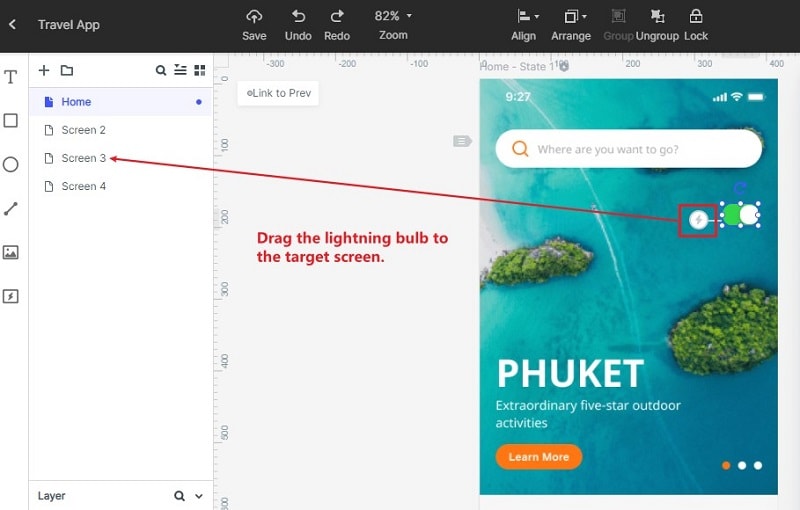
Step 5. Make Your Design Interactive
You can add a new screen to your design by clicking on the plus sign at the top left. Then you can add an amazing micro interaction by going to "events" on the top right corner. You can select any type of screen transition to convey information to your users.
It can help you link different screens to each other. The users will be taken to the screen that you want them to jump to – when they click the button that is linked to that screen. They will also go through your desired transition.
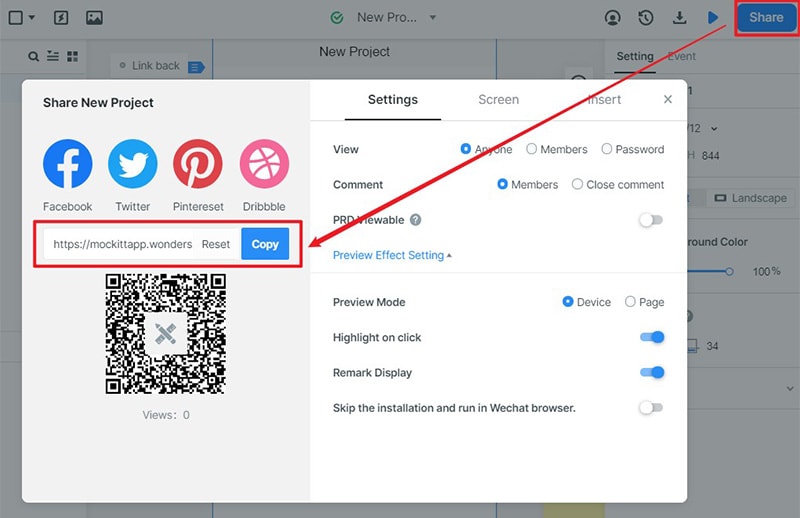
Step 6. Preview and Share Your Project
You can preview your design in various different modes to get the real look and feel of it. It can be viewed within a specific device screen, as a long page, or in "PRD" mode.

You can use a link to share your design with your community. They can also share their feedback with you through that link.
Mockitt automatically generates a "Handoff" code for you to let you finalize and use your design – hand it off to the developers.

