How to Create Horizontal Scrolling Animation with Adobe XD Alternative

As designers, we all love to show maximum content to our viewers and users. With the next-generation device form factors becoming smaller and smaller, scrolling has become an integral part of any website or app. Without the scrolling feature, one cannot read or see the details and images further listed in the app or website. Adobe XD is a great tool for designers and developers for creating wireframes, prototypes, and designs for digital products. Adobe XD scrolling is a new feature added by Adobe XD in the form of "Scroll Groups".
- Part 1: How to Create Horizontal Scrolling Animation in Adobe XD
- Part 2: How to Create Horizontal Scrolling Animation with Adobe XD Alternative
- Part 3: Video Tutorial on How to Create Horizontal Scrolling
How to Create Horizontal Scrolling Animation in Adobe XD
Sometimes when you create an Adobe XD design, it is not possible to fit your long content on the artboard. With the help of Scroll Groups, you can create various scrollable groups within a single artboard. Before Scroll Groups was introduced scrolling in Adobe XD was limited to the vertical scroll in the artboard. Now there are more options available through which the designers can introduce scroll vertical, horizontal, or vertical & horizontal (also known as Pan). Here is a complete guide on how you can create an Adobe XD horizontal scroll.
- To create a Scrollable group, you need to first enable the layers that are going to be scrolled. You need to choose the Content group for creating a scrollable group. Then, click on the "Horizontal scroll button"
- The next step is to design or select an Adobe XD scrollable area.
- Next, go to the design mode, and select the objects you want to turn to scroll group.
- Then select the options in the Property Inspector menu - for scrolling (select horizontal), fix the position while scrolling, and then specify the width of the artboard.
- After that you can wireframe the artboard using the prototype mode. There are various options in the Prototype mode like fixing position while scrolling or preserve the previous position.
- Once everything is set up, its now time to preview all the prototype comprising Adobe XD horizontal scroll. To preview the artboard, click on Desktop Preview. You can even drag the preview window to view the horizontal scroll.
Scroll groups are very handy to use in Adobe XD because of its unique UI elements. Now that you have an idea of creating a horizontal XD scrolling, you can create a vertical or both (horizontal and vertical) in the same way.
Would you interested in responsive design in Adobe XD? Click and learn more about How to Use Adobe XD Responsive Design: A Beginner-friendly Guide.
How to Create Horizontal Scrolling Animation with Adobe XD Alternative
Let us face it – Adobe XD scrolling is quite complicated. Further, more and more designers now prefer zero installation, cloud-based tools. Designers prefer tools that can just be accessed via a web browser anytime and on any device.
One of the most highly recommended, cloud-based, and completely online tools is Wondershare Mockitt. Mockitt helps to animate and prototype much faster. And you can design prototypes easily without any coding knowledge. There is no need to install, download or update the software version. You can log in and use it directly through a browser. It helps in multiplying efficiency and ensures data security and recovery. You can also demo your designs online/offline and get instant feedback. Wondershare Mockitt comes with a wide variety of templates that enable you to easily create smooth horizontal or vertical scrolling.

The obvious next question is - how to create Horizontal Scrolling with this Adobe XD Alternative. Here's how -
Step 1. Create a new project
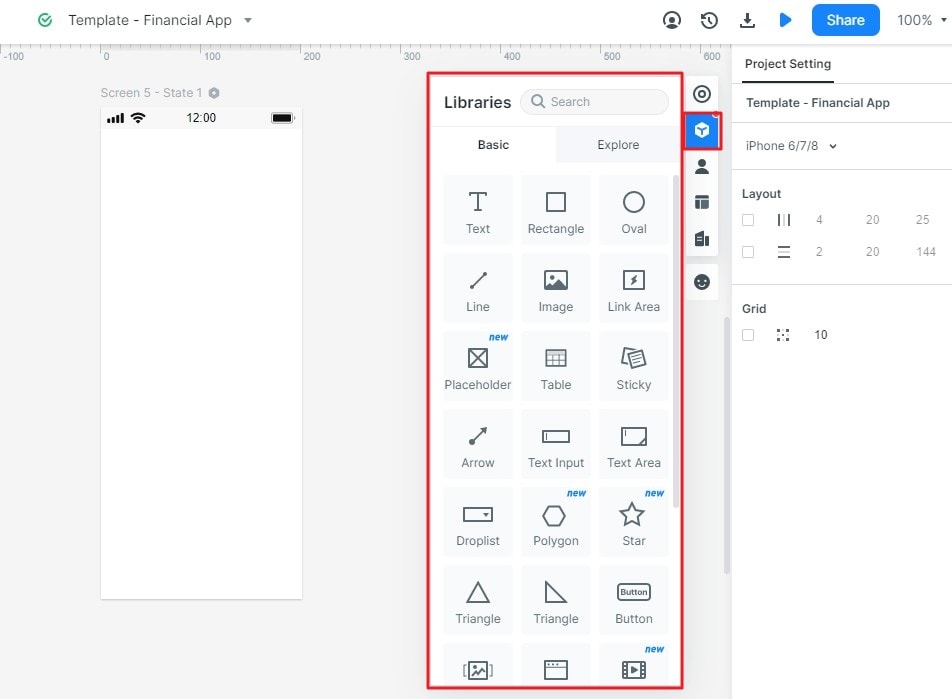
Once you log in to Mockitt, you can get started by creating a new project by clicking the "Create > Prototype" button and choosing the device type.

Step 2. Design Your Prototype
Now you can drag-and-drop the built-in widgets in the "Basic" libraries. You can also search for more assets, like the icons, components, screens, etc. on the "Explore" tab.
Step 3. Select the Components
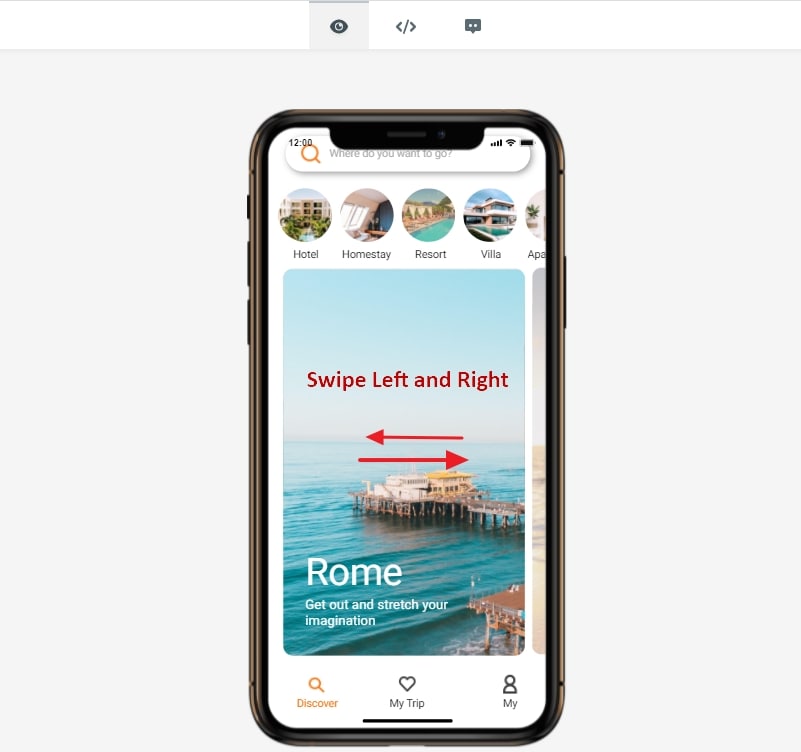
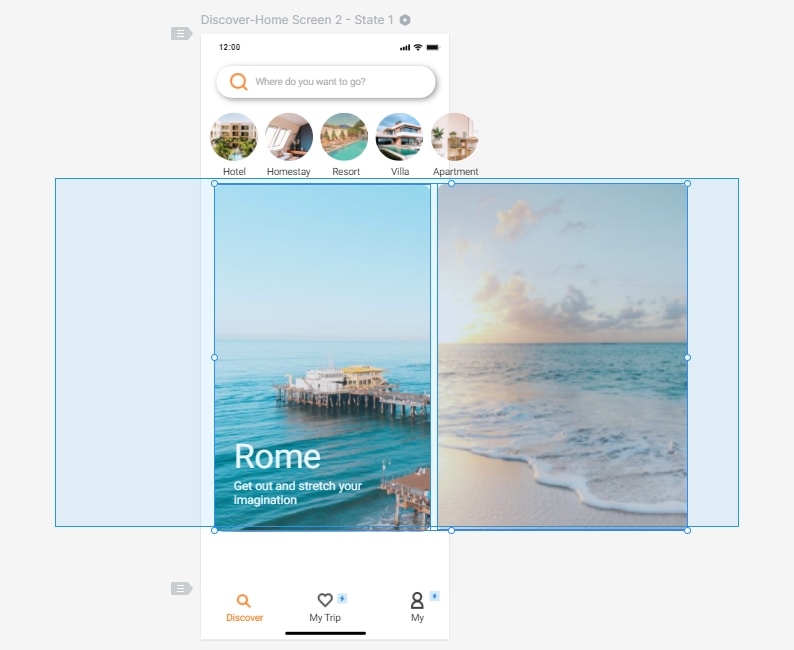
Drag your mouse and select the components you want to scroll. In this tutorial, we will take image scrolling for example. Now you select the two images.
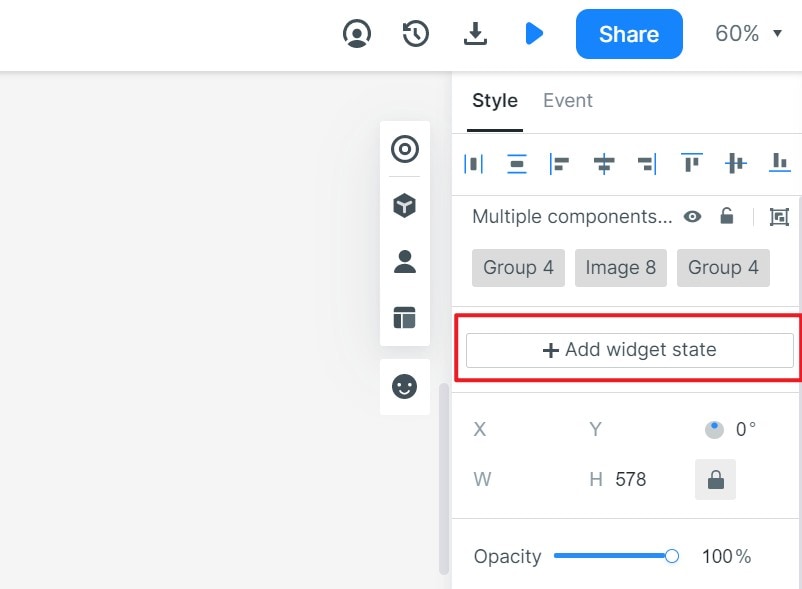
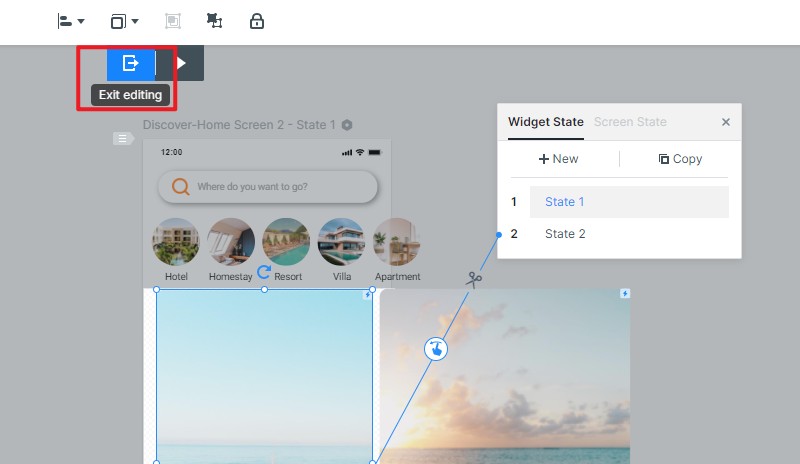
Step 4. Create a Widget State
Then you will find there is an "Add Widget State" button that appears on the right properties panel. Click on that and then you can set different states for the dynamic widgets.
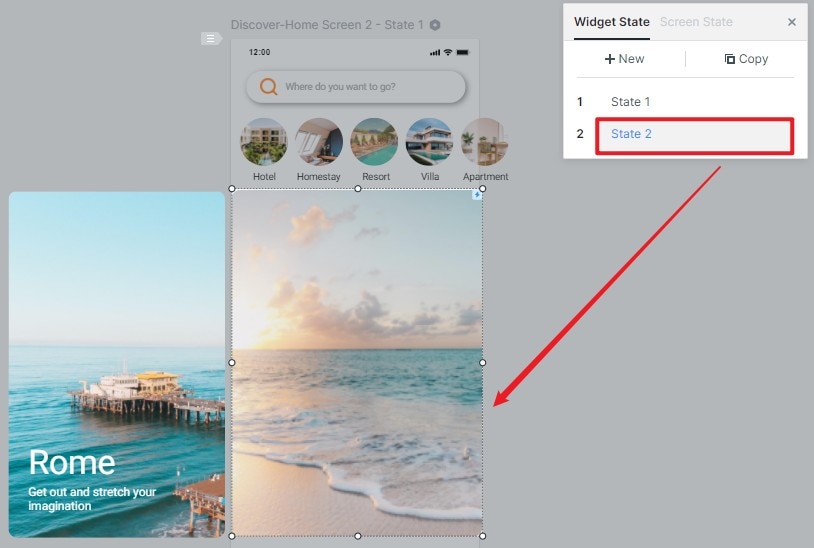
Step 5. Create State 2
Now you can click the "New" to create a new state, or you can simply copy State 1 and adjust the image position to make it different from State 1.
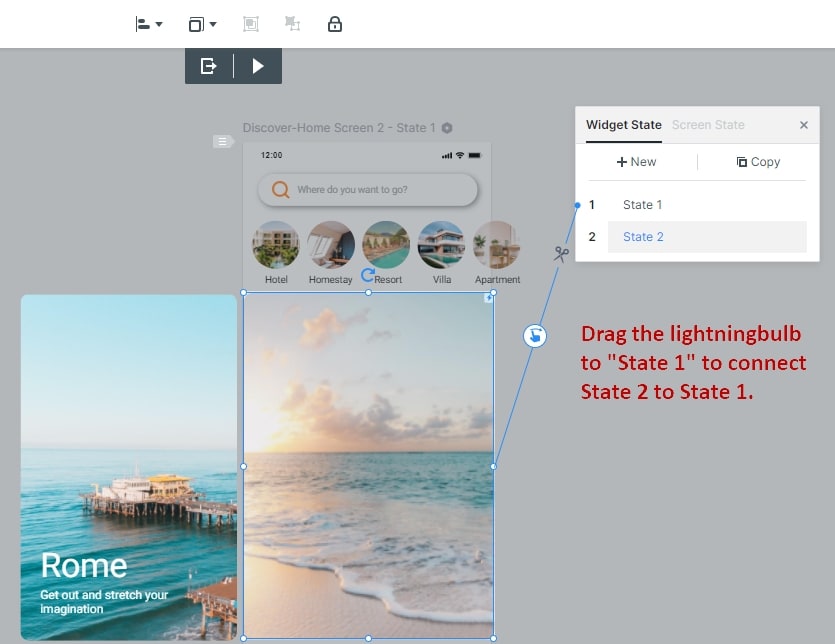
Step 6. Connect State 2 and State 1
Click the widget and then drag the lightning bulb to State 1. This will connect State 2 to State 1. And you should also connect State 1 to State 2.
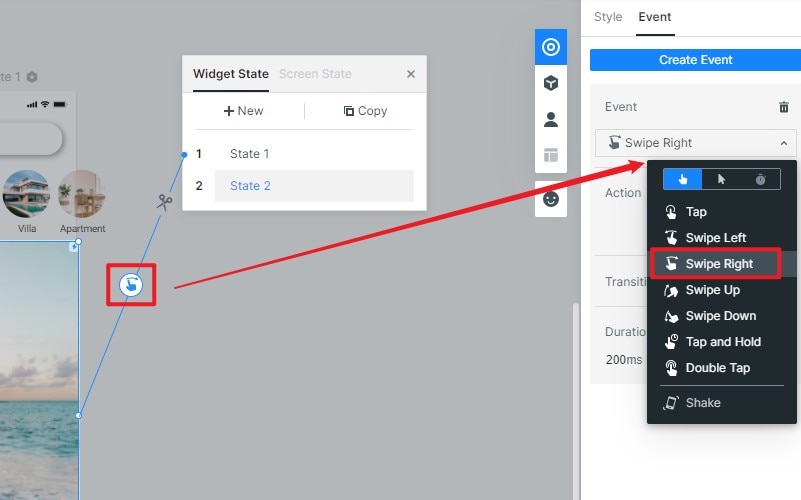
Step 7. Set Event Gesture
Click the gesture icon and change the event gesture on the right panel. If you want to scroll horizontally, then you can choose "Swipe Left" for State 2 and "Swipe Right" for State 1.
Step 8. Exit Editing the Dynamic Widget
After you finish setting the dynamic widget, you can click the Exit Editing icon.
Step 9. Preview the Horizontal Scroll
Click the blue preview icon and then enter into the preview mode.
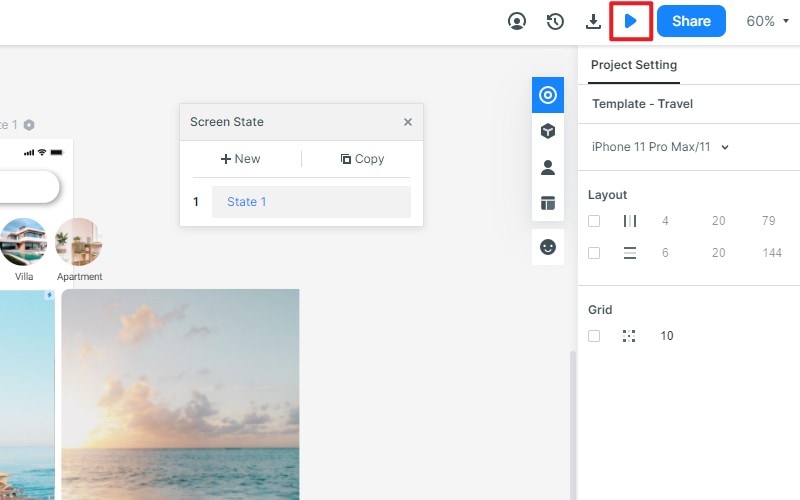
The preview mode give you the real device frame and you can also choose to preview in the PRD mode. Now you can scroll the images you just set. Simply swipe left and swipe right.