How to Create Slider in Adobe XD

Creating a slider with Adobe XD is easy due to its many features and tools. A slider can enhance the user-friendliness of your design or interface. You can create simple sliders that can inspire future projects. Adobe XD provides various features and tools that simplify the process of creating a slider. You can use Wondershare Mockitt as an alternative to Adobe XD to create a slider. Here is a guide to creating a slider with Adobe XD and Wondershare Mockitt.
- Part 1. How to Create Slider Animation in Adobe XD
- Part 2. How to Create Slider Animation with Adobe XD Alternative
How to Create Slider Animation in Adobe XD
Auto-animate is a feature in the latest Adobe XD that simplifies creating slider animations. This feature enables designing prototypes with immersive animations. Using this feature is easy, as one can duplicate an artboard and modify object properties such as position, rotation, and size. Afterward, applying the auto-animate action creates an adobe XD slider prototype between artboards. Here are some simple steps to follow when creating an adobe XD carousel slider.
Source: helpx.adobe.com
Step 1: Begin with artboards for each state of your form
View the prototype for these states by pressing play at the top of Adobe XD.
Step 2: Make prototypes interactive
- Go to prototype mode
- Tap on the element you want to be interactive. You see a blue arrow at the right of the element.
- Click and drag the arrow to point at the artboard.
Step 3: Customise transitions
- Create richer interactions using the auto animate feature of adobe XD
- Auto animate allows for more accurate representation of web design on artboards. Transitions are seamless as the form automatically resizes and elements shift up and down, similar to browser behavior.
Step 4: Toggle between radio buttons using auto-animate
- Click deselected radio button.
- Drag prototyping arrow to the artboard that shows how it looks when selected.
When you preview your prototype again, you will be able to see the auto-animate feature here. You will note how the active state indicator slides between the two buttons. This is a cool effect, and one that you can set up even if this is your first time doing it.
Step 5: Setting all other form fields to be interactive
- To set the other form fields to make them interactive, you should repeat the same steps between the other artboards. You just need to keep on dragging arrows from all the clickable elements to the artboards that showcase their related state. It is that simple.
After previewing your prototype again, the auto-animate feature will be visible and the active state indicator will smoothly move between the two buttons. It's a neat effect that can be set up easily, even for beginners.
Would you interested in sharing prototypes with Adobe XD? Click and learn more about How to Share Prototypes with Adobe XD Share: A Hassle-free Solution.
How to Create Slider Animation with Adobe XD Alternative
Wondershare Mockitt is an Adobe XD alternative for creating slider animation. Many designers prefer it for its efficiency. The tool allows you to create prototypes or apps on any platform. It is compatible with Web browsers, Windows, Mac, and Ubuntu.

The tool is effective for group work as it enables multiple people to collaborate on a project simultaneously. Additionally, it offers the ability to generate slider animation through screen states, which is a valuable feature for creating animations using state transitions on a single screen.
The tool has an icon library with over one hundred icons for slider animations. All screens are in one place, allowing for easy viewing, editing, and sharing of the flow URL. The tool also includes a rich text editor for selecting styles like bold and italic, changing text color, and setting other styles.
Here is how you can build slider animation using this Adobe XD alternative:
Step 1: Create a blank prototype or from templates
Go to workspace, and click the "+ Create" > "Prototype", then you will see there are multiple devices you can choose to create a blank prototype. You can also see there are many templates that you can use to create a prototype.

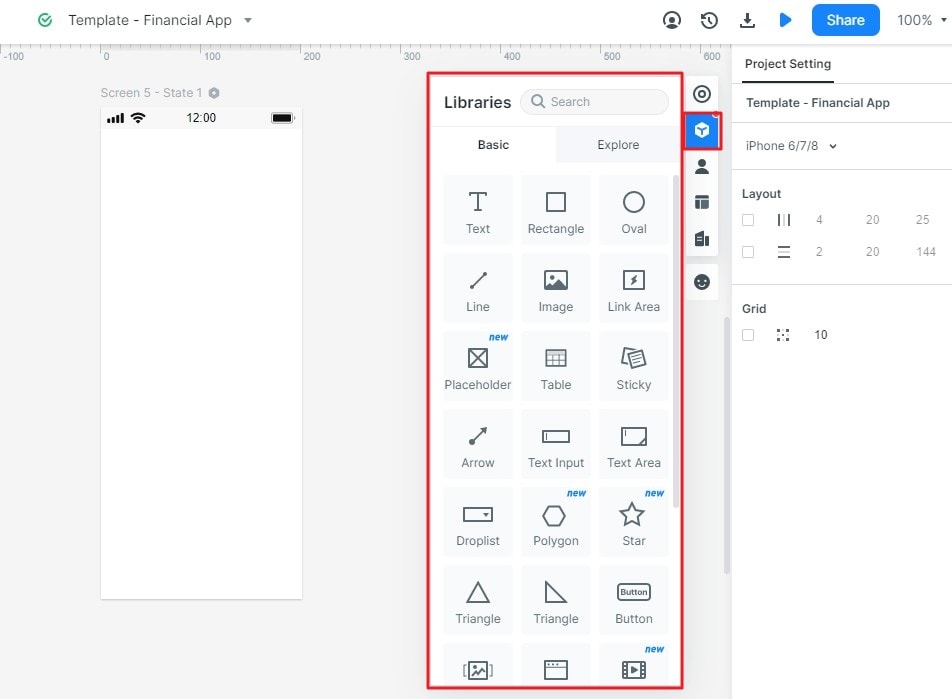
Step 2: Add widget
Adding widgets to the canvas is easy. The top-left quick toolbar has rectangles, ovals, and more. To find more built-in widgets, check the right toolbar. You can double-click or drag and drop widgets onto the canvas.
Step 3: Connect screens
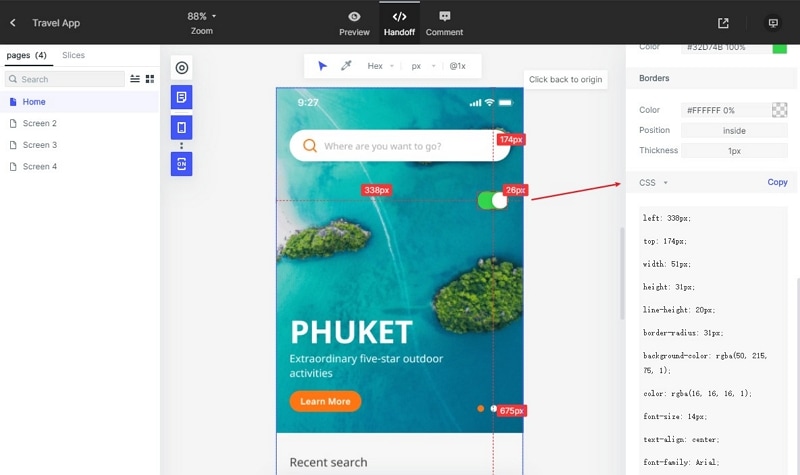
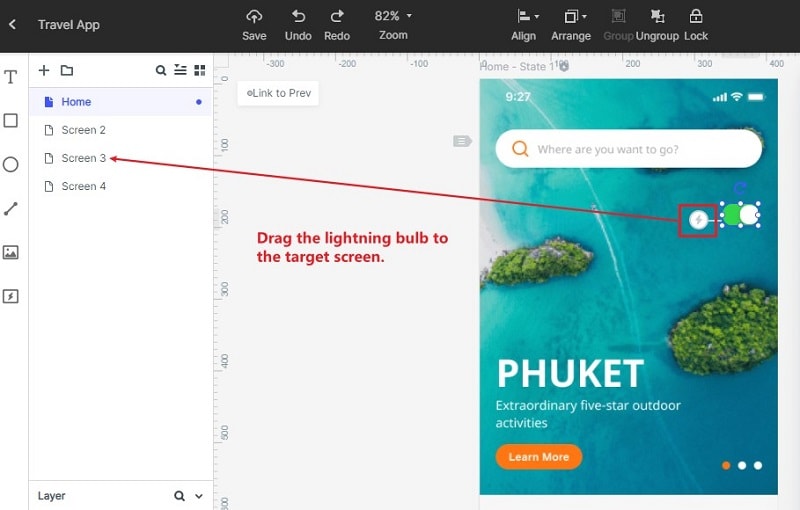
After you finish all your screens, you can now create page transition, advanced page state, and animations. If you just want to connect screens, you can drag the lightning bulb into the target screen.
Step 4: Preview, share, and handover to the developer
This tool enables users to preview and share prototypes with clients through a link. Additionally, it allows developers to download the code.