Steps to Create Interactive Prototype
Creating an interactive prototype for websites or applications provide the best way for designers, developers, and project managers to visualize their final product. However, getting the right interactive prototype tool is the most crucial step and should not be taken for granted. This is because a program can make or break your prototyping experience. If you have been looking for the best way to create interactive prototypes, then this article is your home. In this article, we shall give you a detailed guide on how to create interactive prototypes for your project.
The Best Tool for Creating Interactive Prototype
Wondershare Mockitt is an outstanding design, prototype, and collaboration tool you can think of now. This tool is equipped with a plethora of top-notch features that make it edge other same purpose software. The ability to create interactive prototypes with speed, ease, and efficiency explains why scores of people around the world value this tool.

Use the rich UI assets and templates library to create designs for diverse industries. These templates lessen your design process as you don't have to start from scratch. You can create your template and asset library and reuse them anytime you need them. Use the several inbuilt widgets, edit them, and put them in your widget library. The collaboration features are outstanding. You can collaborate with team members in real-time and co-edit your project to accelerate the development. Once you are through with your prototype, you can preview on PC, mobile, or offline and share it with members to see your design in real action.
Features:
- The cloud feature makes the project accessible anywhere and anytime.
- It supports real-time collaboration and co-editing.
- It has plenty of UI assets and Templates that speeds the design process.
- It supports interactive prototypes with the help of animations, gestures, action, and transition features.
How to Create an Interactive Prototype
Step 1. Create a Project
Visit Mockitt website and log in using your credentials. When the main interface is displayed, hit the "Create > Prototype" button. And then you can select a specific device by selecting the options provided under the device drop-down icon. Or you can create from templates.

Step 2. Add New Screen for Your Interactive Prototype
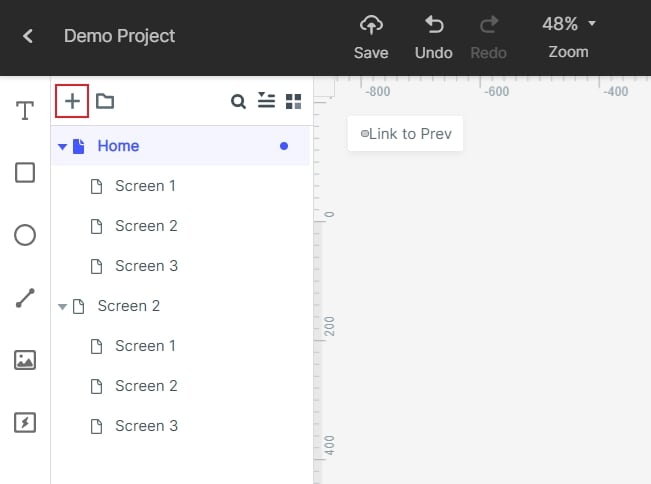
Now the program will display a prototyping window. To make it interactive, you should add more screens so that they can be linked with objects of different screens. To add screens, click the "+" button. Add as many screens as defined by the nature of your program.

Step 3. Add Widgets and Icons to the Interactive Prototype
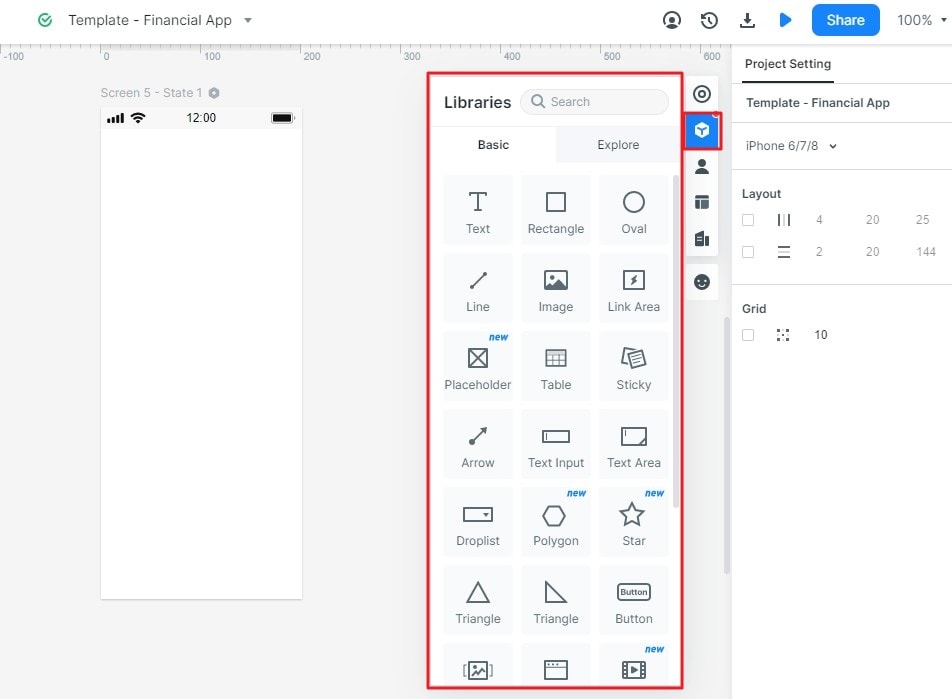
Once you have added the target number of screens, add the needed screen objects such as buttons, text fields, which shall be used for interaction. Drag the widgets into the Canvas and begin drawing your shapes. Use the Build-in Widgets, My Widgets, and Icons to make design your UI elements accordingly. You can edit these widgets and save them to your widgets library so that you can reuse them the next time you require them.

Step 4. Create Object and Screen Interaction
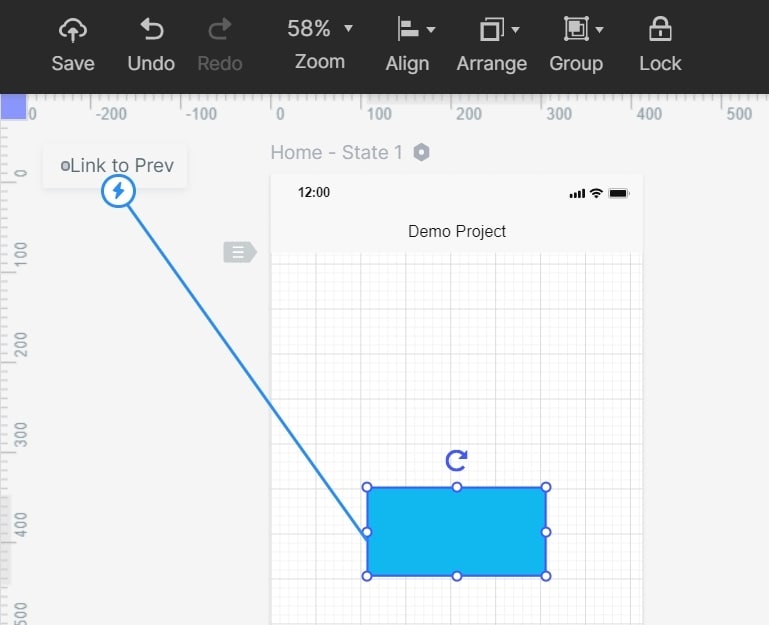
The core part of the interaction is linking your screens and objects. Once your design is satisfactory, click on the screen object and drag the circular handle that appears on the right side of the object. Drag it to the respective screen that the object should link. To link another object to another screen, repeat the same procedure. Do it across other objects and screens that ought to link.

Step 5. Preview the Prototype Interactive Project
Now that you are done with the connection, it is time to preview what you have done. Simply hit on the "Preview" tab and interact with your prototype. If it is not working as need, just go back and fine-tune the connections and design.

Video Guide on How to Create Interactive Prototype
Video on How to Create Interactive Transition between Screens
Video on How to Create Interactive State
Useful Tips for Making Interactive Prototype
Creating an interactive prototype does not solely rely on your expertise but also myriads of other factors. Without the right tips, you can easily plunge into a prototyping disaster. But who wants to fall into such mayhems? No one. The following are some of the useful tips for making an interactive prototype for your project.
1. Use Templates
There is no need to build from scratch when there is an assortment of templates suitable for diverse industries. Just choose the right templates, edit them, and prototypes with speed and ease. Starting from scratch wastes much time and remember time is of the essence. Wondershare Mockitt, for instance, offers plenty of templates and UI assets that are ideal for different types of industries.
2. Choose the right tool
There is no good feeling as finding a tool that efficiently translates your idea into a useful prototype. While other softwares are known to complicate the process, choose tools that have elegant and seamless prototyping interfaces. The program should also be affordable and offer plenty of useful features for prototyping.
3. Test Severally
Once you have completed creating your prototype, you must now test it. Testing is not doing it once and forwarding for implementation. This doesn't seem right, as the project should be rigorously tested. Conducting tests will help identify hidden flaws both in cosmetics and functionality. Such faults may have a devastating effect on the product once it is deployed in mass. In a nutshell, testing will save the cost that would be incurred if errors go unnoticed to the final product.
4. Take Feedbacks Seriously
Feedbacks come from team members, clients, or customers in general. These people give feedback as per their taste. Remember, you are designing a product to fit the customer, and therefore his/her response is invaluable. The good thing is that several prototyping tools offer collaboration features. For example, Wondershare Mockitt allows users to collaborate in real-time and co-edit the project. This way, you can obtain the feedback directly and discuss it together for a satisfactory design.
