How to Create Wireframes with Sketch App

Sketch is an excellent Mac utility for creating wireframes, style guides, illustrations, mockups, and other visual flows for UI design. A Sketch wireframe is essentially the skeletal form of a web page or application before it’s actually designed and developed into a fully functional product. It’s similar to a blueprint that an architect might use to show structural and functional aspects of a building before proceeding to the actual design phase. Similarly, you can create a Sketch website wireframe or an app wireframe on Sketch that serves a similar function. The idea is to have the layout, elements, and function flow in a tangible form so it can then be designed and developed into a product that works.
- Part 1. How to Create a Wireframe in Sketch
- Part 2. How to Create Wireframe with a Sketch Alternative
- Part 3. Tips to Create Wireframes with Sketch
How to Create a Wireframe in Sketch
The simplest way to get started, if you’re not familiar with Sketch, is to just dive right in. The intuitive tools will allow you to figure out things quickly. However, there are some basic principles to follow if you want to remain on the right track throughout the process. This next section focuses on how to create a Sketch wireframe, but it focuses more on following best practices that designers all over the world use for their own work. Creating your wireframes in this manner accustoms you to a particular way of working that is ‘in tune’ with your organizational needs.
Step 1: Once you’ve got Sketch open on your Mac, the first thing to do is the create your pages and artboards and get them in place so your wireframe is organized from the get-go.
- The best practice here is to create one page for all related screens of the app or website you're wireframing for.
- For example, you may have separate pages for the home page, the assets, various categories, the product page, the payment/checkout page, and so on.
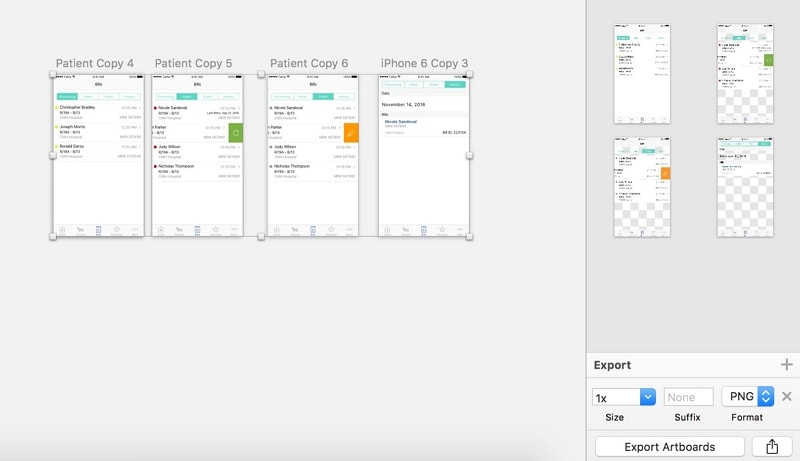
Step 2. On each page, you'll need to create multiple artboards - one for each set of variations of a single screen.
- For instance, a single artboard might eventually show the steps that the user has to go through to complete the actions for a particular screen.
- Alternatively, it may show how a particular screen would look on different device types with different aspect ratios, and so on.
- One important aspect to note here is the naming convention for your artboards so other collaborators will immediately know what it's for. Your company will likely have a design style guide with this information, so be sure to check or ask your team leader or project manager.
- The naming convention should ideally be followed not just for artboards but also text styles, symbols, pages, and any group of related files for the purpose of easy identification.

Step 3: The next step is to create a uniform text style that you can attribute to all text elements in your wireframe. That way, you won't have to do each one separately.
- Text styles may be of different types, such as H2, paragraph, labels, etc.
- Each text style can contain multiple elements for which you will use that style

Step 4: Learn how to name symbols effectively.
- Using slashes in your symbol names will create groupings in Sketch, which you can easily navigate when you need a particular symbol for your wireframe.
- The best practice here is to create symbols that you'll be using more often and create a library for quick retrieval.
- Your symbols should be responsive, meaning when you stretch them, the layout shouldn't break. You can control this using the properties sidebar panel on the right.
Step 5: Try to avoid layers.
- Developers hate having to hide/unhide layers just to figure out how a particular screen should behave under various states.
- To circumvent this problem, create more artboards for different screen variations.
If you follow the steps and advice shown above, your wireframes will be widely acclaimed within your company and with its clients. There are also some pros and cons with regard to creating a Sketch wireframe, as outlined below:
Pros
- A quick way to show the basic elements and functions of a web page, desktop app or mobile app
- Provides the client with the information required to sign-off on the design and development stages
- You can take advantage of numerous Sketch wireframe kits that are available for free
- A Sketch wireframe kit can save you a tremendous amount of preparatory time for your wireframe creation process
Cons
- Wireframes are quickly getting outdated with advanced design and prototype tools on the market
- Clients nowadays look for interactive prototypes as the standard, as opposed to the old way of viewing cumbersome and bulky wireframe files
- Sketch can't match the prototyping capabilities of some of the more advanced tools like Wondershare Mockitt or Axure RP
How to Create Wireframe with a Sketch Alternative
Wondershare Mockitt is an ideal Sketch alternative for crafting stunning UI designs with highly functional prototypes without the need to learn any coding. From a high degree of collaboration to a rich set of assets and tools for designing apps and web pages for multiple device types, it provides an end-to-end solution for designers.

Some of the key features include a vast asset library, rich effects such as transitions, gestures, and animations, comprehensive review and feedback functionality, and the ability to automatically generate and export backend code for each and every element and component of your design. This makes the handoff process to developers as seamless as possible because they can also inspect code elements during the design phase instead of having to wait until the end.
Let's look at the simple steps involved in creating a wireframe in Mockitt:
Step 1. Create a Wireframe Project
Login to your Wondershare Mockitt account and click on "Create Project". You can choose between starting from a blank page or using one of the available demo projects.

Bring your mouse to hover over the project and go to "Settings". Here, you can define the device type, size, and name the project.
Step 2. Create the Wireframe by Dragging and Dropping
You can get fast widgets on the left panel. Just double-click, drag or draw them using hotkeys on your canvas. On the right, you'll see other icons and widgets you can use. The widgets can now be edited using the controls in the "Inspection Panel" on the right sidebar. Any widgets you customize can also be saved for later use.

Step 3. Link Screens for the Wireframe
You can now link screens by dragging the link icon next to the widget (on the left side) to the target screen. After this, you can set the animation, gesture, target screen, state, and other parameters in the Link Panel.

You can also save a widget to the "Master Library", from where you can use it on another screen and edit it individually for that instance. This helps save a lot of time. To do this, just right-click a widget and select "Create Master".
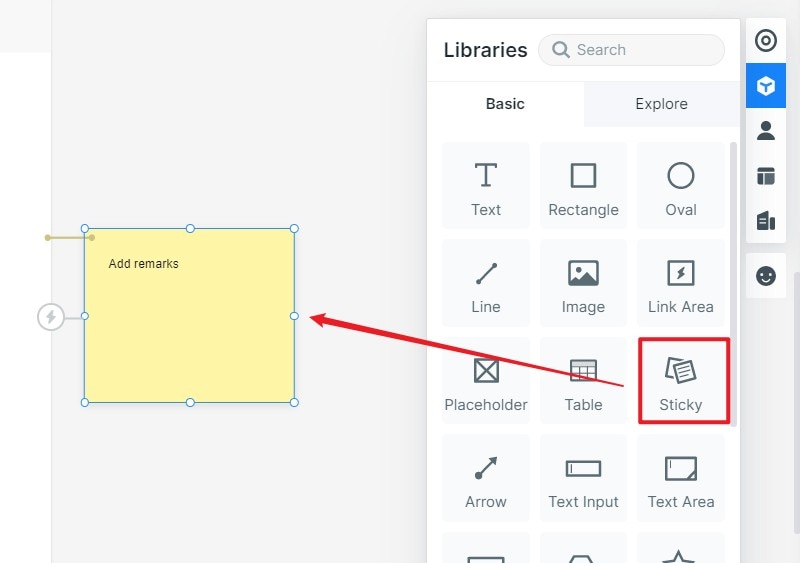
Step 4. Add Sticky Note for the Wireframe
Finally, you can add notes to your design by using the "Sticky" option from the widget library.
That's about it. The above process allows you to create a basic wireframe with interactive links; essentially, a functional prototype that your project manager can review and provide comments on. There are also advanced tools for adding audio, video, and other elements, create animated widgets for different states, and much more.
Tips to Create Wireframes with Sketch
When creating a Sketch wireframe, it is always good to have a standard set of practices that you follow. Many of these have been outlined in the section above, but there are also some quick tips you can keep in mind when working with a Sketch wireframe template or even when starting from scratch.
- Keep it simple and clear - Don't overcomplicate your design; always see it from the client's and the end-user's perspective.
- Do your homework - Understand the purpose of the design and the product itself so you can contribute to the user experience, even if it's in an indirect way.
- Know the flow - Have a clear idea of the user flow and have it mapped out on paper if you need to. It will help you move through the wireframing process in an efficient manner.
- Always test your wireframes - Using a utility like Wondershare Mockitt, you can import your Sketch designs and make highly interactive prototypes for testing so everything is properly checked even before it goes to the developer.
