How to Create Mid Fidelity Wireframes

There are three main types of fidelity in creating a Wireframe and they include: low fidelity, medium-fidelity, and high fidelity. Wireframe fidelity is simply the measure of the number of visual images and details that will be included in your Wireframe project. You should be able to differentiate the three types of frames, know their pros and cons, and when to use them since they are designed for different reasons. We will break down to you about Mid-Fidelity Wireframes, their importance, when it's best to use them, and how to create them effortlessly using the best wireframe tool - Wondershare Mockitt.
- Part 1: What is Mid Fidelity Wireframe
- Part 2: When Should You Use Mid Fidelity Wireframe
- Part 3: How to Create Mid Fidelity Wireframe
What is Mid Fidelity Wireframe
Mid Fidelity Wireframes are intermediate and the bridge to move from the low fidelity to the high fidelity wireframes. Low fidelity wireframes are sketches simply showing the concept, rough layout of the screen, and with little or no specifics of the wireframe layout. However, unlike low fidelity, the Mid Fidelity wireframes have more comprehensive and realistic components of UI. Sometimes, the Mid Fi wireframes may contain real imagery thereby making them be more and like Mocks but this is in the later or final stages of creating the Mid Fidelity wireframes.
In Mid Fidelity, more details are added to each of the components in the Wireframes and differentiate the text-only links from the button links. Mid Fi Wireframes are black and white, however, color can be used sparingly to differentiate the essential elements from the other components of the Wireframe. More so, the weight of the text may vary in the Wireframe most especially between the body content and the headings.
Some of the advantages of using Mid Fidelity Wireframes include;
- Mid-Fidelity wireframes give more accurate depictions of the layout of the project as well as give a glimpse of how the final project or product will be.
- They are an intermediate level hence capable of adding, editing, or getting rid of components in the Wireframe more easily.
- Mid-Fidelity wireframes also show how things will work around in the wireframe.
- Unlike low-fidelity wireframes, Mid Fidelity wireframes can be used in presenting the wireframe project formally and to the clients or users.
When Should You Use Mid Fidelity Wireframe
Medium Fidelity wireframes should be created after you are done with low fidelity wireframes, sketches. This will greatly help you in developing the sketches, adding more information to specific elements in the wireframe as well as setting the visual hierarchy. More so, you should go ahead and use the Mid-Fidelity Wireframes only when the team has agreed on the objective and purpose of the screen. They should share common ground on the specifics of the contents and layout of the wireframes. Medium Fidelity wireframes are formal hence they can be comfortably used in presenting your ideas.
Additionally, you should take note and know when Mid-Fidelity wireframes should not be used. You should never use the Mid-Fidelity wireframes if the team is not yet clear with the objectives and purpose of the wireframe. In such a case, you should go for the Low Fidelity wireframes because they are simply the sketch of the outcome and can be easily edited or changed. If your audience is very formal and contains high-tech people, then you should consider advancing your Mid-Fidelity wireframe to a more advanced one, High Fidelity wireframes or prototypes.
How to Create Mid Fidelity Wireframe
Always learn to use the right tool and for the right job. Each program has its strengths, weakness, and best designed to perform a particular task. Wondershare Mockitt is among the best and most used tools in creating Wireframes. The program has amazing features and built-in templates that can be used to help you create your Wireframe easily. It is a cross-platform program that can be compatible hence accessible on any type of device. Despite having great rivalry from other software over the past few years, Wondershare Mockitt is still the best tool for designing Low, Mid, or High Fidelity Wireframes.

The main features of this program
- Global colors are present in the program and it also displays the current colors of the page. The Color Picker can be used to select any desired color in addition to customizing your personal palette.
- It has a QR code and a shareable URL link of the current project you are working on thereby making it easy to share the wireframe. The end users can preview as well as interact instantly with the project without having to log in.
- The program library has abundant icons and widgets that can be used in various projects. It also helps in maintaining consistency across the project.
- You can easily export your Mid-Fidelity wireframe in any of the available export formats and the one that is convenient for your presentation.
- It supports Cloud service hence making it easy to access the current project you are working on on any device.
The following are steps to create mid-fidelity wireframe
Step 1: Create Project
Type your Wondershare Mockitt username and password so as to get access to the features and tools of the program. Click on the Create Project button to begin creating your Mid-Fidelity wireframe.
You can either click on the "Blank Project" to start your new project from the scratch or select the "Create Project from Demos" to use the abundant templates in the program.

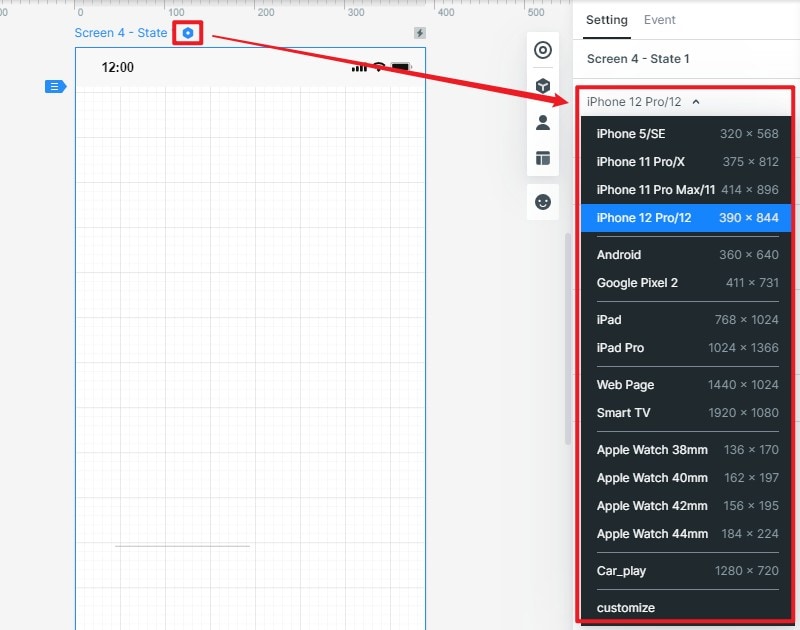
Step 2: Choose the Device and the Size of Your Mid-Fidelity Wireframe Project
Specify the title of your Mid-Fidelity wireframe project in the text box just below. Choose the type of device you are using such as a Mobile, Tablet, and specify the model of the device.
Choose the size of your project. You should select the correct size to avoid having to change the icons or layout of the page as you move from Mid to High Fidelity wireframes.
Step 3: Start to Design Your Mid Fi Wireframe
Design the page layout of your Mid Fi wireframe according to the sketches made and in line with the objectives of the wireframe. Once the wireframe layout is well set, then you can begin adding widgets and icons to the canvas by dragging them from the "Fast Widget" on the left side of the window and dropping them on the Canvas.

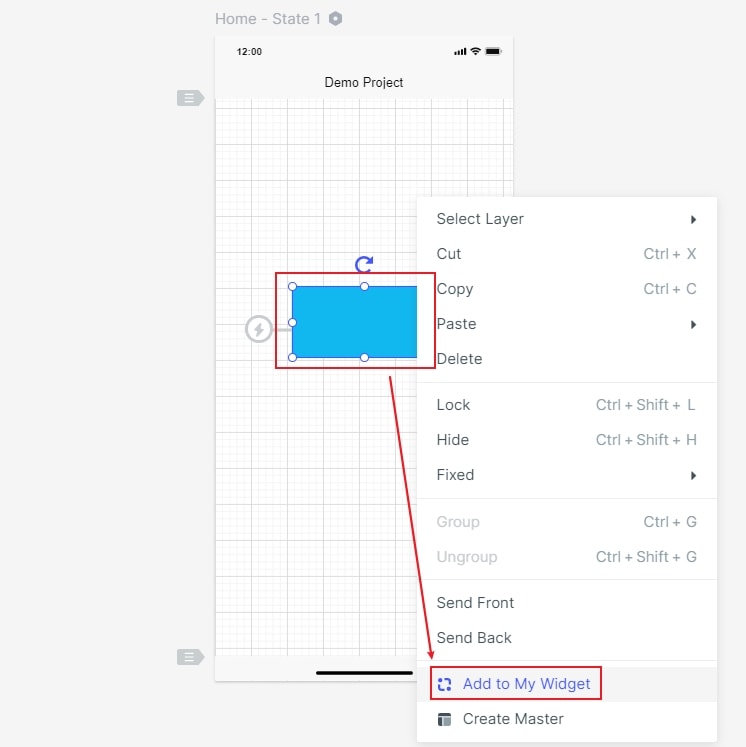
Step 4: Save the Widgets for Later Use
If you need to edit the widgets already added in the Canvas, then simply left-click on it and make the necessary changes in the Inspector panel. Save the best and common widgets and icons in the "My Widget" panel for use in the following projects.
Step 5: Preview Your Mid Fi Wireframe
After finishing the design of the mid-fi wireframe, you can preview the project on PC, mobile, and other devices that you want. To preview the project on PC, you can click the "Preview".
To preview the mid-fi wireframe on mobile, you can hit the "Share" button to get the link and QR code.

