How to Create a UI Wireframe with Beautiful Design
In the design of a website or an application, one of the essential components is the UI interface. This is where users will interact with your product and should, therefore, be given deserved attention. Creating a UI wireframe is not a strenuous process as it used to be in the past. The advancement in the software industry has paved the way for excellent UI wireframe tools. If you have any problem in creating UI wireframe, then you have just hit the right button. In this article, we shall guide you on how to create UI wireframes using the best UI wireframe tool - Wondershare Mockitt .
What is UI Wireframe
A wireframe is a skeleton, or a sketch of a website or an application often used to layout the various contents and functionality. A UI wireframe is a user interface wireframe. It is about the sketch of the components and elements of user interactions on the website or a given application. It lays out what precisely the elements will appear on the given pages of the application. It is an essential process that determines the user interaction with the product being developed.
The main role of UI wireframes is to give visual aspects of the various pages to the designers, developers, and relevant stakeholders before it is approved or the creative stage. The UI wireframe may have some basic components of interactions, and then more and more features are added by the UI designers. Generally, the role of the UI wireframes is to provide a skeleton of user navigations on the product being developed.
The Best Tool to Make UI Wireframe
There is no better tool than Wondershare Mockitt when it comes to making UI wireframes. It houses plenty of excellent features that make design, prototyping, and collaboration much simplified than ever. Suppose you want to create your wireframes or prototypes anywhere at any given time, simply login using your browser and get started. Pick a suitable template from the template library to avoid starting your projects from scratch. This will save you more time and energy since the process becomes faster. You can choose the desired canvas size by resizing it to fit the device prototype. To make our wireframe more beautiful, use the widgets and icons available on the program. Transform your static screens to interactive screens by linking them with various objects and defining the transitions and animations features. Wondershare Mockitt is suitable for all sizes and types of organizations, and this is why several organizations have made it their indispensable tool.

Features:
- It has rich widgets and icons that help in creating great interfaces.
- The cloud enables team members to sync across different devices without time and space limitations.
- Users can preview their projects on PC, mobile devices, or offline.
- Users can animate their prototype freely.
- It supports real-time collaboration and co-editing.
- Handoff features make it easy to hand off the project to developers.
How to Create UI Wireframe
Step 1. Login and Create Project
Go to Wondershare Mockitt using your browser and log in to access the primary window. Hit the "Create Project" tab and select either of the "Blank Project" or "Create project from demos" depending on your need. Provide a suitable project name and choose the device for which the UI wireframe is about. Click "Create" to proceed.
Hover your mouse over the project and click the "Settings" tab. Go to the device drop-down icon and select a suitable size for your UI wireframe. Click "Save" to allow the changes.

Step 2. Add Screens to UI Wireframe
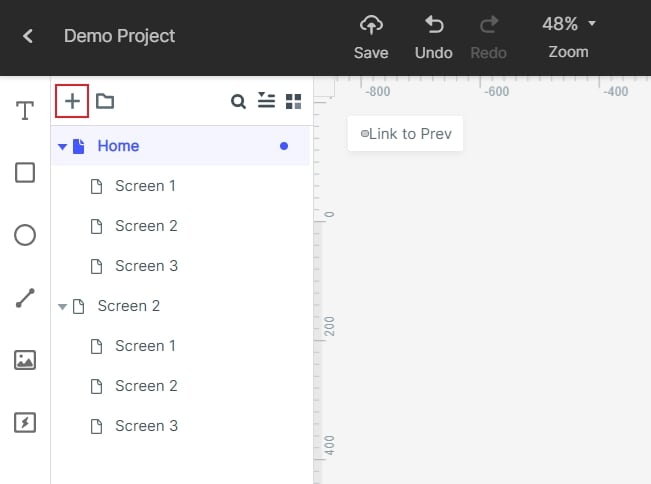
Screens are useful in creating connections between objects and other pages. It ensures that when you click an object, it will automatically direct you to the respective page. Click the "New Screen" button on the left side of the screen and add as many screens as dictated by your UI wireframe. Provide suitable names for the screen for better navigation.

Step 3. Drag Widgets and Icons to UI Wireframe Design
Double click the widget of interest on the left side of the screen and drag in into the canvas. Start drawing your shapes. Other widgets are available on the right side of the window. Click on the widget and edit the widget on the Inspector Panel. Drag the edited widget to the "My Widgets" library for reuse.

Step 4. Add Links to Widget and Icons
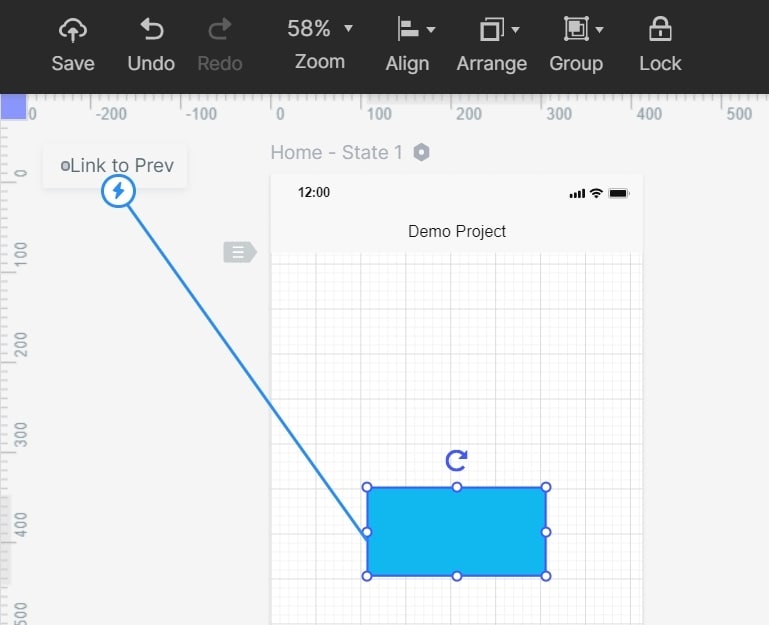
Choose select and widget and click the "New Link" tab on the right side of the screen. Choose a suitable gesture, action, state, and animation for your widget. To link an object to another screen, just drag the link icon to the destination screen and release it.

Step 5. Preview the UI Wireframe
Hit the "Preview" tab on the toolbar to allow you to interact with your wireframe. Scroll and click to check whether your wireframe is working accordingly.

Useful Tips to Create UI Wireframe
It is a wish for every designer out there to create a good UI wireframe for the project in hand. However, this might not be achievable without taking into account some of the proven and useful tips. The following tips will enable you to create good UI wireframes with ease and speed.
- Know and make your goals clear to bring value to your wireframe.
- Use the right UI wireframe tool. Make sure the tool offers good UI features, has a friendly user interface, and is affordable.
- If possible, first sketch your ideas on a sheet of paper because this will allow you to explore as many options as possible.
- Use an appropriate canvas size to avoid designing a layout that would call for several unnecessary corrections.
- Strive to keep consistency on the UI elements. This means the buttons and tabs should have consistent designs. One method to do this is by creating reusable elements.
- Focus on the flow of interaction between screens. Don’t simply be carried off by the design of a single screen. Users require seamless flow.
- Strive to make it functional, not beautiful.
- Leverage templates and UI assets to accelerate the design process. No need to start from scratch.
- Ask and take feedback seriously.

