Wireframe Meaning – What is a Wireframe
Wireframe meaning is easy to define. This article is being written to make sure that the obvious backbone of any project is defined in layman terms. It is something that has been regarded as one of the most important aspects of any application project. Without the wireframe, it is not at all possible to make sure that an application is outstanding. This is something that will make it possible for the UI and UX designers to get the best layout at all. I will let you delve deep into the subject so that you get to understand the outcome with perfection.
- Part 1: What is a Wireframe?
- Part 2: Introduction of Wireframe Layout
- Part 3. The Best Wireframe Tool
- Part 4: Steps to Create a Wireframe
What is a Wireframe?
Wireframe definition is not hard to explain at all as the name itself tells us a lot about the idea. It is related to the structure of the application and it also means that all the parties make sure that the elements are placed where they want. It is a phenomenon that is related to the UI and UX design and they make sure that the developers code the interface in the same way as wireframe depicts. The skeletal outlook of the app is very important and therefore it is something that can be rightly called as the backbone of the project. There are two important types of wireframes that are used all over the world. This also answers the question i.e. what is a wireframe?
Low Fidelity Wireframes
The navigation, framework and the basic structure are some of the elements that are already defined in this type of wireframes. To define wireframe this kind must be taken into consideration. For the project start up this kind of wireframe is used and the design is turned into the second type which is a high one. This lacks the advanced features and therefore it must be only used for the low-end projects. If you want to know basic functionality then it is the wireframe that you must go for.
High Fidelity Wireframes
This is more of a complex design that defines how the best and the most advanced outcome are generated. Concerning the wireframe design, the high fidelity frameworks must be completely defined so that the newbies get a clear picture. The weighing and the hierarchy are defined within these wireframes. Interactions of different elements and instructional text and the layouts are also defined in these frameworks.
Introduction of Wireframe Layout
Certain elements in the wireframe layout define the structure. This also answers the question i.e. what is a wireframe design. These elements let the developers know how complex or simple an application is. It also makes the layout of the wireframe. Some of the most important layout elements that define a wireframe layout are as follows:
- Logo Image
- Search field or bar
- H1, H2 and the related headers of the application
- GPS integration with local integrations as well
- Buttons
- Body Content
- Contact information
- Breadcrumb
- Footer
The Best Wireframe Tool
Wondershare Mockitt is one of the best and the most used wireframe tools that have been on the market for a while now. This is a tool that makes the process of a wireframing easy and straightforward process. It is one of the best tools that are easy to use and therefore it has been rated high by the users. For wireframe free creation this tool is the best of all.

Features of the Program
- From design to the final implementation this program is too easy to use.
- The asset library allows you to use the premade designs with ease.
- The transition and effect of addition have never been as easy as it is with this program.
- The files can be directly imported from the computer or other designing programs to be used in the process.
- The program is completely online and therefore requires no installation at all.
Steps to Create a Wireframe
From simple wireframes to the advanced ones there is a single process that is followed. Below are the important steps of the process that will make it easy for you to understand Wondershare Mockitt.
Step 1: Create a New Project
Click on create the project once to login to the program
For the device, type change makes sure that the settings are accessed.

Step 2: Add Widgets and Save it for Later Use
On the left, there are fast widgets. Click to add any to your project.
Click any widget to access the inspector panel to make sure that the widget is edited.
Drag the widget to the "My Widget" panel to save it for later use.

Step 3: Add Links
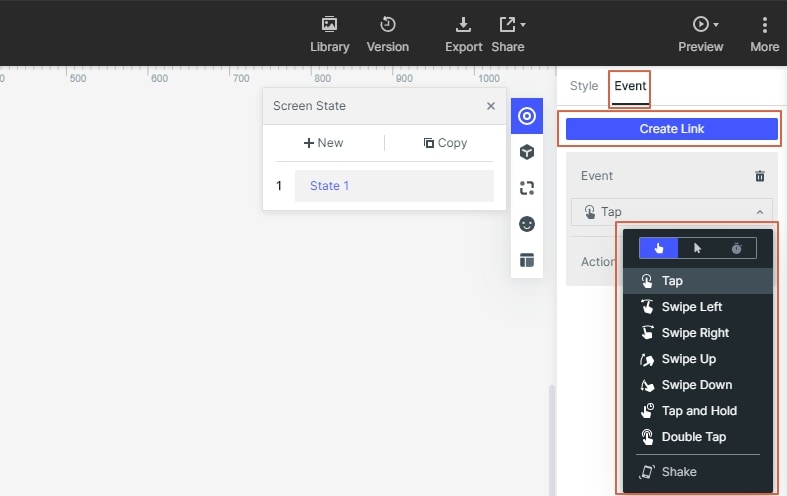
Choose widget and click a new link on the right panel to proceed.
Adjust the gesture, action, and the target.

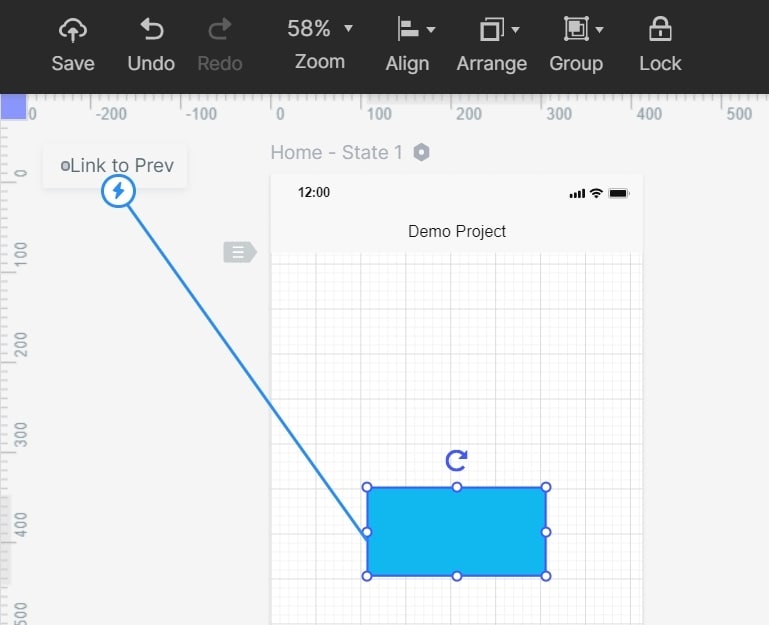
Step 4: Add Links Between Screensv
Right-click the widget so that it could be turned into a master widget.

Step 5: Add Notes
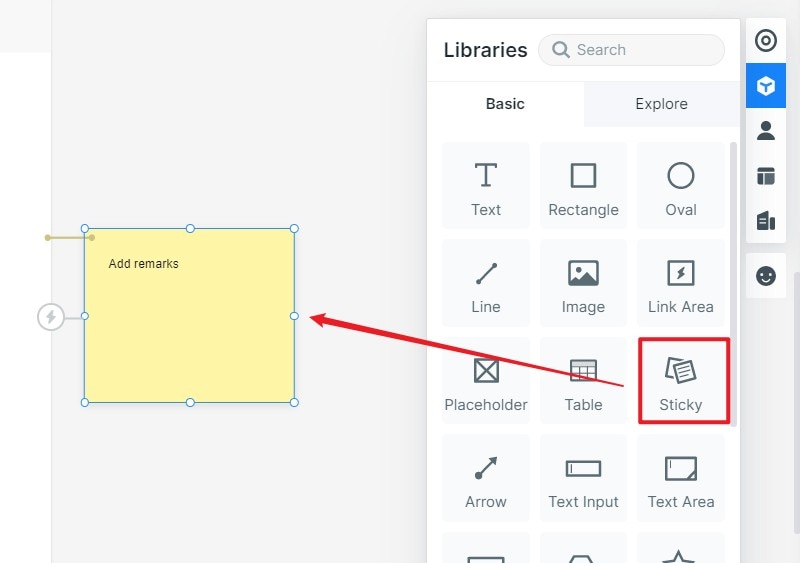
Select sticky in the library to add notes to the widget. This makes it very easy to collaborate both with the client and the team you are working with.
You can also add the text to the sticky notes and it is viewable to all the members of the project. This also completes the process in full.

Step 6: Preview and Share
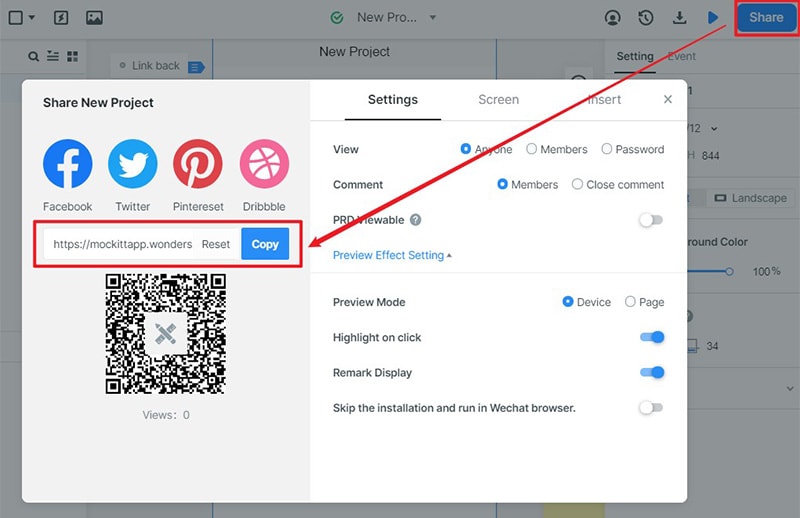
To preview your project on PC, just click the "Preview" button on the top toolbar

To preview your project on mobile, hit the "Share" button, you can get the link and QR code.


