Mockitt - Free Online Prototyping Tool
"If a picture is worth 1000 words, a prototype is worth 1000 meetings." - Tom & David Kelley
- Get to Know Prototyping in Design.
- Reasons of Prototyping Is Such an Important Part of Business.
- Top list of Must-Recommend Prototyping Tools.
- Ways to Use Prototyping Tools.
- Tips to Turn a Vision into Something Tangible.

How to Create Website Prototype for Beginners
A website prototype is a key step in developing a website. It is a mockup or demo of what the website will look like when it will be live for the users. Typically, when people talk of prototypes, they refer to an interactive prototype that allows users to navigate from one page to another and use functionality like drop-down menus. However, for a beginner, it can be a bit overwhelming, but with the help of a variety of specialist prototype tools available on the market and a bit of preparation can make you proficient.
If you are a beginner to website prototype, then this guide is for you. Read on to know.
Prepare before Prototyping Website
As said above, there are a variety of web prototype tools available and one such is Wondershare Mockitt. It is a collaborative well-organized tool that helps users build interactive website prototype online in just a few minutes seamlessly and easily without writing a single line of code. With this tool on hand, you can easily create clickable web prototype online and collaborate with your team members. The tool is compatible with your laptop, PC, Android, and iOS devices.

However, before you start with the prototype, there are certain things to keep in mind. Know the audience who will use the website as this will help you create a better prototype. Next, focus on the user flow and scenarios to sketch the page flow, then create a low-fidelity digital prototype. You also want to make user interactions as simple a possible offering them fewer clicks to look for the information they want on the website. This increases the user experience.
How to Prototype Website
If you have been thinking about how to create a website prototype, then it's easy with Wondershare Mockitt. Here are the steps to follow.
Step 1: Create a Projects
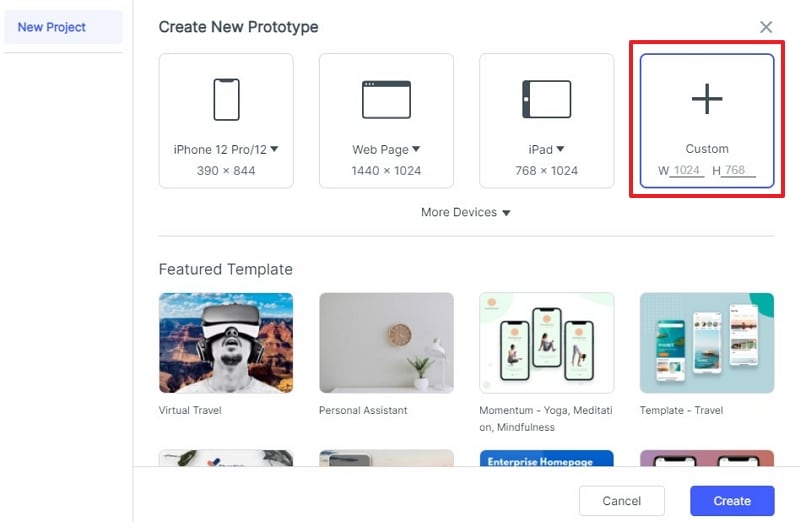
Open the Wondershare Mockitt website, then you can sign up an account. Once you are logged in, simply click on Create New Project. You can create a Blank Project by choosing the right device type and name your project. You can also choose to create project from demos.

Step 2: Change Size for Your Website Prototype Projects
At any time, if you want to change your project size, this website prototype online tool allows you to do so easily. Hover your cursor on the project and click “…” -> Settings. Here, change the device size/type, name your project, and hit the Save button.
Step 3: Add Widgets and Icons to Your Web Prototype Project
Once you are done with the changes, the next step is to add widgets and icons. On the left, you will find Fast Widgets and there are three ways to add them. You can either double click the widgets, drag them, or press the hotkeys and draw.
On the right side, you will find three assets, Build-in Widgets, My Widgets, and Icons. You can add them to the canvas in two ways either by double-clicking or dragging.
You can also edit widgets easily if you do not like them. For this click on the Widget and in the Inspector Panel edit its properties.

Step 4: Save Widgets
Wondershare Mockitt offers you an option to save a well-designed widget for future use. You can add the created widget to My Widget library. This can be done in two ways, either you can drag the widget to My Widget panel or right-click the widget to Add it.
Step 5: Add Links for the Web Prototype Project
Once the widgets and icons have been added, next you need to add links for screens. This action can also be done in two ways. (1) Choose one widget and then go to Link Panel on the right and click on New Link. Set the gesture, action, target screen, and animation for the widget. (2) Drag the link icon on the left of the widget to the target screen and then set the gesture, action, target screen, and animation on the Link Panel.

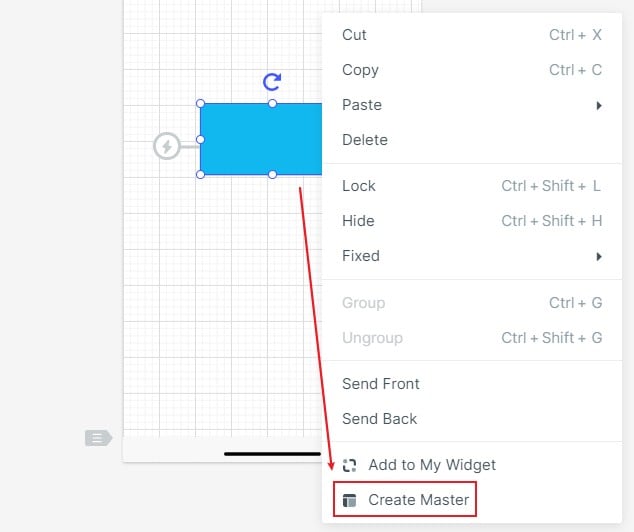
Step 6: Convert Widget to Master
This is done for bulk editing. Right-click on the Widget to Create Master. It will be saved in the Master library. Now drag the master to the canvas to create its instances. If you want to change the Master, hover over it and click Edit.
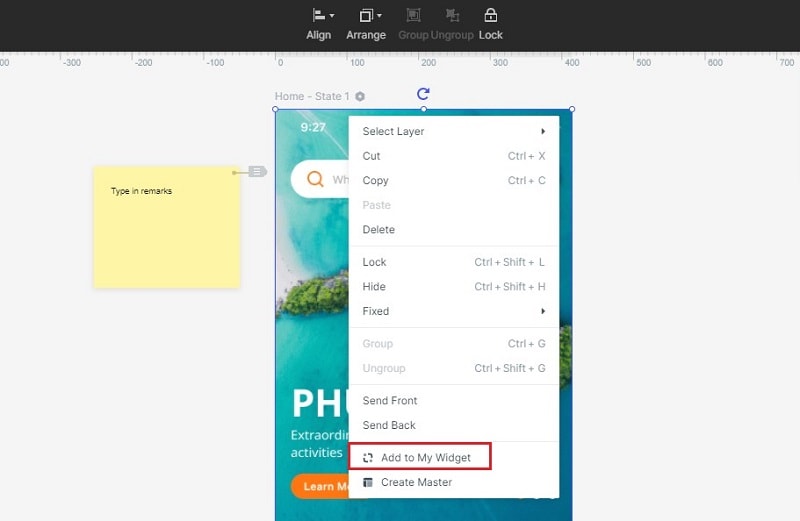
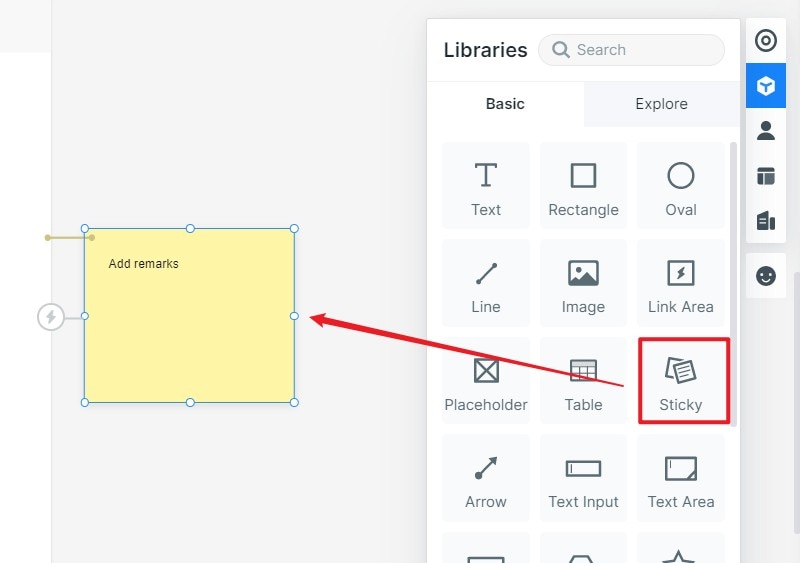
Step 7: Add Notes to Your Web Prototype Design
Adding notes to design helps explain your design. For this use the Sticky in Built-in Widget Library. Then add notes to it.
Step 8: Previewand Share Your Web Prototype Online
Once you are done with prototyping, click Preview on the top toolbar. Adjust the settings such as Page Scroll, Highlight on click, Sticky, and Shell.
Click on the Share button, to get a QR code and link. Share it with others to review or test.

Website Prototype Learning Resources
Regardless of how skilled you are at website prototyping; it is always good to learn a few tricks. Here are a few resources you can look to.
UX Training
It offers a two-day program that teaches all you need to know to master the UX design process. From how to do brainstorming and generate ideas, and then start the interface sketching.
Weekly Design
It is a video learning resource about UX design. Run by Punit Chawla, you will get information tools and interesting interviews with discussions about all kinds of design topics.
Design For Mankind
It is an active blog with thousands of readers. Run by Erin Loechner, a renowned designer you will learn valuable lessons about UX design and web prototype.
Udemy
It gives you access to thousands of tutorials covering everything from IT and software to website prototype. Their Adobe XD professional course is the one to look for. It will teach you all the software's details and the tools and procedures.
Hack Design
Hack Design offers concise lessons each week and is designed by great experienced designers. They also offer a bundle of 50 beginner's lessons to get your basics right with website prototype. And the best part, the lessons are free.
