How to Use Marvel App Create a Wireframe

The Marvel wireframe app for design and prototyping is one of the most intuitive end-to-end design solutions on the market. For creating a wireframe Marvel offers a user-friendly interface, easy functionality, and a vast array of features. That makes it an ideal collaboration tool for smaller design teams that need to handle heavy workflows in an efficient manner. There's also an enterprise version for larger teams working across multiple locations. The app itself offers an online web interface with mobile apps for prototyping designs. Let's see how to create a marvelapp wireframe quickly, and also review a wireframe alternative for an equally intuitive experience.
- How to Create a Wireframe with the Marvel App
- How to Create a Wireframe without Marvel App
- Tips on Creating a Wireframe with the Marvel App
How to Create a Wireframe with the Marvel App
Once you've set up your Marvel account online, you can go to Create Project to start off. During the project creation step, you can also invite collaborators, but only if you have upgraded to a paid plan. If not, you can proceed for free and create the project on your own. While Marvel is geared toward prototyping designs that are imported from other sources, you can easily create a wireframe or design from within the app itself. You still need to use the prototype option for this, but it's different from an actual prototyping job. The steps are as follows:
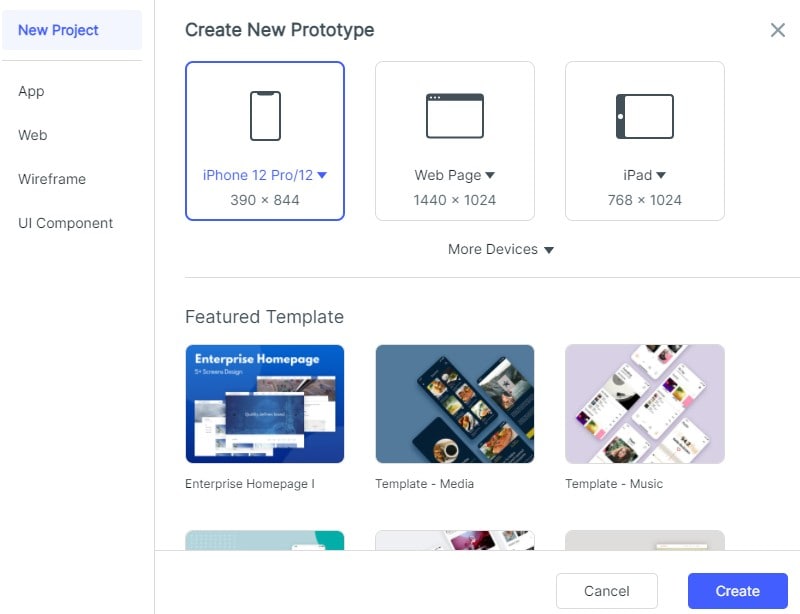
- Log in to Marvel, then go to the Dashboard and click on Create Project
- Name the project and proceed to the next step
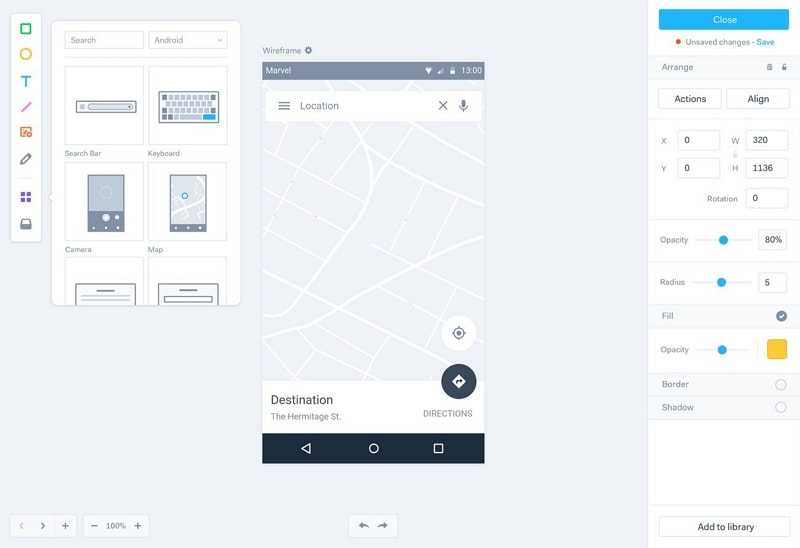
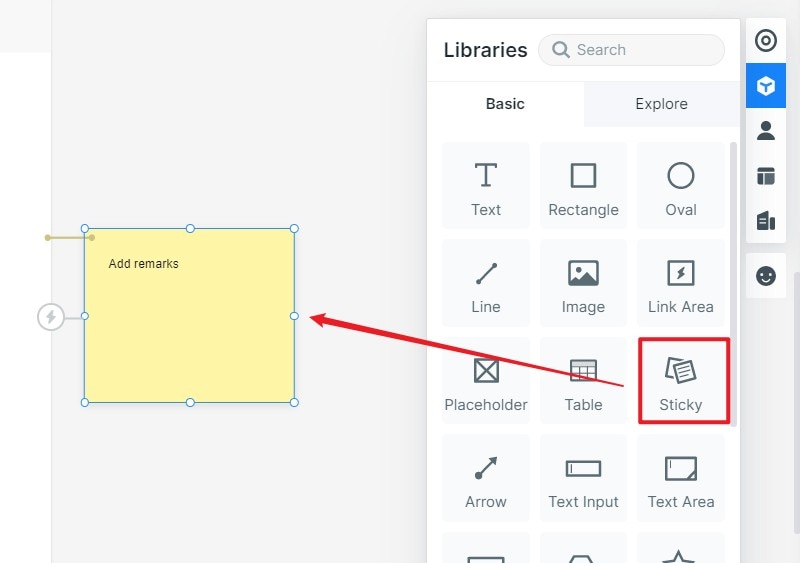
- You can click Add Images to take you to the design editor. In the popup, choose Design in Marvel. If you want to import your own assets, choose the other option
- Once you're in the editor, you can use the components panel on the left side to add various text and visual elements. You can also add custom components to your company library
- When you finish designing, click the Close button on the top right to add it to your project. You're done!
While it's easy to wireframe in Marvel, you can also use the Marvel wireframe templates to get started even faster. However, you'll need to upgrade to the paid plan in order to get full access. Your wireframes are now ready as designs, and you can proceed to prototype them or simply share them as they are with others, who can comment and provide feedback.
Here are some of the pluses and minuses of the Marvel app wireframe design process:
Pros
- Quickly get started using a template or your own designs
- Wireframe from a blank page with an extensive collection of components, text options, and images
- Easy to share and download wireframes
- Invite collaborators to projects
- Easy prototyping and handoffs once the wireframe or design is ready
Cons
- An online tool with little control over the asset library
- Loading and deployment of components might be slow unless your Internet connection is fast and stable
- No annotation tools
- Limited animations
How to Create a Wireframe with a Marvel App Alternative
Wondershare Mockitt is a comprehensive wireframe, design, and prototyping tool that is flexible, powerful, and feature-rich. The intuitive interface comes with a host of transitions, gestures, and other effects, and you have full control over your asset libraries. Extensive design editing tools give you more freedom to get your wireframe as close to the desired functionality as possible.

Zero coding knowledge is required, and the gentle learning curve means you can get a wireframe done in as little as a few minutes and quickly send the prototypes for user testing. The collaborative platform also allows you to get quick feedback and comments so the workflow is efficient and speedy. In addition, the backend code is generated for different styles like Swift, Android, and CSS. Developers can inspect code easily, and export what they need. Stakeholders always have a view of what's going on, and prototypes can be shared with mobile devices for fast feedback.
To create your design with this amazing Marvel wireframe app alternative, just follow the simple steps below:
Step 1. First, choose the canvas on which you want to create your wireframe. Options include web, mobile, tablet, smartwatch, TV, etc. You can even make it device-specific; for instance, a particular model of iPhone with a specific screen aspect ratio.
Step 2. Next, start adding icons and widgets to your pages and screens. It's always a good idea to create multiple pages and artboards to show different screens and their states under various conditions.

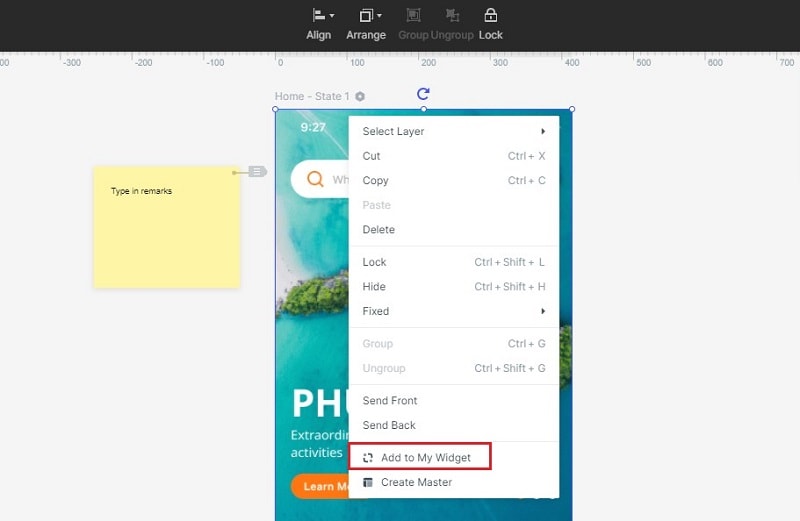
Step 3. At this stage, you can edit your widgets with the properties panel on the right side. You can also add widgets for later reuse by adding them to the My Widget library.
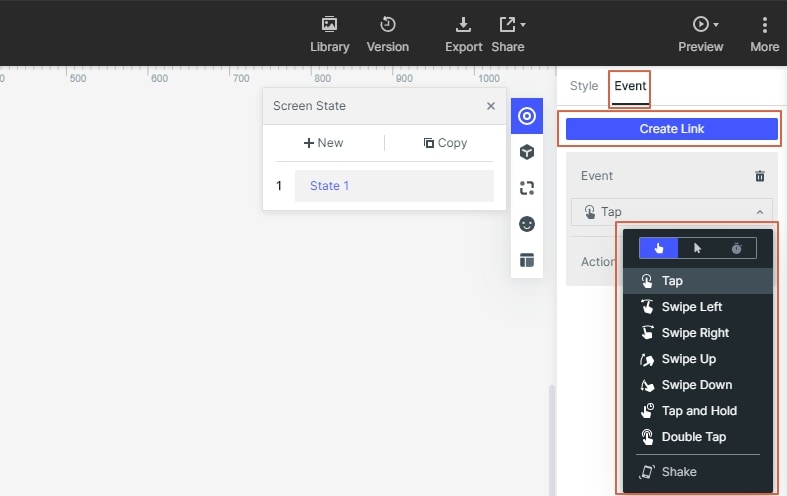
Step 4. The next stage involves linking your widgets to show functional relationships. For this, pick a widget and click New Link on the right panel. You can also set the specific transition or gesture for the link.
Step 5. Add notes and annotations to your design to help explain various screens and their states.
You can also choose the “use demo” option when creating a project if you need to use the many templates available in Wondershare Mockitt. One particularly useful feature is dynamic widgets, which is different from adding animation to a screen state because it can be controlled at the widget level. This gives you freedom and control over smaller elements that need to behave differently from similar elements on the screen.
Tips on How to Create a Wireframe with the Marvel App
Wireframing is simple enough for straightforward websites with minimal functionality. However, the more complex the design, the more disorganized your wireframing process can become. To avoid these pitfalls, here are some tips or best practices that you can follow:
- Get clarity on your project's purpose and the functional aspects of the end product before you start on the wireframe. Having the end in mind helps clarify the design approach for every component you add.
- Know the user from a behavioral perspective. For example, what is a user likely to do after clicking Button A, or what might they do if Response B is seen on Page State C? Such types of questions will help you look at how the user will eventually perceive it. That's the core of UX design.
- Organize your pages, screens, and artboards before you start. You've probably made notes on what screens and what functions are required, so map it out or set a framework in your mind so you know roughly how many artboards you'll require for a fully functional wireframe. Starting from there helps you organize better and work more efficiently.
- Use a standard naming convention for components, text styles, symbols, etc. Doing this will make it a lot easier for the developer to understand the design logic behind the wireframe.
