Look, We Know and Study Adobe XD.
- Get to Think Afresh about Adobe XD.
- Ways to design and Prototype in Adobe XD.
- Adobe XD vs. ? - What Makes Adobe XD Different?
- Essential Tips for Adobe XD.
Mockitt is the best altenative to Adobe XD:

How to Create a Wireframe in Adobe XD
An Adobe XD wireframe is a simple digital drawing of how a particular web page or mobile app page will be in terms of components and functionality. If you are generating ideas for a website or app and want to create a wireframe Adobe XD is an ideal tool because you have a wide choice of Adobe XD wireframe kits free and premium to pick from. This allows you to create your Adobe XD wireframe from ready-to-use components and blueprints so you won't have to start from scratch. This not only makes your XD wireframe ready in a shorter period of time so your client can review it quickly, but it also lets you subsequently take it to the next level of design and prototyping.
- Part 1: How to Create a Wireframe in Adobe XD
- Part 2: How to Create a Wireframe in Adobe XD Alternative
- Part 3: Useful Tips for Creating a Wireframe in Adobe XD
How to Create a Wireframe in Adobe XD
Creating an Adobe XD wireframe is quite a simple process if you know what's expected of the app or site you're ultimately going to develop. The wireframing stage is extremely important because it shows the underlying process flow and logic without the distractions of color, text, and other content that will ultimately be added to the design in later stages. Let's start by learning how to create a simple wireframe using the Adobe wireframe tool.
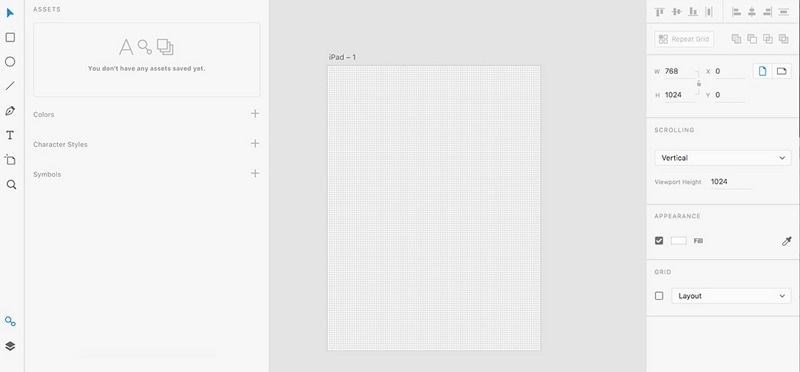
- The first step is to pick your canvas or artboard. The size can be selected from preset options or customized to the target device of your choice. This is an important step because it will show a realistic view of how various components will be laid out on the page. The name of the artboard can be changed by double-clicking the title and editing it.
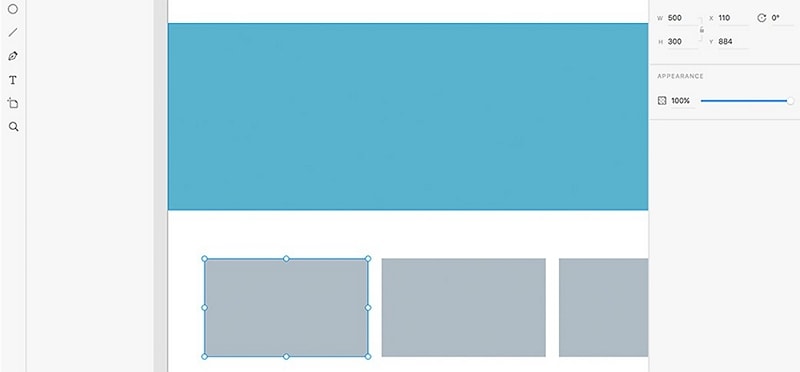
- Keeping the layout as simple as possible, start adding various objects to represents different sections of your website, such as header image, title text block, sidebars, etc. If you're using Adobe XD wireframe kits, you'll have more options for these components, but you can also use simple shapes to represent various objects on the page.
- Next, use symbols to show interactive elements on the page. Since the page layout will essentially be the same, don't duplicate your work by creating new artboards from scratch. Simply replicate them and then change the required symbols to show various states.
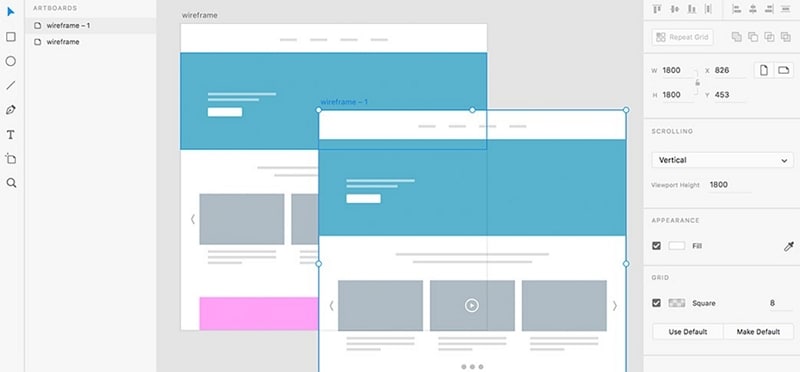
- The next step is to get your artboards in a logical sequence. For this, you can click-drag them to their relative position on the main grid. You can even drag a group of artboards this way by holding down the Shift key.
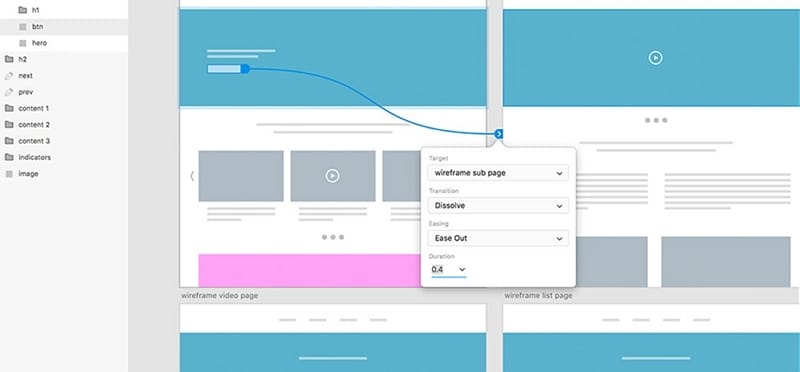
- Once your artboards are in sequential order, you can add transitions between them and even control the duration of the transition. This step is called "wiring an app" and allows you to create similar transactions in batches so the process moves forward faster.
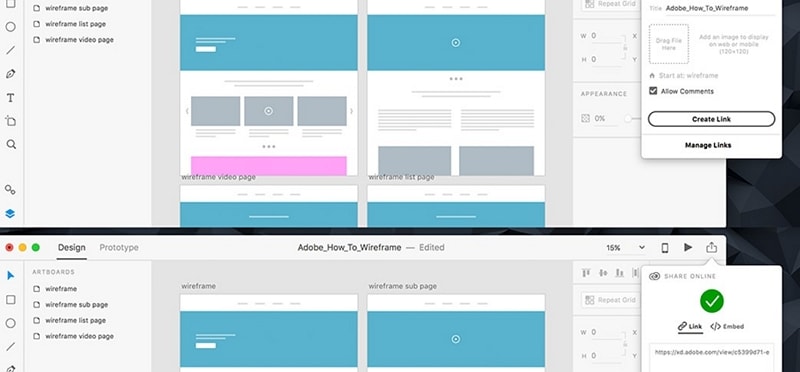
- When your XD wireframe is ready, you can share it with stakeholders using the Share Online URL generator. This feature allows you to share your wireframe with someone else with a simple link. The Preview pane allows you to update your design and see the final version change in real-time.
Even though an Adobe XD wireframe is relatively easy to create, the Adobe wireframing tools aren't extensive. That means you may not find the components you need unless you search for third-party Adobe XD wireframing kits. Besides, the collaboration feature is a little clunky and you'll need to update your design to Adobe's servers before others can work on it; otherwise they'll only see older versions. That's the other issue - version control. With so many issues, it's no wonder designers constantly keep looking for Adobe XD wireframing alternatives. One such user-friendly wireframe, design, and prototyping tool is showcased in the following section.
Would you interested in installing Adobe XD Windows? Click and learn more about How to Install Adobe XD Windows 7/8/8.1/10.
How to Create a Wireframe with an Adobe XD Alternative
One of the stand-out features of Wondershare Mockitt is its extensive asset library of components, symbols, and other elements that allow you the freedom to create rich and interactive prototypes. The wireframes themselves can be infused with animations, transitions, gestures, and other effects so they work almost exactly like the final version of the app. This allows you to rapidly create interactive wireframes for clients to review, and then proceed at speed to the design and prototyping phases without skipping a beat.

Wondershare Mockitt also offers a richly collaborative environment where everything design changes are updated to the cloud instantly. This allows collaborators and other stakeholders to get a live view of designs as they are created. The robust commenting system creates a rapid feedback loop that helps avoid lengthy design reviews and lets the process flow smoothly from wireframing to prototyping to development to the final beta testing phase prior to go-live status.
But possibly the biggest advantage is the ability to create interactive prototypes that are code-ready and easy to hand off to the developer. Code inspection is convenient, and various style codes are generated on the fly, giving the designer full freedom to focus on what they do best.
Steps for Creating a Wireframe in Adobe XD Alternative
The user-friendly interface and intuitive controls of this powerful wireframing tool allow designers to hit the ground running. In just a few simple steps, a functional wireframe can be created and sent for review. Here's how it's done:
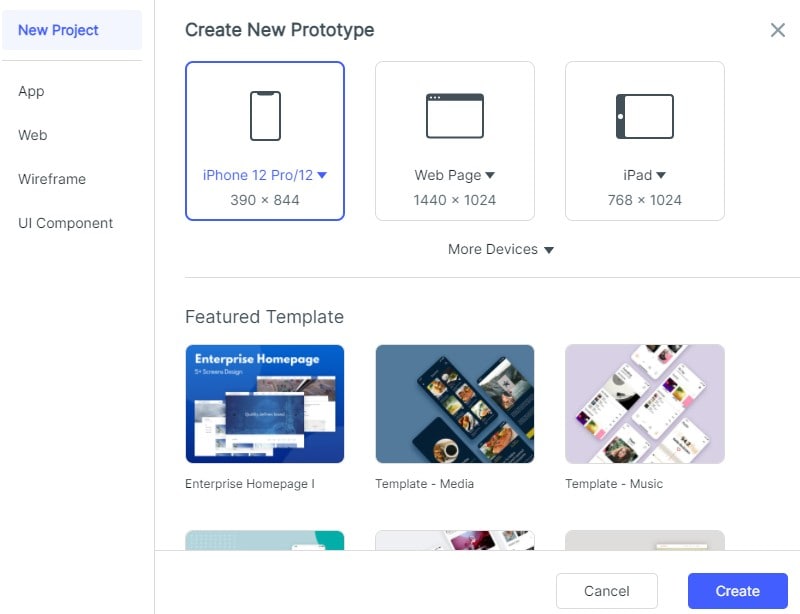
Step 1: The first step is to create a new project (click Create New Project) and choose whether you want to start from a blank page or use a demo, which is essentially a wireframe template.

Next, name your project and specify the target device canvas and device type.
Step 2: You will arrive at the first screen in your wireframe, where you can begin adding shapes, widgets, icons, and other components. The easiest way to do this is to drag and drop it from either the left-side Fast Widgets panel or from the right-side panel.
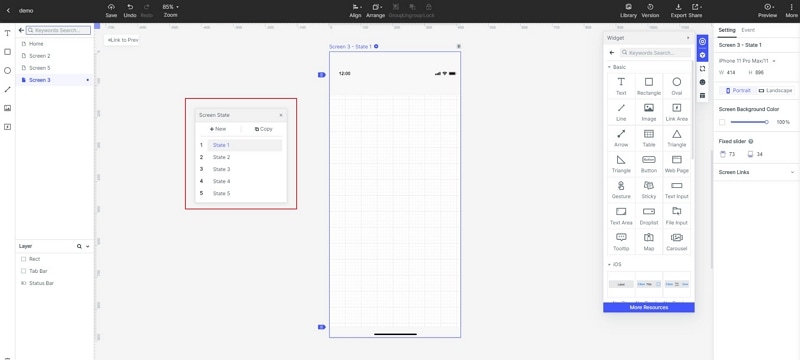
Once you add the static elements, create copies of your screen/artboard so you can give them custom states and link them with gestures, interactions, transitions, and effects later on. It will save you a lot of time.

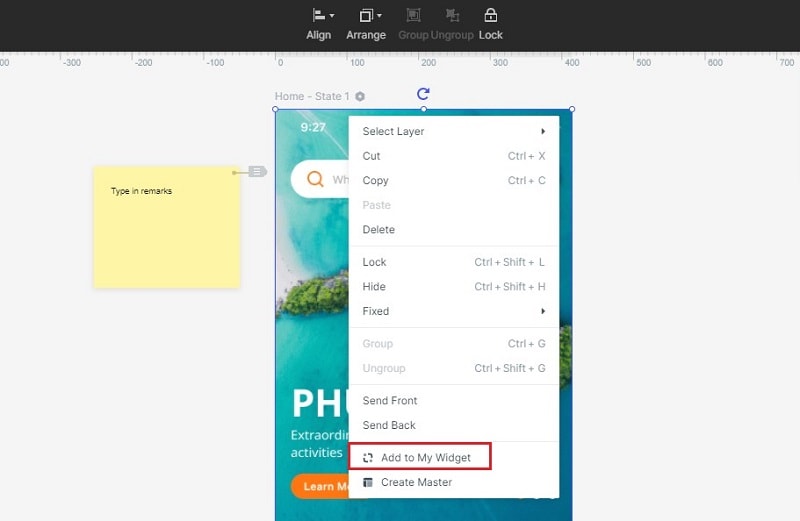
You can now edit the components on each screen by selecting them and using the widget properties panel on the right. If you need to reuse widgets later, right-click on it and select "Add to Widgets." This will save it in the "My Widgets" section that you can access at any time.
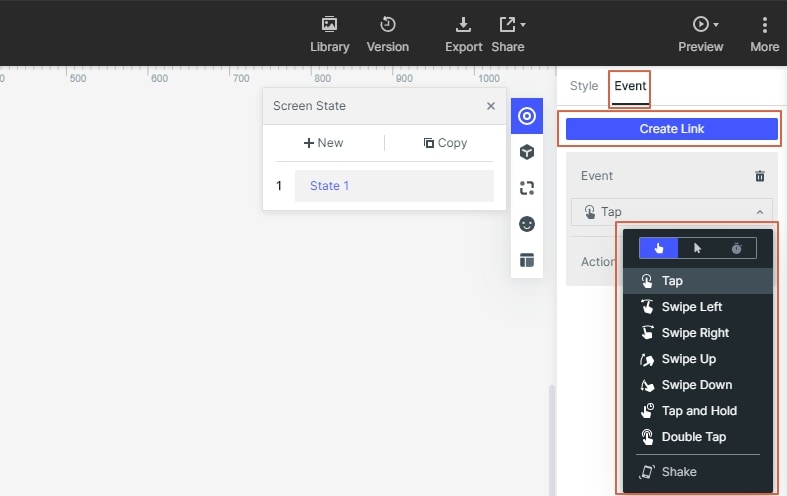
Now, it is time to create links between different page states. For this, simply click on a link icon (left side of a component) and drag it to the target page. This essentially shows the flow between the first screen or page state, the action was taken on that page, and the change in state as shown on the second page.

The links can be edited to add a new state to the second page, and the options for these include gestures, transitions, animation, action, etc., which you will see in the Link Panel on the right.
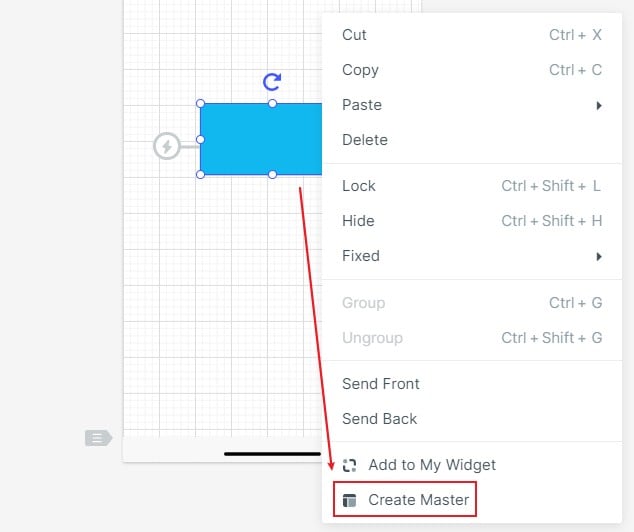
Tip: If you plan to use a set of widgets over and over again, such as a page header or some other component, you can add it to the Master Library by right-clicking and selecting Create Master.
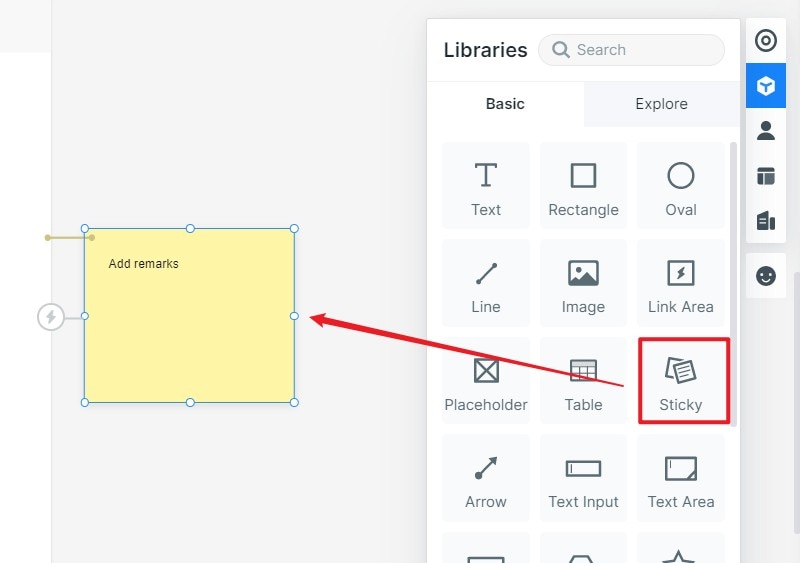
Step 3: Next, annotate your wireframe with the "Sticky" feature, which is basically a "Sticky Note" that you can write text on. This will help other stakeholders figure out what's going on on a particular page or a section of it.
Tip: You can use the Dynamic Widgets feature to show various animations on a page without having to change the screen state. This gives you more granular control over animations and transitions.
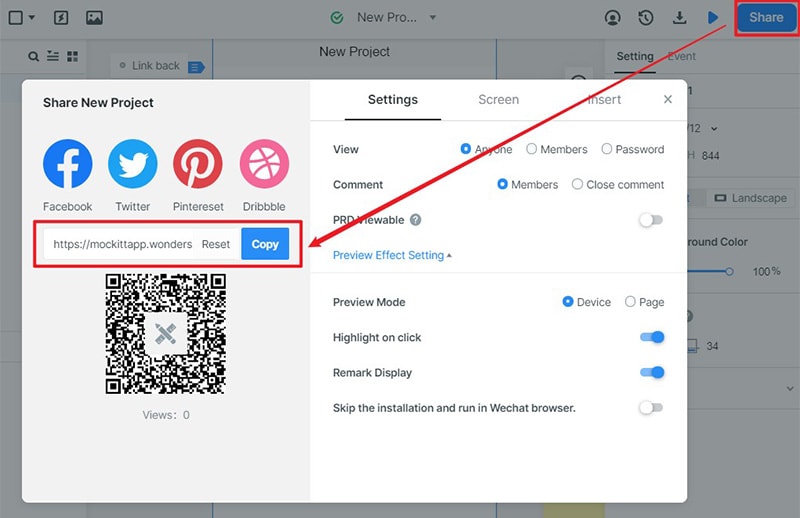
Step 4: Once the wireframe is ready and you're happy with the design, click the "Share" button to generate a link or a QR code, which you can send to other stakeholders for them to review and provide feedback and comments. You can also download the APK or HTML demo for offline reviewing.
Wondershare Mockitt is one of the easiest yet comprehensive wireframing tools available that can also take care of your design, prototype, and handoff requirements.
Tips on How to Create Wireframe with Adobe XD
Whether you're using Wondershare Mockitt or Adobe XD wireframe tools, there are certain principles you need to follow in order to be efficient and deliver to tight timelines. Some of these tips and techniques are listed below:
- Reuse customized assets. If the tool you're using allows asset customization and asset library management, use it to good effect. It will save you a lot of time when reusing similar elements because you can avoid a lot of duplication.
- Create multiple screens before starting. Knowing how many screen or page states your project requires saves you a lot of time as well. The idea is to create a screen with static elements (components that won't change regardless of the page state) and create duplicates of those before proceeding to the next step. This will allow you to quickly add links and effects to put it all together.
- Keep it simple. Don't forget that a wireframe is not intended to be a beautiful design, so don't spend a lot of time on esthetic features. Focus on feature functionality, page states, transitions, and other key elements of your wireframe instead of getting widgets to be the right size or get the layout perfectly. Those can be taken care of in subsequent design iterations.
- Make them interactive. Clients want to see the functionality at this stage, so make sure you're using effects to optimize their experience and show them what the website or app is capable of in terms of how it will interact with the user.
Most of all, remember that the wireframe is just the beginning of the process. There's no need to make it perfect. Understanding the purpose of wireframing will go a long way in making you more efficient and productive.
