How to Build Online Store Prototype Even If You Are Not A Designer
Irrespective of any platform (Shopify, Wix, WordPress) you use for your e-commerce website, it is beneficial to build online store prototype before website development. And, whether you intend to use free online store builder WooCommerce (WordPress plugin) or paid online store website builder, Wondershare Mockitt has got you covered.
Designing prototypes for mobiles and websites was never easier before. Even if you have never used any online store maker (Shopify, Wix, WordPress) or any design prototype tool before, you would not feel overwhelmed with the interface of Mockitt. Its interface is clean and not cluttered.
This article will use the free version of Mockitt and show you how you can design your online store prototype even you are a novice in creating prototypes.
Steps to Build Online Store Prototype
This goes without saying that the first step in prototype designing is to do brainstorming for ideas generation. Along with that, you must have a clear idea of your potential customers. What type of customer are you planning to target? How would they like to get your web experience? You should spend a reasonable amount of time to study your prospects.
Here we are just assuming a fictitious brand name to design our store, and we'll call it In-demand.
Step 1: Sign up Mockitt account and select the free plan.
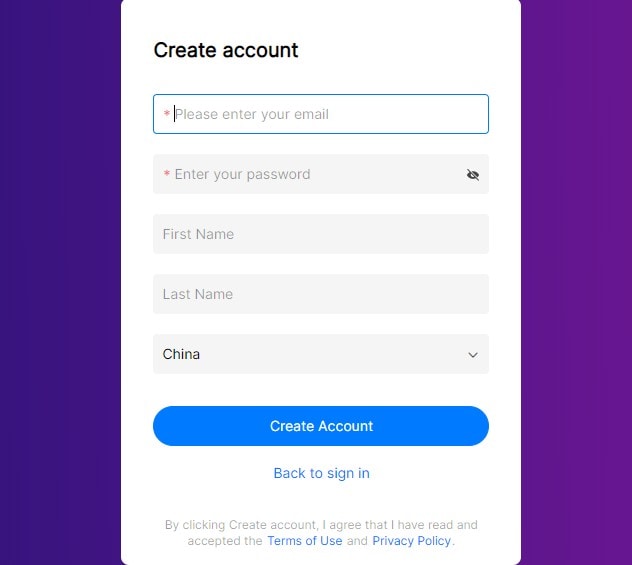
Note: We recommend you to explore personal and enterprise plans as it covers unique features you may want to use as a professional.
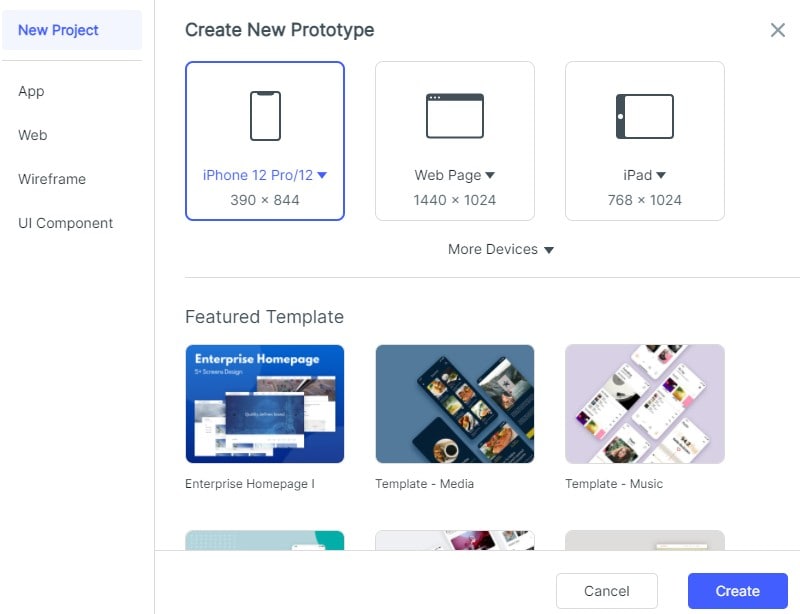
Step 2: Login and create a new project
Note: See the create button in the below image; click that button to start.

Step 3: When you click that create button (See above picture), a screen will pop up asking you to enter the project name and select screen size. Name your project, just like the way we did. Our project name is Build online store prototype. Choose a screen size as per your requirements or click the custom button to give your required Height and width. We used the default webpage size in our project.
Step 4: We shall be mocking up a few pages for our brand "In-demand" to show you the process. But you might want to include below standard pages when you get a project of e-commerce web designing.
- About Page for brand information
- Home Page
- Category Page (Trousers)
- The Cart page to show items that customers have added for checkout
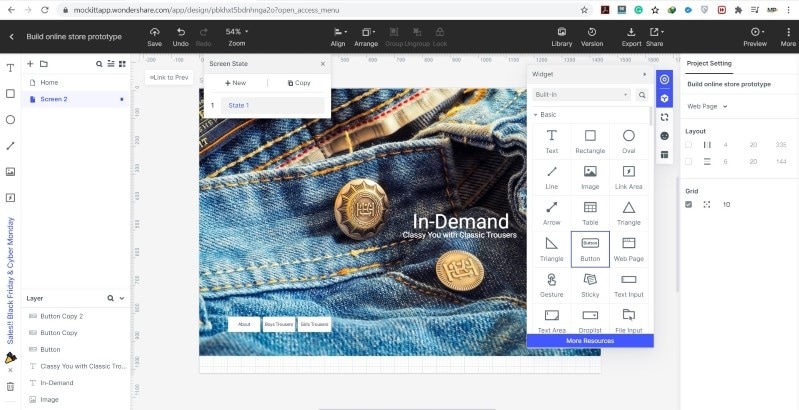
Step 5: At this point, we will be placing an image and including text, and to achieve that, we would use one large image of trousers to cover our entire background.
On the extreme right (see below image), there is an option to include a picture. With this option, you can either have your desired photo from your laptop or computer or select a pre-served image in Mockitt Library.
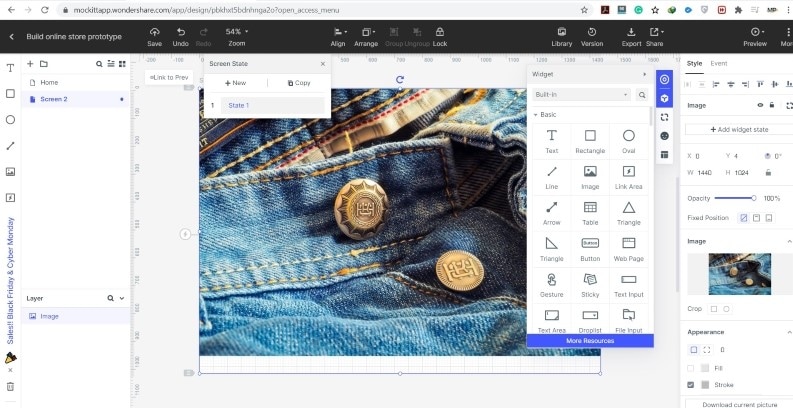
After we include the image, we want to have some little text. The text will be the brand name (You can use a logo instead), a tagline with a navigation bar.
Drag Built-it Text box from widget bar and place it where you want to write your brand name. Use the same Text box to write your brand tagline. In our case, "Classy You with Classic Trousers" is the tagline. There are many Text options to choose from, including its font, color, size, style, and other attributes.
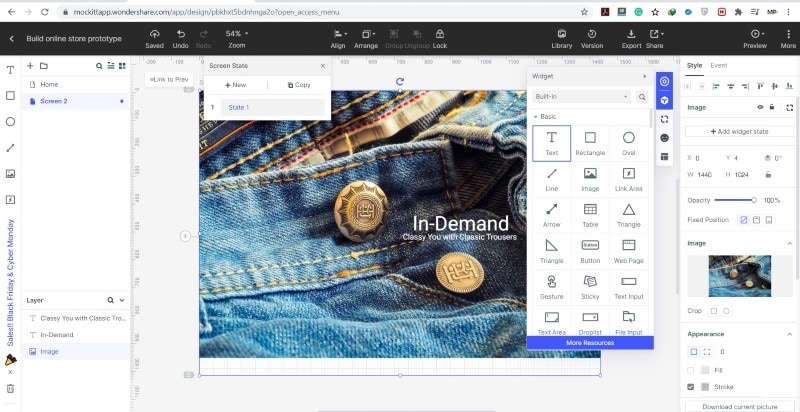
Step 6: Use buttons from the built-in widget bar for navigation purposes and place it at your desired position. In our example, we used separate buttons to show stock for girls and boys. In this way, when someone visits this website, they know where the required information is available.
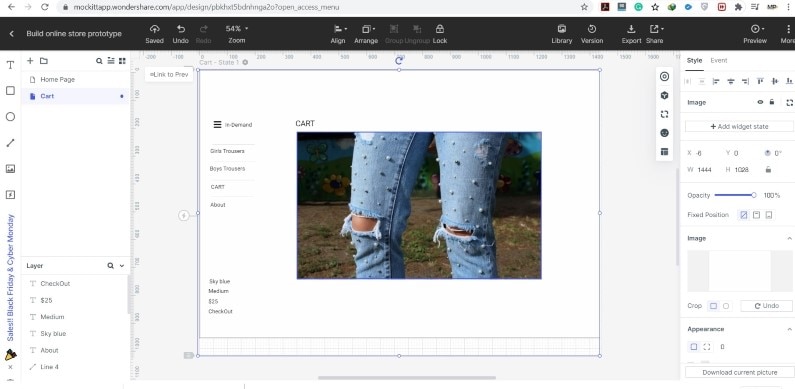
Step 7: Use all of the information we have gathered until this step and apply it. With the help of using those widgets and icons, build below the CART page. It shows the size, price, and color of a shortlisted trouser along with the checkout button. Again, this is just an example. You may want to change as per your needs.
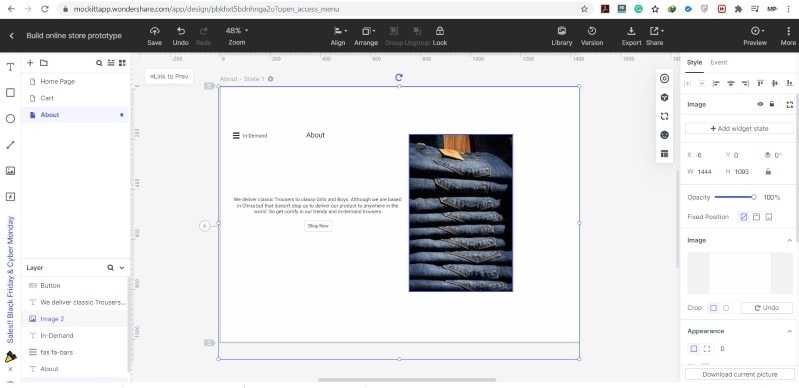
Step 8: Design the About Page with the help of one attractive image of your product. Make sure to write a compelling copy to persuade your readers. Use white space for a harmonious and balanced layout. White space helps the webpage to look less crowded and cluttered.
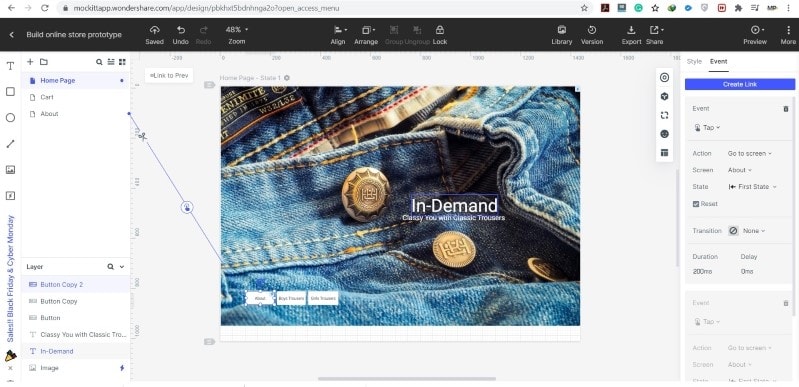
Step 9: In this step, you will see how to create a link between different screens within your website. We created a link from the About navigation button on the Home page to the About screen.
Drag the link from the About button and connect it with the About screen (See below image). On the right-hand side of the screen, you will see various options under the heading "Event." This window gives several options to choose from; options like what kind of action would you like to be performed when a connection builds up among different screens. You can select options among "Go to Screen," "change screen state," and "change widget state". Right there, it also shows the screen to which this link builds up.
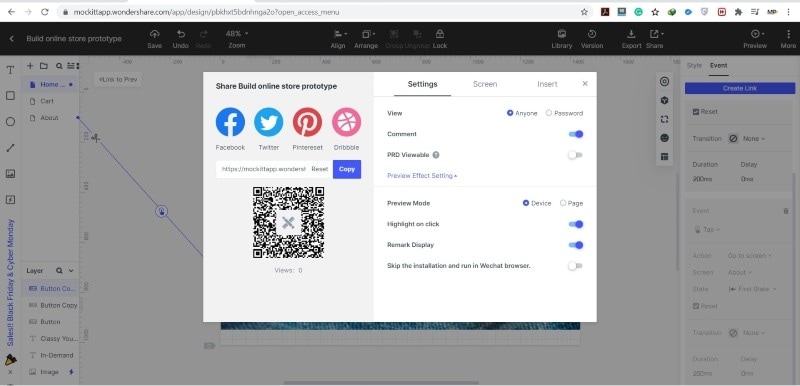
Step 10: When you complete the design prototype, you can share your design prototype with your stakeholders to have their input. It is a best practice to have all the stakeholders on board from the beginning of a project.
We have seen that it is a no brainer to build online store prototypes with Mockitt in few easy steps. With a clear interface, you can choose from various widgets and icons to create your first design prototype.
Mockitt for prototype designing should be your first choice before building your website with any free online store maker.
Nowadays, more and more people are inclined towards mobile commerce. They like to use handheld wireless devices such as tablets and smartphones to purchase products, so it is essential to create shorter screens. Mockitt gives you the option of choosing between various mobile templates, so it is recommended to design prototypes for mobile screens.
So, start using an online store builder free of cost for your web development, and with the help of Mockitt, give your design a new look.


