Create An Online Store With These Tips And Skyrocket Your Sales

In 2019 with a whopping 3.53 trillion USD e-retail sales worldwide, more and more people are now turning towards the web to create an online store for business growth. Lately, technological advancements have simplified web development, and one can create online shop with no prior coding experience. Although a couple of online store builder is there to choose from, Shopify and WooCommerce (WordPress Plugin) stand out among all.
While the WooCommerce plugin allows you to create free online store on WordPress, Shopify is not an open-source to use. However, if you are interested to create online store, Shopify offers 14 days free trial period to get a sense of what will be coming your way if you opt to go with this option.
Shopify and WordPress both have built-in themes, and with the drag and drop functionality, one can create online store to sell their products. Regardless of any template/theme, you choose within these platforms to create online shop; you always need to tweak your website design as per the end user's customized requirements. And, why not when website usability is found to be the most critical design characteristics in research conducted for US consumers in 2018.
Since website design plays a vital role in the purchasing behaviour of customers, it is imperative to discuss a few essential design tips here so that you get able to convert your visitors into regular customers.
Overall Layout
Imagine you walk into a store, and you come across a disorganized stock having no details attached to it and no one to assist you throughout your stay at that store. How would it feel like? Will you stay there for long, and even think of buying anything from there? Probably, not!
Similarly, if your website's overall layout found to be messy and cluttered with no guiding pointers; it would repel your customers, and hence you would end up with zero to minimum sales. Overall layout should be consistent among all of your web pages as it helps to build a brand image. For instance, if you are in the business of selling baby girls clothes and accessories, you might want to make such a website which helps you in putting your brand message across the parents of baby girls.
Thankfully, Wondershare Mockitt gives its users complete freedom to get their creative juices flowing. With tons of inbuilt widgets and icons, Prototype designers can create an overall layout in no time. Doing so would help designers and other stakeholders to decide between shortlisted prototypes practically and efficiently.

Navigation
User-friendliness of a website depends upon how much it is easier for a visitor to navigate within your website. And, to make it happen, use navigation menus and clear CTA (Call to action) buttons so that visitors can acquire relevant information as per their requirements.
With the help of Mockitt, designers can create dozens of navigation menus along with the few most commonly used (including Drop-Down Menu; Fixed Position Menu; Hamburger Menu; Mega Menu; Card Grid Menu) and can include these within their design prototypes.
Responsiveness
51.3 % of online traffic generated with mobile, so if you want to expand your e-commerce sales, making your website responsive for mobiles should be your top priority and not only for mobiles and computers but also with Tablets.
Mockitt gives you this option of selecting various template sizes based on your requirements when you want to create an online store. With the facility of making design prototypes for Tablets, Desktops and Mobiles, one could get a feel of the end product and make changes customized to the user needs. In this way, one can get an idea of how a particular web page would look like on mobile and tablets.
Few things to consider while you make your website design responsive for Mobiles and Tablets
- Use comparatively larger CTA's as mobile and tablet screens are pretty smaller than a standard Laptop
- Concise and Jargon-free copy to persuade your prospects in a better way
- Go with the condensed menu options to save some space
Imagery
Attractive visuals in the form of images attracts prospects and retain your potential customers more onto your website. More staying means more chances of buying.
Mockitt gives you an option of putting an image widget into your design prototype. In this way, you would get an idea that where on web pages you want your images to be and how would they look like if you place them on your intended position.
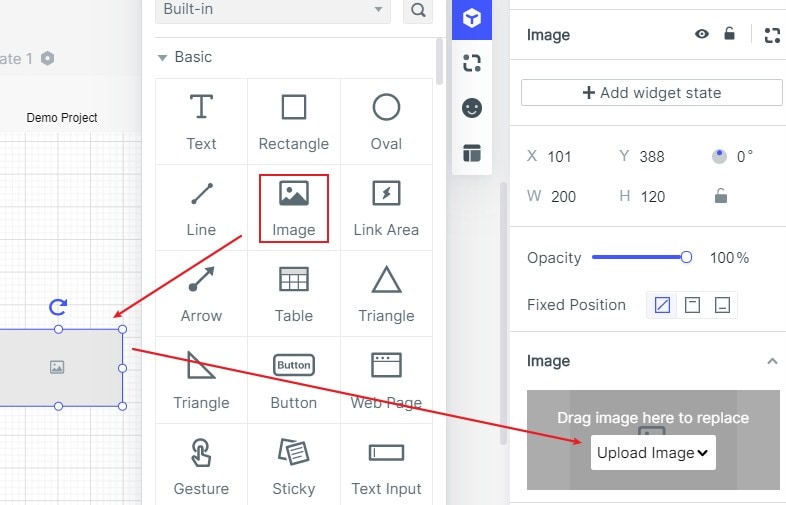
Few tips regarding images placement in your online store.
- Always optimize your images for SEO
- Use Tags and Titles within your images
- Resize your images as the website takes more loading time with massive file sizes
- Put images from every side angle as it would help buyers to take a prompt action
Font Types And Sizes
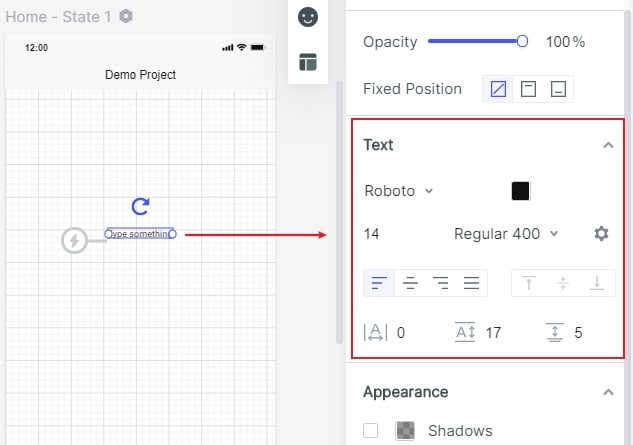
It is crucial to select appropriate font sizes while writing your copy and product descriptions. While you do need to keep things simple, you certainly want to intrigue your readers and induce curiosity in them. And to achieve that, use well-written copy with suitable font type and size.
Mockitt has a long list of various types and sizes available to make your written content persuasive enough so that it makes an impact on the subconscious mind and grabs attention. Try using multiple font sizes and types within your design prototype to identify which suits the most and serves the purpose.
Colours Psychology
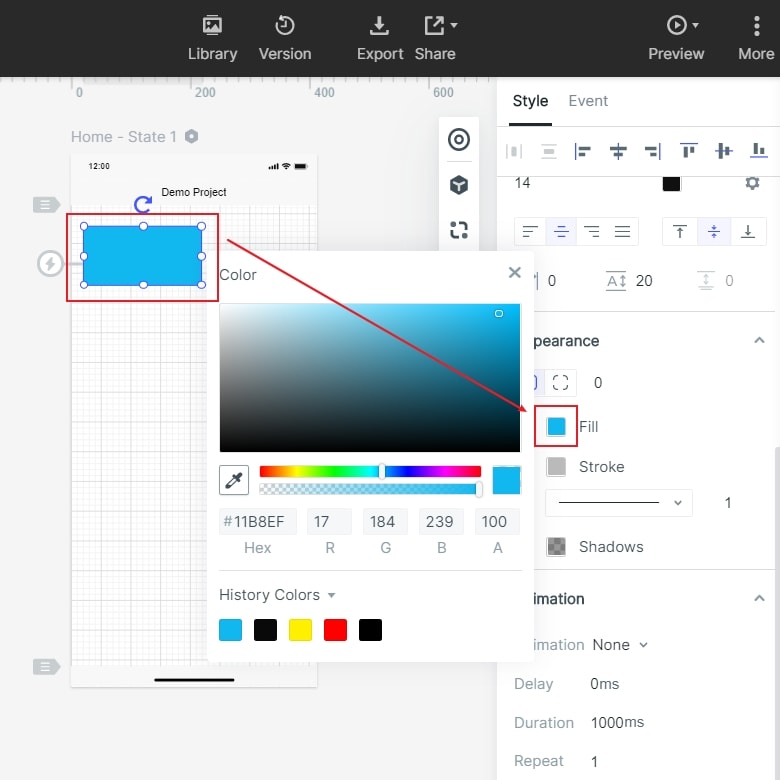
In a coloured button test conducted by HubSpot, red-coloured CTA button outperformed the green one by 21%. That is why colour combinations should be chosen very wisely when you aim to create an online store.
In our website example of baby girl clothes and accessories, you might want to use more pink colour combinations. Pink gives soothing effects, and also it exhibits love and kindheartedness. Similarly, every colour conveys its meaning, so it is crucial to understand the colour theory before designing your online store.
The blue colour appears to be popular among big names like LinkedIn, Facebook and Twitter.
To make your design process uncomplicated, Mockitt allows you to copy HEX Color codes from anywhere on the internet and place it after # in Mockitt colour palette. It will automatically identify a particular colour from the provided code, and you can use that colour right away. Else, you can also use your colour combinations within the Mockitt itself. In this way, you will be able to design prototypes as per desired colours and can even show that prototype to all the stakeholders for their consideration and approval.
Look Out For Competitors
If you are clueless about how you may want to create an online store with an impressive design, the best approach is to look out for your established competitors. Learn from them, their strengths and weaknesses and apply those techniques within your website.
So whether you would like to make a free online store with Woocommerce or use Shopify as a paid online store builder, It is crucial to apply all these tips in your design Prototype before moving towards creating an online store. Brainstorm for ideas, make a design prototype, consider all of the above information, get it approved, and apply it in your final product design. And, this goes without saying that you should identify and read your potential customers prior even starting with the Prototype design as It would save you a lot of time.
Step by Step Tutorial of Shopify Store Creation
So without further ado, let's start with our step by step tutorial of Shopify's store creation.
Step 1: Account Creation
Go to your web browser and head to Shopify website. Register for a trial version by putting your email, password and a store name.
Note: Have a unique name; otherwise, you won't be allowed to proceed.
Once you complete the form, it will take some time and show you the next screen where you will have to answer some more questions.
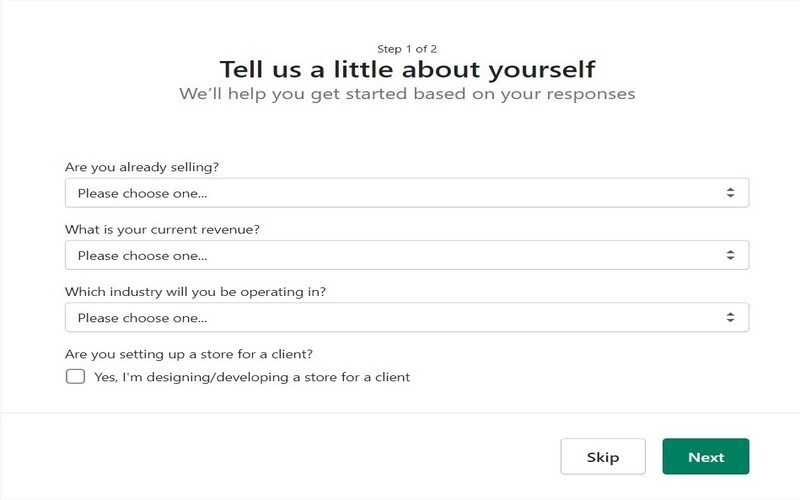
Source: Shopify
Details like Name, Address, City and Zip Code are mandatory to be filled.
Step 2: Get used to the Admin Screen
After you answer all the questions, Shopify will show the Dashboard where you will be spending most of your time. Here you will be able to see your order related details, products information, and you can customize your entire website from this window.
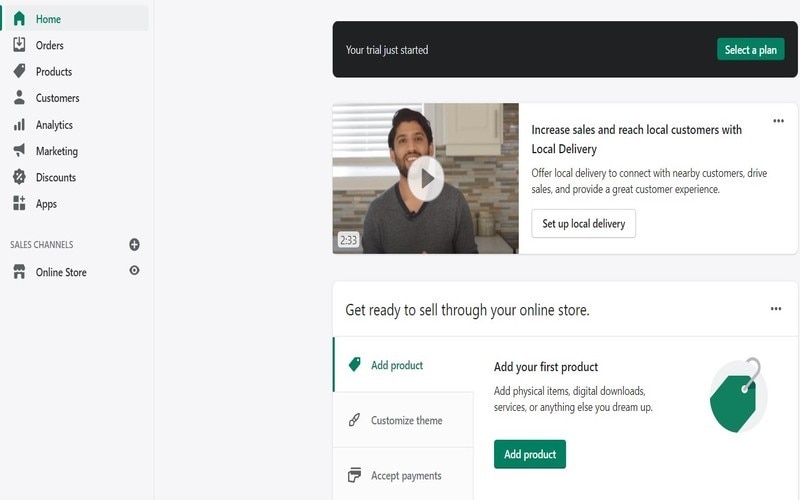
Source: Shopify
Step 3: Customization
At this point, you need to select a theme as per your tailored requirements.
But since we are about to start with some fun part; customization – Its vital that you have your website design prototype with you while you change the layout of your store on Shopify.
A website prototype will guide you along your journey of setting up a Shopify store. And you can create free online store prototype with Mockitt.
It doesn't matter if you are using an online store creator free of cost or not, as long as that platform allows you to customize your store, you can use Mockitt to create a prototype first. And, then with the help of that prototype, you can design your entire website on that particular store creator. Mockitt allows you to create a design prototype for your Web pages, Mobile and Tablet screens.
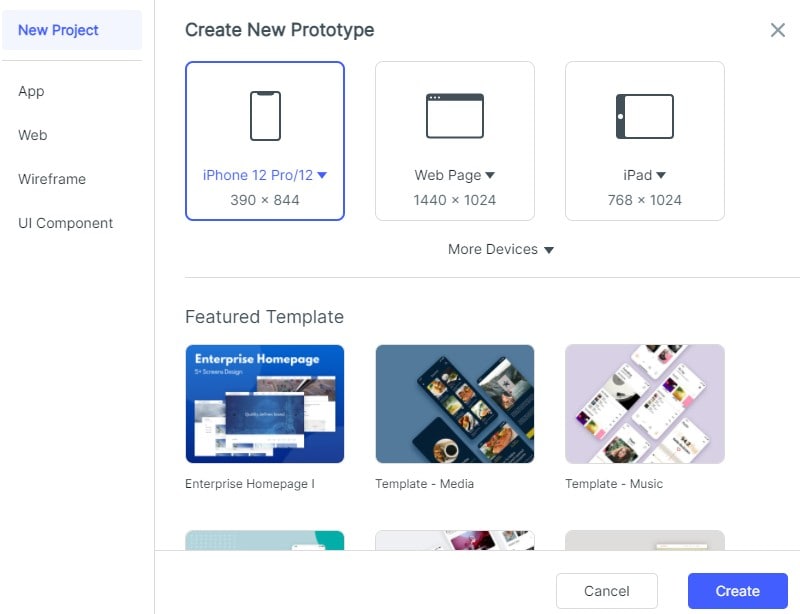
You can either start with the blank project or can select various templates in which much of your work would already have been done. If you select to go with Blank project, there will be a couple of options for you to decide. You can choose between various screens (Mobiles, tablets, Webpages) and also can create a custom screen size as per your tailored requirements.
And, once you select the template, you can start editing it as per your choice. It also has a template for eCommerce which you can use to create an online store prototype.
So make sure before you head on to Shopify, you get your design prototype ready.
Now let's look at the customization features of Shopify.
Shopify will set the default theme for your store, but you can change it by selecting from the library of free and paid themes.
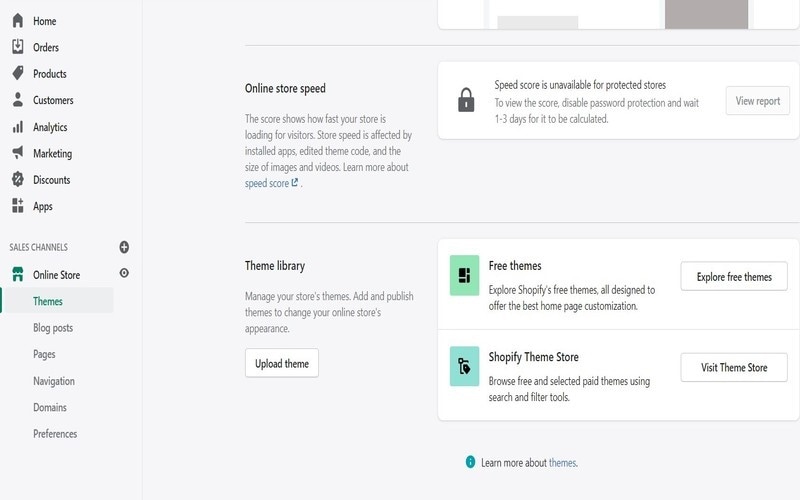
Source: Shopify
Go to "Online Store" under "Sales Channels" and click "Explore Free themes". You will be directed to a page where you can select your theme by clicking on "Add to theme library". The theme will be added to your store. You can also preview any changes you made.
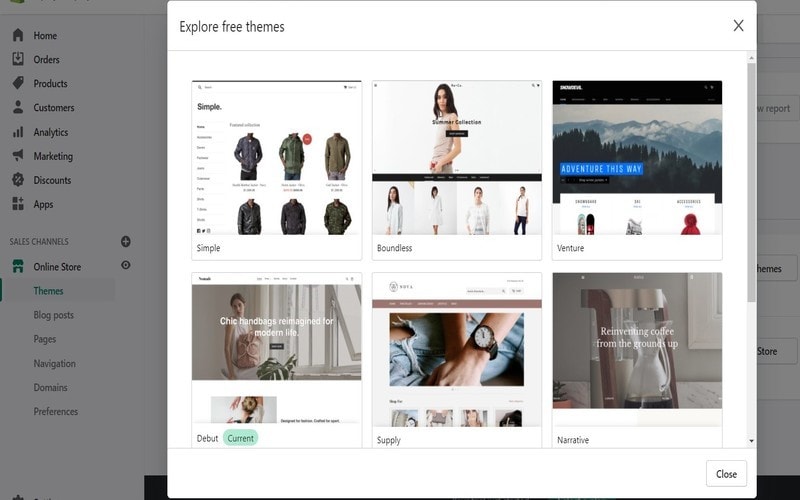
Source: Shopify
All themes come with the Shopify support so you will not have to worry about the performance. You can also find third-party Shopify themes on various other market places.
Make sure to read about all the features and included styles of the selected theme. There is a review section where you could check out what people are saying about that particular theme.

Source: Shopify
Once you select your theme, you can start to customize it if you want. You can edit the code, add free stock images, change text and more. You can get help from Shopify Experts if you need to do such changes that require you to code in HTML and CSS.
Step 4: Add Products
Now its time for you to add those products which you are going to sale. To do this, go to the "All Products" under the "Products" section and then select "Add Product."
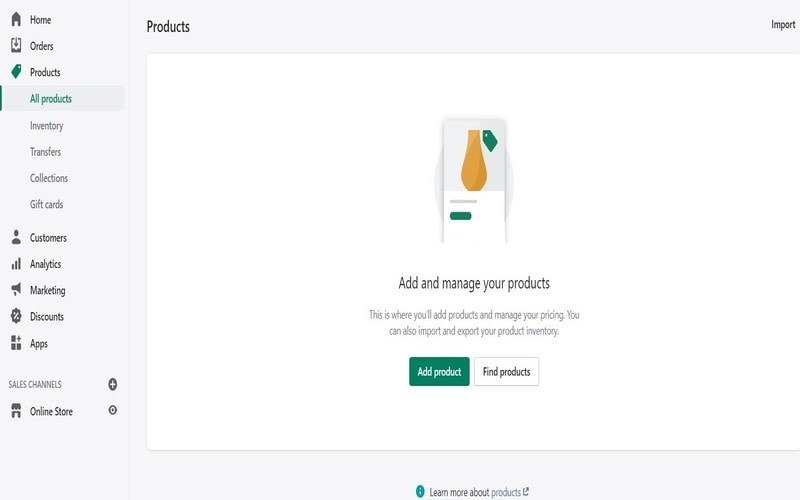
Source: Shopify
You can add Title, Description, Media, Pricing details and more. Make sure to add as much information as possible because it will help your visitors in selecting between various products.
There is a section of "Search engine listing preview" where you can add Page title and description using keywords. You can also modify the URL as per your SEO techniques.
You can check the box of variants and can include product details as per different size and colours. With the bulk editor, you can edit the products in bulk.
Step 5: Shipping and Payment Settings
In the Settings section, you need to add some general information about your store.
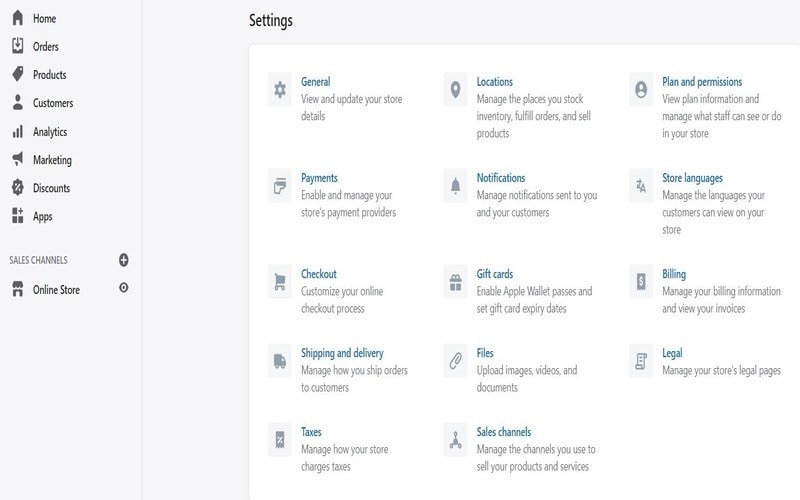
Source: Shopify
In the Locations section, you manage the locations where you fulfil orders, stock inventory and sell products. You store locations can be warehouses, retail outlets and any other place that is related to the Inventory.
In the shipping section, you can manage settings related to the order's delivery. Your customers will be able to choose their prefered delivery method on checkout. You can create a shipping profile to add custom rates for a group of projects. Consider actual costs, product weight and packaging while deciding on shipping rates.
At the checkout section, you can change settings for customer accounts, customer contacts and form options. If you want to acquire some extra information from your customers on checkout, you can set the options within the Checkout section.
Under the payment section, you can enable a couple of payment options for your customers. You should consider transaction fees and the locations of both your and your customers. You can choose from 100+ third party payment services providers for credit card payments. And for non-credit card payments, you will have options such as PayPal, Apple Pay, Amazon Pay and more.
You can manage your tax collections by accessing the Tax section. You can modify the settings as per your country and its rules.
Step 6: Custom Domain
Last but not least you can include your own purchased domain name if you want. Shopify will assign the domain like www.yourstorename.myshopify.com so you might want to change it for better SEO and brand image. You can also get a domain name from Shopify. Choose a domain name which is short and easy to remember.
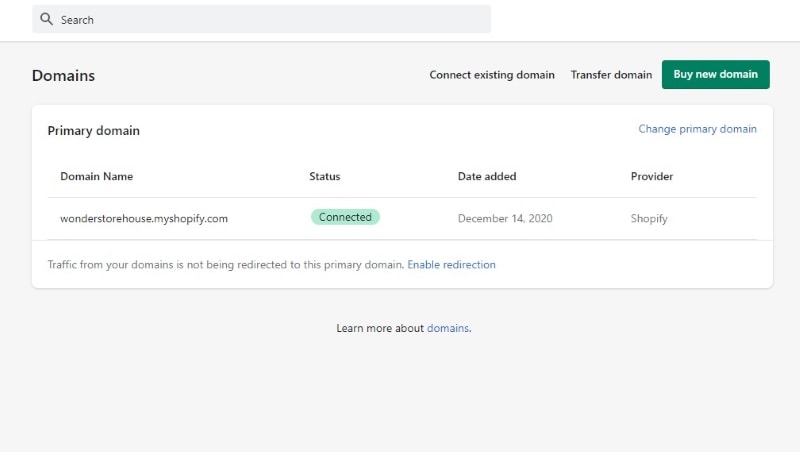
Source: Shopify
And this was the last step of this tutorial!
By the time you complete all the steps which we have mentioned, you will have your store up and running.
