How to Make Android Prototype Easily
Several people are looking for the best way to create an Android prototype. Making an Android prototype may sound easy, but without the right Android prototype tool, your story turns inside out. With plenty of tools claiming to offer the best Android prototyping experience, it is easy to get tricked into the wrong Android prototype tool. Fortunately, this article here to save you from the trap and treat you with the ultimate Android prototyping experience. In this article, we shall give you a detailed guide on how to make Android prototyping more comfortable and faster.
The Best Android Prototype Tool
Wondershare Mockitt is no doubt the best Android prototype tool you can have. This fantastic program is enriched with numerous excellent features that make it a perfect choice for all kinds of tasks and organization size. Users can create prototypes from scratch or the available program demos. The plenty of UI assets and templates helps to accelerate the design process because you don’t have to start building everything from scratch. These templates are of diverse industry designs, and you can also build your own and reuse them anytime.

From design to development, everything can be automated and made accurate with the help of the inspection and discussion features. You can switch to Handoff mode, Inspect and view codes, and comment on the project to push the project forward with more pace. Animate and prototype your websites or applications with interaction effects like action, target, and transition. You can connect several screens with objects to create a professional prototype without writing a single code.
Features
- It offers built-in widgets and icons for easy UI design.
- There are plenty of UI assets and templates suitable for diverse industries.
- It supports real-time collaboration and co-editing.
- The cloud feature ensures everyone is synced at any time.
- Support collaboration across various devices.
How to Make Android Prototype Online
Creating an Android prototype on Wondershare Mockitt is a seamless process. The following are some of the steps on how to make an Android prototype.
Step 1. Create a Project for Android Prototype
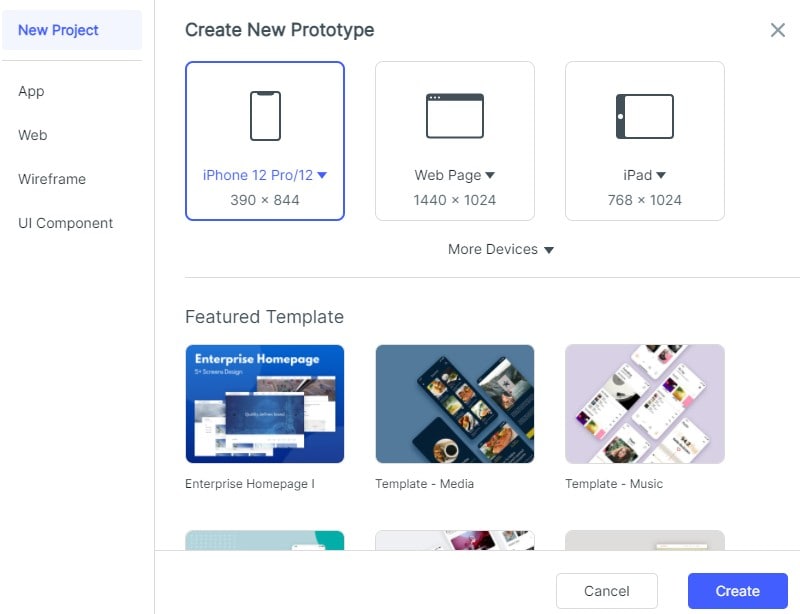
Begin by Logging in to Wondershare Mockitt using your correct credentials. Once logged in, click the "Create" button to create a new project. Then, name the new project and select "Mobiles" from the list of devices displayed to create an Android prototype.

Step 2. Add Widgets and Icons for Your Android Prototype
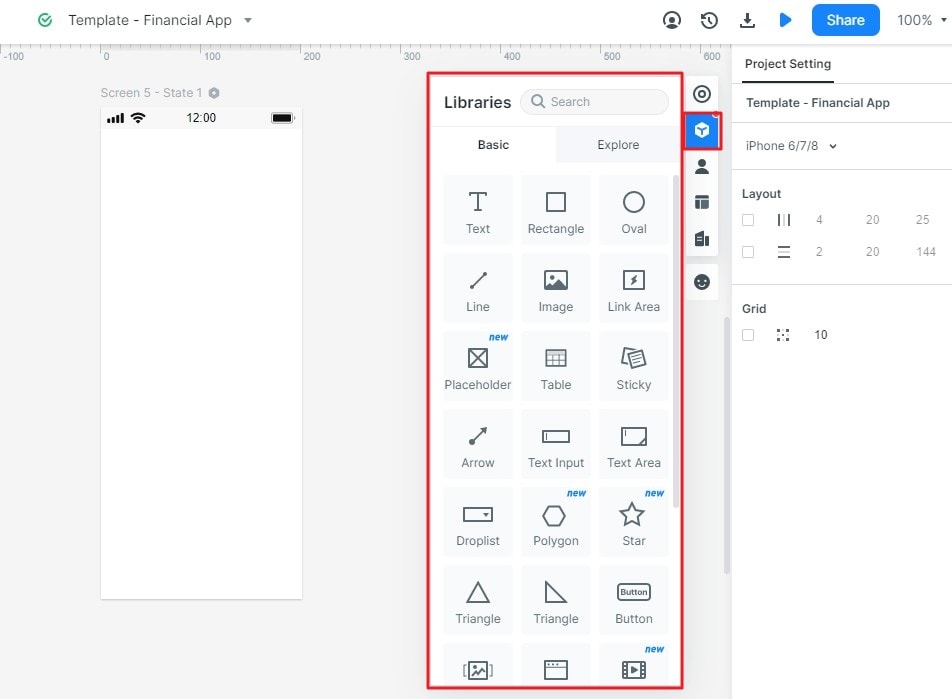
There are several widgets and icons available to design your screen. Access them from the fast widgets, My Widgets, built-in widgets, and icons.

Just drag them to the canvas and begin drawing your shapes. Use background colors and various templates to make your designs more appealing. Do this for all the screens you have, depending on the functionality you want to achieve.
Step 3. Create Screen Connections for Prototype Android
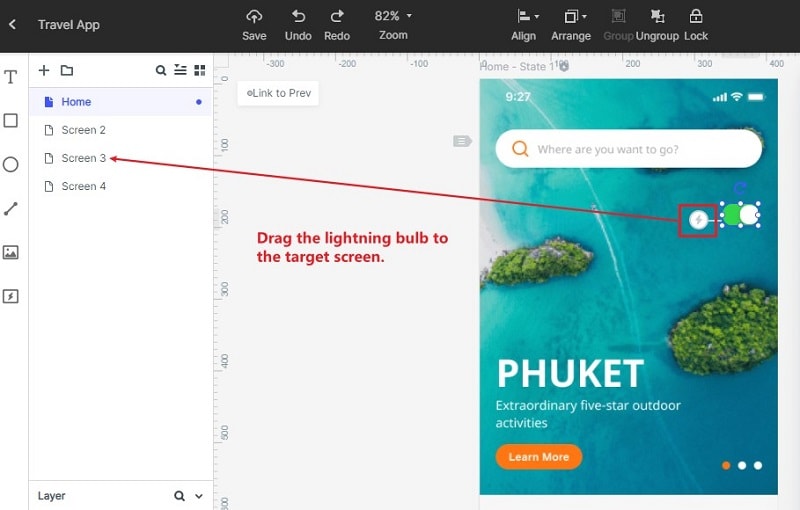
Once you have finished adding the various components to your screens, now it is time to create connections between these objects and the different screens you have created.

To link an object to a particular screen, click on the object, and drag the circular handle that appears on the right edge of the object. Drag it into the screen that you want to link this object with. Repeat the same procedure for other objects across the various screens until you have completed the connections you wanted to create.
Step 4. Preview and Share Your Android Prototype Online
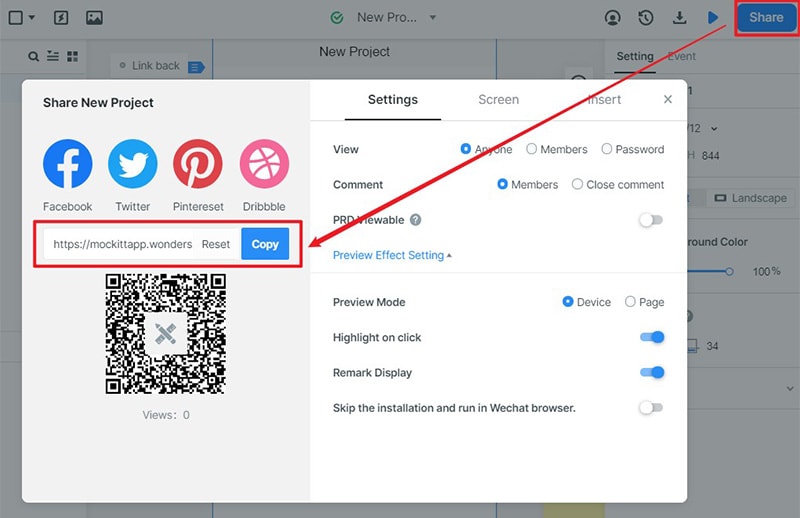
When the connection is complete, you need to test whether your prototype is working as you need. Click on the "Preview" button and interact with your Android prototype. If it is not satisfactory, you can always go back to improve on connections and design. For a mobile preview, hit the "Share" button and get the respective link and QR code.

Useful Tips for Making Android Prototype
Every designer, developer, and android project manager yearns for the best product. However, this may turn miles away from reality if the right prototyping tips are not put into practice. Experienced designers understand how vital prototyping is towards the realization of the end product. Let’s dig into some of the plausible tips for making an Android prototype.
1. Use Built-in UI elements
Building your prototypes from scratch is possible. However, there are plenty of up to par UI elements you can customize and create stunning designs. Starting from scratch will take much time, and your project will move slowly. Wondershare Mockitt, for instance, has several UI assets and templates for different types of industries and would take less time to fine-tune them to fit your need.
2. Use the Right tool
There are several Android prototyping tools, but a couple of them offers the best experience. Choose a tool that gives essential, prototyping features and seamless navigation. With plenty of features, you can design great-looking interfaces and functionality without much effort.
3. Take Feedbacks Seriously
When you collaborate with team members or clients on the Android prototyping tool, you will receive feedbacks or various corrections and recommendations. Take action on the feedback because you are designing the project to suit the test of that consumer. Gather lots of feedbacks and use them to improve your design and functionality.
4. Test Meticulously
Testing your prototype is important to see whether it works as you desire. With tests, you quickly pinpoint the various sections that don’t work accordingly. Do the tests severally until you can’t find any mendable flaw.
5. Organize your Elements
Repeating yourself every time you create the same line of products is annoying. To avert repetition, organize your assets and elements libraries. Also, you can customize various templates, widgets, and icons then save them under your own library. These optimizations will lessen your design the next time you start a project of the same type.
Would you interested in the UI prototype? Click and learn more about the What is UI Prototype and How to Do UI Prototype.

