How to Create a Program in 5 Simple Steps

Creating a program is not as hard as you might think. If you can get past the initial learning curve, anyone can learn how to create a program. All you need to do is dedicate some exclusive time each day or each week and you'll be well on your way to creating a program of your own. Your first one obviously shouldn't be a complex one because then your learning curve becomes that much steeper. Start with something small, like automating a daily task that you manually do on your computer every day. When you learn how to create a computer program with utility as the focus, you'll find that your goals become clearer as well. Let's learn how to create a Windows program as an example.
5 Steps to Create a Program
Step 1: The Initial Legwork of Creating a Program
The first step is to figure out what you want the program to do. As we said earlier, the utility part gives clarity to the rest of the process. It doesn't matter what the purpose is as long as you have it clearly in your mind. What does the program do, and who will find it useful? This question will tell you how to design your program and what features are required.
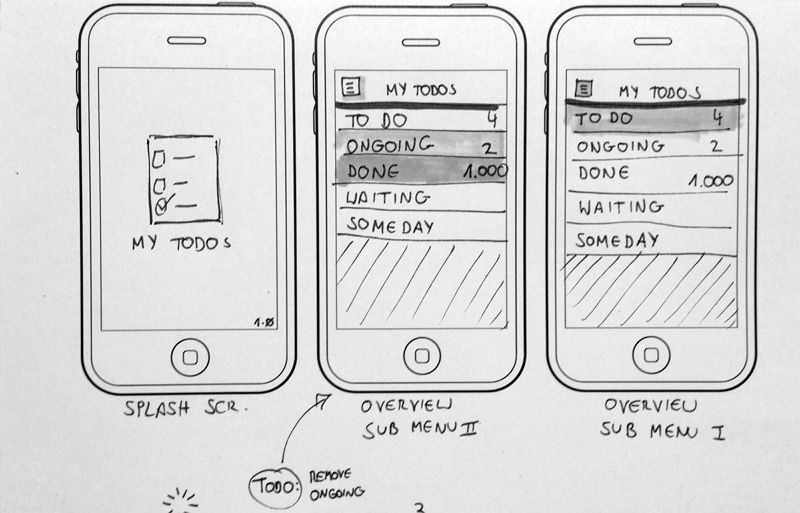
The next stage is to make a sketch of what the pages and interactive elements might look like. This sketch or drawing is very important because it crystalizes the idea of a program into an actual form of some sort.
You may also want to list out the features of your program, including aspects such as what the program will do, what it will look like, what platform it's meant for, and things like that. Once you have the initial blueprint on paper, you can move to the next stage.
Step 2: Wireframe your Program
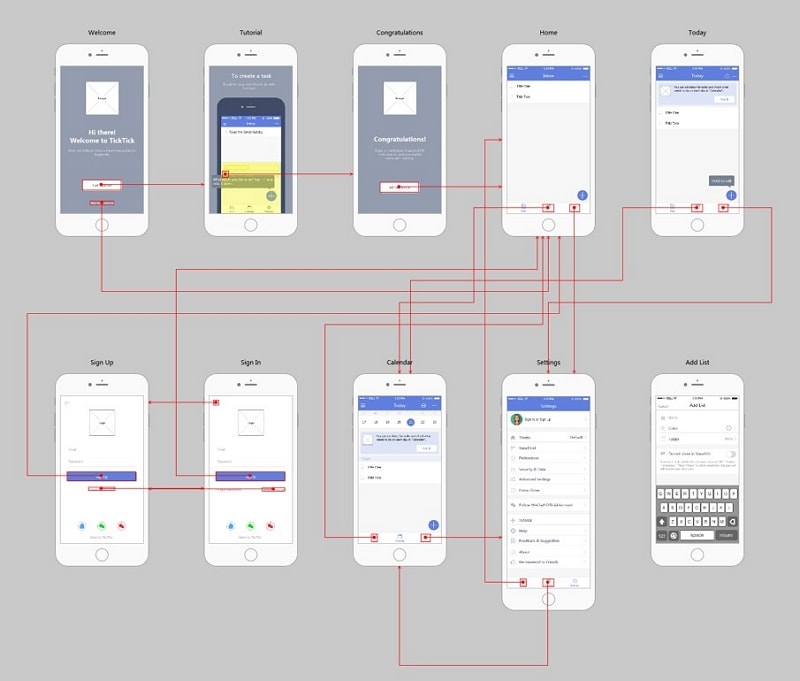
The next stage in creating a program is to give the program a proper flow. What page comes first? What page or state does each button lead to? And so on. This logical flow is best done using a wireframing program like Wondershare Mockitt. It will help you create a tangible version of what you have in mind and what you have in your initial notes. It will also force you to rethink some parts and maybe redesign some functions so it's easier for the user. And that's the primary purpose of wireframing and designing a mockup - to define the UI or user interface and the UX or user experience.

Wondershare Mockitt will help you quickly create a wireframe for any type of software program or even a website. It's very easy for beginners to get started on but it also has some advanced underlying features that you will discover as you start learning how to create your own program. Inside, you'll find a rich asset library with widgets, icons, and other components to represent the different parts of your website. You'll also see a vast collection of transitions, animation, effects, and other dynamic elements. The drag and drop feature allows you to rapidly build a wireframe and even prototype it so it looks and behaves like a fully coded program. Of course, it won't have the backend database connections and other aspects of a fully functional program, but the interface part will be complete, and you can actually see how the program will interact with the user as they navigate from page to page and section to section.
The best part about Wondershare Mockitt is that it allows you to collaborate with others so they can review and comment on your designs. From a development standpoint, it automatically generates all the HTML, and style code for various platforms, which means you can inspect the code as the design is underway.
Steps to Create a Wireframe for Your Program
- Create a new project:
Name your project and pick a device type that it is intended for. When you've created the project, you'll see the first screen where you can start the wireframing process.
- Design the program:
This is where you create new screens/boards to show each page and its elements, and interlink them with dynamic effects and transitions. You will need multiple pages because you'll also be showing interactions between these boards to mimic the user's interaction with your program.
- Start adding widgets, icons, and other components to your screens. You can simply drag them from the Fast Widget panel on the left or the more comprehensive options on the right. You can also double-click a widget to place it on your screen and then move it into position.
- Drag the link icon to the left of a widget and drop it on the target page, then edit the link to add an interaction or a gesture. For example, link page 1 to page 2 and add a swipe-left gesture. This shows that if you swipe left on page 1, it will take you to page 2. Keep doing that until all your pages are linked.
- You can now add annotations to your wireframe to describe various aspects. This will help stakeholders understand certain complex parts of your wireframe.
- At this point, you can also add interactive animations such as dynamic widgets. This will allow you to control the actions of widgets without having to alter the states of the other widgets on that page. It's different from a page state and it gives you more granular control over the elements on a page.
- Preview the Design and Prototype
You can now test out your prototype to make sure it flows the way you designed it to. The advantage of using Wondershare Mockitt is that your prototype is fully interactive, so every tap, swipe, and pinch will make the wireframe behave like the final program.
- Share your Prototype
It is now time to have another user test out your prototype and provide feedback that you can use to tweak your logic flow and program features. This is an important part of the process because a second set of eyes can give you a more objective view when creating a program.
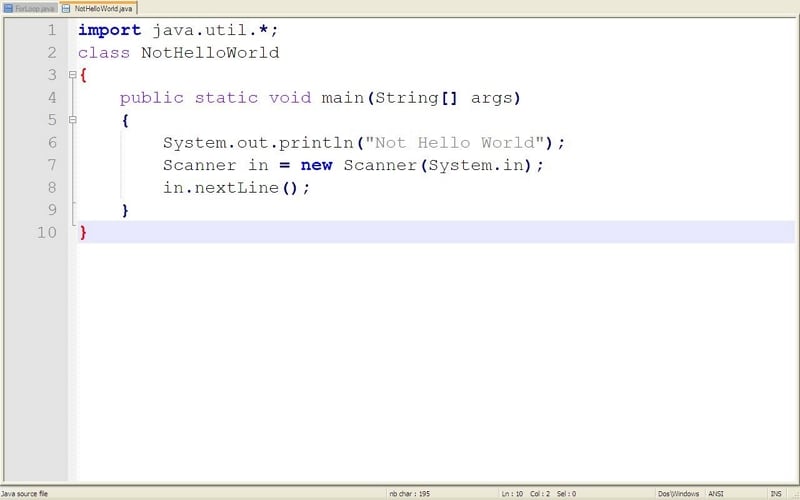
Step 3: Coding the Program
The next stage is to write the code and compile the program. There are several ways to do this. You can use a text editor like Notepad to write the code, but using something like Sublime Text or Notepad++ JEdit is recommended because it will help you parse the code and highlight the syntax so you can spot errors right away. Notepad++ also lets you compile and run Java programs.
If you're using a language like Python or Perl, then there's no need for a compiler because these are what are known as 'interpreted languages' that won't require a compiler to run. If not, download the appropriate compiler. If you're using Visual Basic, you can write the code and directly compile by running the vbc command in the command line once your code is saved in a .vb file. The compilation will yield an executable file
Step 4: Package the Program
Creating a program package is nothing more than creating a directory of interfaces and classes for your program. This is done in different ways depending on what programming platform you chose. You can define your own package, but keep in mind that the purpose of packaging is to prevent naming conflicts and help the program find and use the interfaces, classes, etc.
Step 5: Test and Run the Software program
After compiling your package, you are now ready to run the program and test it to see if it works as it should. If you've written a program in Java and you're using an environment such as Eclipse, you can directly run the program by right-clicking the source file that contains the main() method and, from the contextual menu, choose 'Java Application' in the 'Run As...' option. If you need to make corrections to the code, Eclipse will automatically recompile the code so you don't have to do it manually each time.
Summary
In essence, creating a program for the first time involves a slightly steep learning curve, but it will give you all the skills you need to pursue a career in computer programming, if that's what you desire. The wireframing part is crucial because it gives form to the initial idea of the program and is an essential cog in the software development life cycle. Wondershare Mockitt makes it easy for a potential developer to understand the design side of the software so they gain a more holistic view of the entire process instead of just one part of it. In addition, it helps generate code for the components and code for various styles depending on the target device for the program.
