How to Design a Software for Beginners Step-by-Step
There is no doubt in saying that designing a software is not an easy task. It takes a lot of skills and even a small mistake can create many problems. That's why if you want to design a software on your own, then you must execute everything properly. Today in this article, we will provide you a comprehensive guide that will teach you how to design a software from scratch. It will clear all of your doubts and help you design a software very easily. So if this sounds useful, then stick to this article.
The Best Tool to Design a Software
In the past few years, many software designing tools have come into the market. However, now you have a lot of options but it can also be confusing to the right one. So if you are new to software designing and don't have much experience, then Wondershare Mockitt is the best option for you.

It is one of the most popular wireframing and prototyping tools that is used by professionals UX designers. It allows you to build highly interactive prototypes, which are accessible on the internet, both on mobile devices and desktop. Wondershare Mockitt also helps you create a graphical, interactive presentation of your ideas to communicate to a development team or your clients. To help you understand better, here are some main features:
- Asset Library- It offers tons of widgets and icons that can be used directly. You can also save and reuse your widgets very easily
- Easy Designing-WondershareMockitt enables you to design a beautiful prototype and build dynamic effects without writing a single line of code.
- Cloud Editing- You can design prototypes without installing the software. It keeps your progress fully secured and you can access it from anywhere
How to Design a Software Easily
After discussing the basic information regarding Wondershare Mockitt, let's move further to the designing process. So here is the step-by-step guide that will help you design a software very easily:
Step 1 - Choose A Project
First, you have to decide whether you want to create a mobile project or a web project. Wondershare Mockitt allows you to create prototypes for Web, Mobile, Watch, and TV. Once you have decided, simply log-in to your Wondershare Mockitt panel and click on "Create Project" to start prototyping. You could also create a blank project, select the right type of device, and name the project. Simply take your mouse cursor to the project and choose settings to change the name of the project, device size, type, and save.

Step 2 - Add Widgets And Icons
Now you have to add widgets to your project. On the left side of your screen, fast widgets are present. To add them, you can either double click on them or drag them to the canvas or simply click on the hotkeys and draw. On the right, three types of assets are present: "My Widgets", "Built-in Widgets", and "Icons". You can double click the widgets or simply drag them to the canvas to add them. If you want to edit a Widget, you just have to click it and then you can edit or change its properties. When you have designed a widget, you can save them to the My Widget by dragging it to My Widget panel.

Step 3 - Add Links Between Screens
To add links between screens, you have to choose a widget and press the New Link. After that, you can set actions, gestures, target state, and animation. If you want to convert Widget to Master, then you have to Create Master, which you can do by right-clicking the widget. Then simply drag the master to the canvas to make instances. You can also use the Sticky Widget to include text notes to explain your design.

Step 4 - Create Interactive Animations
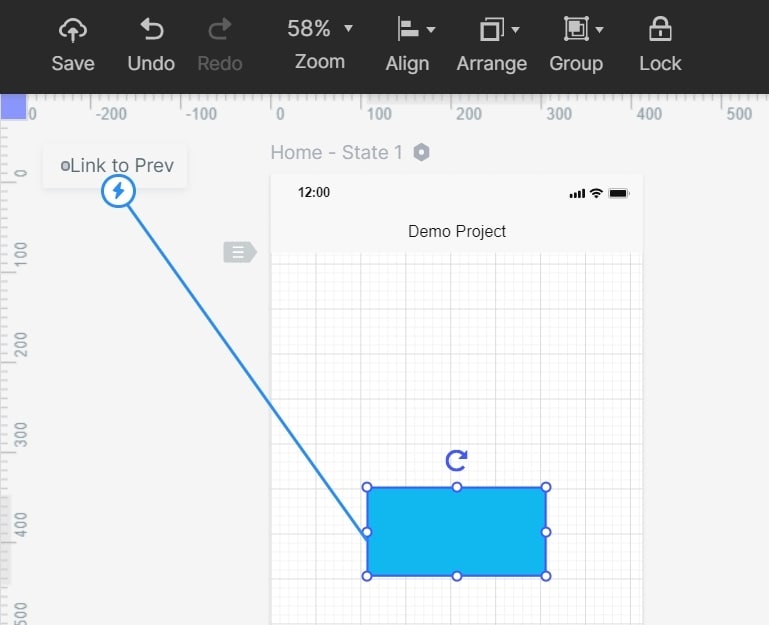
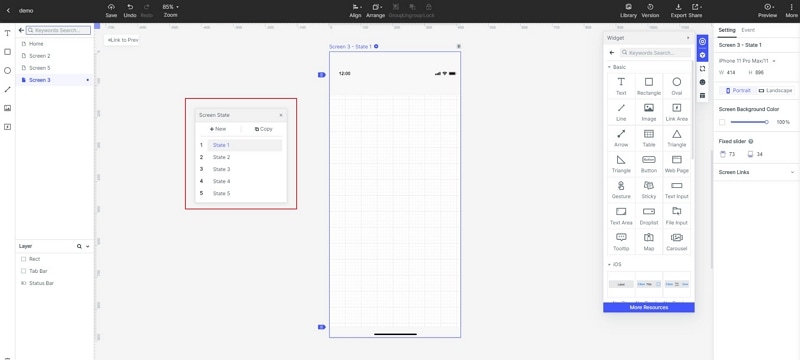
There are different ways to create interactive animations. You can opt for the screen state, which is complicated to reuse and save. But if you are a beginner, then you should use the dynamic widgets to create interactive animations. To create animations, press the Widget icon and select New Widget. Now select the State icon, which will open the State Panel. Select New State and create a new state. Now simply drag the link icon to the decided State to link all of them.

Step 5 - Making A Carousel
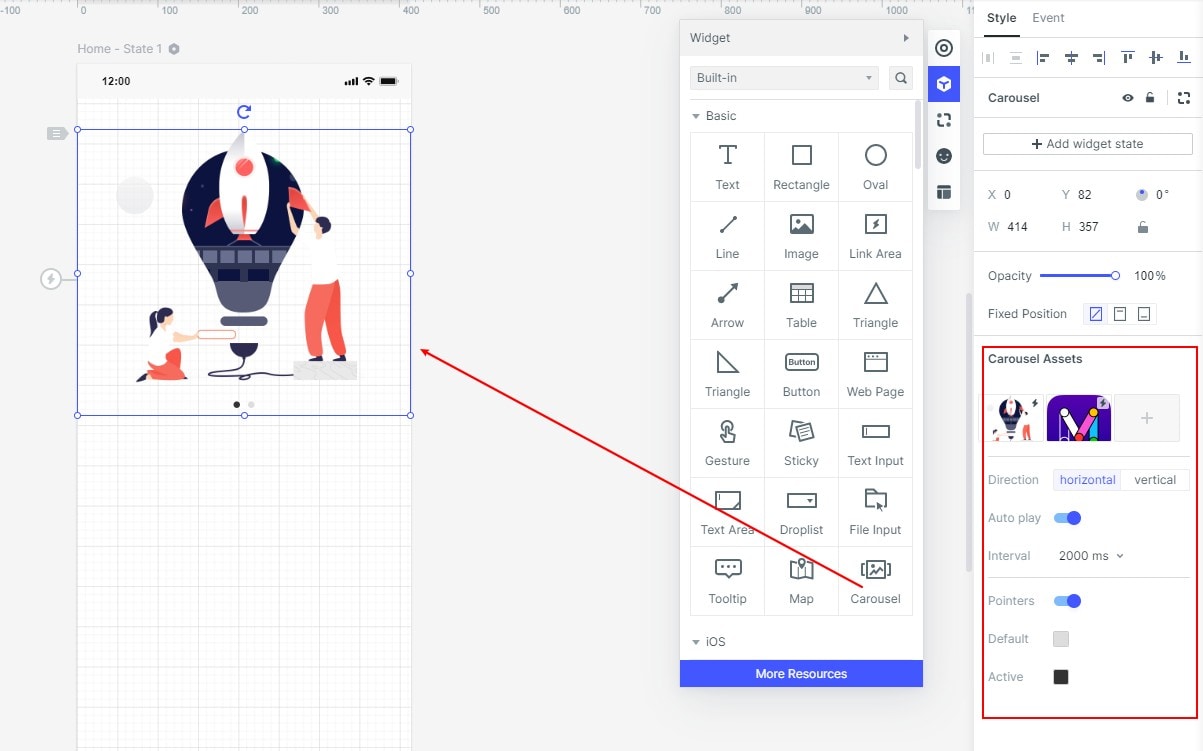
Open the built-in components, and drag the carousel. Now to adjust the carousel order, drag the image in the thumbnail. You can set both vertical and horizontal scrolling and indicator points can be assigned automatically to a suitable position. Now you can select an automatic carousel, which will fix a time interval or you can also choose click on the carousel option.

Step 6- Preview And Share Prototype
Once your design is ready, you can also preview it to check how it would look on PC and Mobile. Simply click on the Preview option and you will able to interact with your prototype on PC. In case, if you want to preview it offline, then you will have to click download to download to HTML5ZIP file. After downloading the file, you can use Chrome to access the index HTML file. To view on mobile, press the share button to generate a sharing link. Download the Wondershare Mockitt Player and preview your prototype on your mobile device. You can send this sharing link to your team members or clients, so they can also view your prototype. The good thing that they won't need to register to Wondershare Mockitt to access this file.

Summary
Some years back, it was very difficult to design a software or prepare a custom software design. Only professional coders and developers have the ability to do it but now things have changed and anyone can use tools like Wondershare Mockitt and start their software designing journey. You can design software even if you don't have any coding knowledge and experience. However, you will have to put effort and time but it makes things a lot easier and convenient. Hope this article will solve some of your queries and provide you some valuable information.

