Creating a Prototype with the Zeplin App

Zeplin app is a well-designed application program that works as a collaboration tool bridging the gap between developers and designers by offering a connected space for product teams. Though it is quite robust but feels lightweight and thus is the industry standard for handing off designs to engineering. The handoff is facilitated by taking a design from Adobe XD, Photoshop, Sketch, or Figma and exporting them into a format that can quickly generate style guides, code snippets, assets, and specs. This article offers a quick walkthrough for creating a prototype with the Zeplin app used by leading product teams and introduces an alternative.
- Part 1: How to create a prototype in the Zeplin app
- Part 2: 5 Things to Keep in Mind Working with Zeplin
- Part 2: How to create prototypes with the Zeplin app alternative
How to create a prototype in the Zeplin app
As you know, what Zeplin is, it is essential to know that it can serve as the 'single source of truth for product teams because of its capability to create component libraries, generate living style guides, and versioning design assets. Let us see how a prototype can be created using the Zeplin app in 10 steps:
1. Zeplin Login- The first step includes creating a Zeplin account or logging in if you already have one. Then, download the Zeplin desktop app or Zeplin iOS app and the plugin for Sketch
2. Preparing a Sketch File- In Sketch, organize your layers and assets. Depending on the type of projects, the asset's naming convention is automatically adjusted, making exporting them easy. Create symbols for common assets and elements and save colors and fonts in Document Colors and Text Styles, respectively.
3. Making assets exportable in Sketch- Once the assets are grouped into symbols, the page is opened up in the Sketch file. Highlight the group and locate the 'Make exportable' option. Choose the slice option to export assets directly from Zeplin.
4. Creating a new project in the Zeplin desktop app- Depending on the platform you are building for, choose the project type. Different codes will be generated based on the project type. Select the project resolution similar to your Sketch artboards.
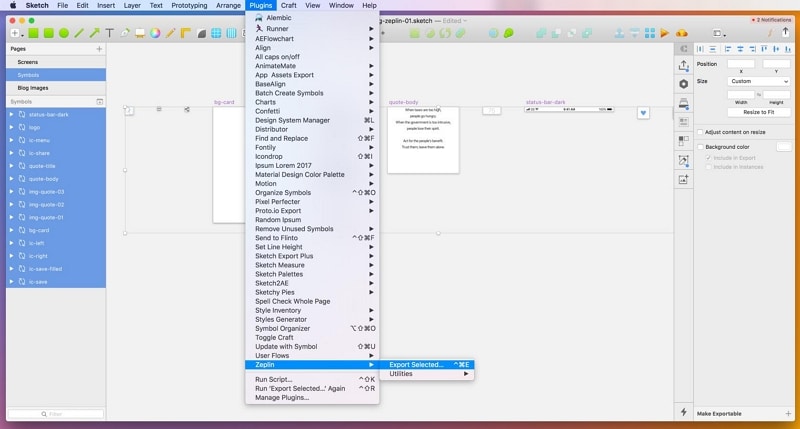
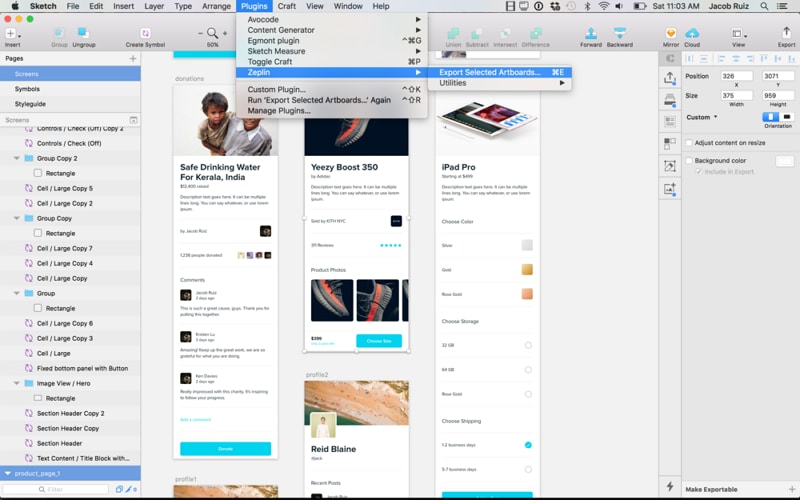
5. Exporting the Sketch artboards to Zeplin- On highlighting all the artboards, you would like to export to Zeplin, press E on your keyboard. Do the same for all symbols.
6. Organising the project in the app- As the Sketch artboards have been exported, the artwork is to be organized into sections. For doing this, select a similar screen to group into categories from the dashboard view.
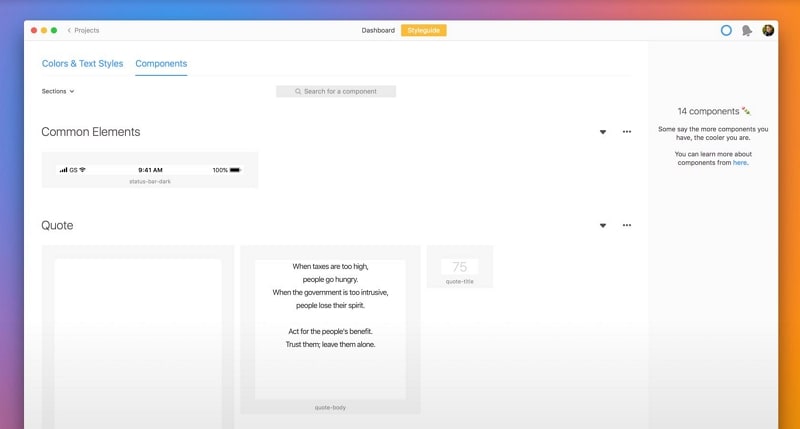
7. Utilizing components- This is the most usable feature of Zeplin- organizing assets into component libraries. This comes in handy when a project design is developed on multiple platforms by different team members. The next steps are: Select the Styleguide tab, select the secondary tab Components, Organise these into sections such as Images, Icons, Common Elements, etc.
8. Exporting style guides from Zeplin- Locate the share button from the dashboard view of the Zeplin project. Go to Share, then Scene. Select enable and then open to generate a dynamic style guide. A shareable URL will be made available to you.

9. Annotating your designs in Zeplin- To add notes to your design, select the add note icon and pin it to a component in the detailed view of a screen. A note can also be added by holding down Cmd or Ctrl and clicking anywhere on the screen.
10. Sharing, collaborating, and using version control- Here it is, your Zeplin file is ready to be shared with the team. Continue updating the file by exporting artboards from Sketch. The best part is the app will automatically version control your files and allow you to continue collaborating.
As seen from the Zeplin example, a workflow bridge empowers designers to annotate screens and make the handoff phase easy with precise and complete specifications. Flexibility is the most significant advantage of the app updating assets dynamically, exporting assets into native code, saving time and tedium. Thus, Zeplin is a crucial piece of any product development puzzle.
5 Things to Keep in Mind Working with Zeplin
1. Sizes of Artboards
The artboards are the self-contained design areas where you can draw your designs. So, it’s better to understand the different sizes of the artboard before drawing. Artboard sizes may differ according to the needs of screens. Different platforms come with varying sizes of the artboard.
iOS: The artboard size for the iOS devices inside the Zeplin app is @1X:375 x 667 px
Android: And for Android devices, the size of an artboard should be dpi: 360 x 640 px.
Web: Web pages come with different web pages. It depends on the devices on which your design will be displayed because the same web page can be accessed on multiple screens simultaneously. Your product can be visible on mobile devices, laptops, and tablets.
- 1920 x 1080 px
- 1200 x 900 px
- 1024 x 768 px
- 320 x 480 px
2. Share Responsive Design on Different Screens
Remember, developers are not minded readers; they’ll design what they see. So, it’s better to create breakpoints on the Zeplin app which you already created. In simple words, place your design on different resolutions and devices. It can also help the designer to understand whether a particular design fits on all screens or not.
Simply place your single design one by one on different resolution devices and adjust the design accordingly to the developer’s need.
3. Design Raster Images
Always use the maximum size of raster images to avoid any loss of quality when your design result is displayed on large screens with higher resolutions. If you don’t maximize the size, your design will pixelated, and your developer would not like this. Here’s a tip, if you’re about to create a design for an iOS app, make sure to set the size of the image to @3x. This will prevent the image from pixelated.
4. Create Exportable Elements and Images
You can design anything you want, but everything should be exportable from the Zeplin app. Developers may ask for multiple elements to export. So, it’s better to make elements exportable. Here’s a tip for creating elements exportable as a whole. Make all the elements exportable and arrange them into the group. In this way, Zeplin app developers can easily export a group of elements for their usage.
So these were the exportable element we were talking about. So, what if the developer asks you to export the image? No need to panic; exporting images is the same as exporting the elements.
5. Make Space Around Icons
There may be some imported icons that are surrounded by areas. It may good for the designers to export the item, but it can be challenging for a developer to adjust margins between objects. If you send the icons to the developer without removing the spaces around the icon, the developer will probably ask you for revision.
So, beware of such things and avoid yourself for revisions. The same goes with the buttons as well. Make sure to remove any unnecessary area around every element present on your design, either its icons, buttons, or texts.
How to create prototypes with Zeplin app alternative
Though Zeplin has many helpful features, it is not ideal. The free plan offered by Zeplin is limited to one project, and the same project cannot be used for iOS and Android. The workflow only becomes accessible once the flow of working with Zeplin and other mentioned apps is understood. However, the learning curve of the app requires some attention and time. Thus, we introduce an alternative, Wondershare Mockitt- a simple and easy-to-use collaboration and prototyping tool.

With Mockitt, you can:
- Work both on macOS and Windows as it's an online tool, it fits all systems.
- Create wireframes and prototypes for free, you can create up to 3 projects with the free version.
- Animate and prototype apps/websites fast.
- Communicate seamlessly and hand off specs.
- Use abundant templates to design effectively.
- Keep every project in sync at all times.
- Bring everyone in the enterprise together.
Creating prototypes with Mockitt:
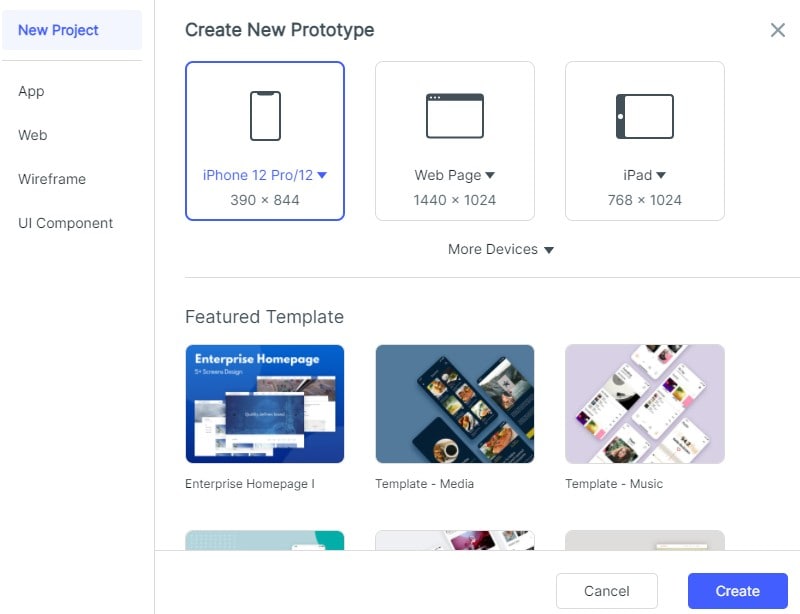
- Click on "Create" to create a new project and choose the project type as per the device.
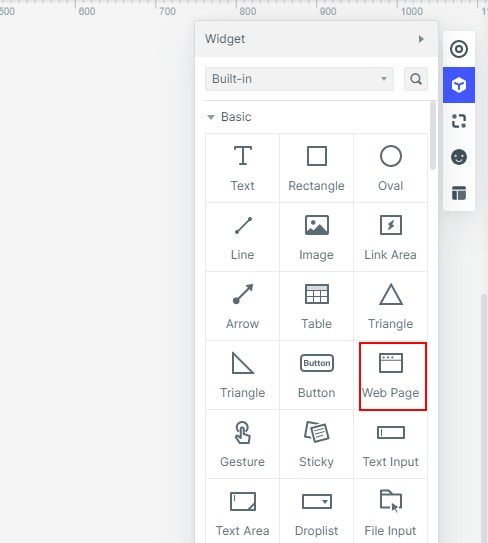
- Add widgets in "Built-in", then edit the properties of the widgets in the workspace.

- Save the widgets to 'My Widget' Library for future use.
- Add links between screens to set the action, gesture, and animation for the widget.
- Use 'Sticky' in the "Built-in" library to add notes to your design.
- Use demo widgets and screen from the templates in "Resources".
- To better manage the asset library, add folders, labels, perform batch management, high-efficiency search, and replace images.
- For creating Interaction and animation, use dynamic widgets with the Screen state.
Optional Features to add life to your design:
- Add audio.
- Add video.
- Add Google Spreadsheet.
- Add States for animation.
- Create States of the widget and link them.
- Create a navigation bar, set transitions effect on a dynamic widget.
- Make a Carousel by adding, adjusting the order, and setting scrolling.
As you are aware of the basics of designing, head to Mockitt for creating your prototype.
