How to Create Prototypes with Uxpin

The trend of all in one designing tool has taken the industry by a storm. These tools help users create, collaborate, discuss, and test the wireframes, prototypes, layouts, mockups, and everything else without coding.
One of these innovative tools is UXPin, which offers the design and management ability for the complete UI/UX project on a single platform. Furthermore, it provides a dedicated artboard surrounded by creative and unique design elements.
Such tools and software can certainly meet your creative requirements, are easy to use, leverage from drag and drop functionalities, vector shapes, preview, handoffs, and much more. These solutions help reduce the time and effort put into creating bespoke applications or website designs.
- Part 1. What is UXPin?
- Part 2. How to create a prototype in UXPin?
- Part 3. How to create a prototype with an UXPin alternative?
What is UXPin?
UXPin is a bit different from the other web-based design tools that you may have come across. It is said to be an end to end UX platform that helps create design systems and not just a screen or page design.
UX means user experience, and where the other tools lay focus on User Interaction, this tool helps create new experiences altogether. Plus, apart from a single person use case, the UXPin material design UI kit can serve larger teams of designers.
UXPin allows creating designs from the conceptualization stage to testing and development while maintaining design consistency all around. Plus, the ability to allow multiple users to lean in on the work process provides a credible and robust understanding between the engineers, designers, developers, and all the other stakeholders involved in the project.
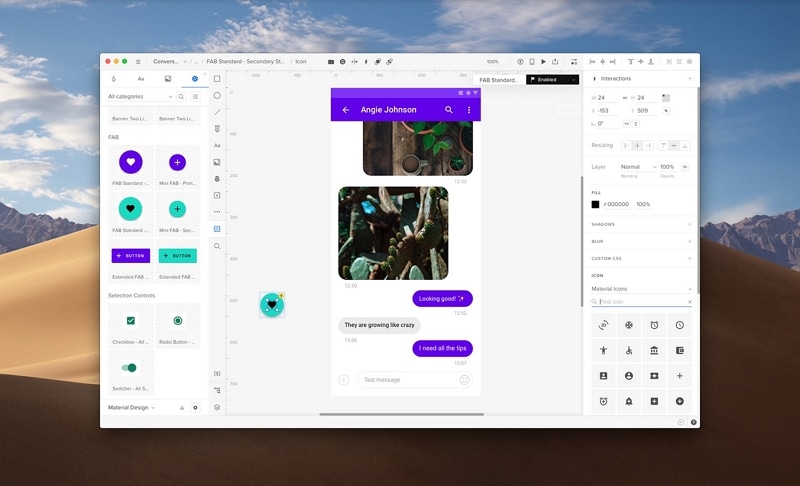
The UXPin UI kit is decorated with plenty of items, elements, interactions, variables, and expressions. The real interactions and ability to transfer the items into HTML code is advantageous and time-saving. UXPin is fast, secure, and a cross-collaborative tool to create designs for any screen-based digital product or solution.
UXPin can cover the design needs for both simples to complex digital solutions. The users of this software leverage the specific requirements that require some intricate work.
How to create a prototype in UXPin?
Here we are going to make a simple prototype with the UXPin UI kit. Before we move forward, take note with the UXPin, you do not get an option to choose a dedicated platform for the designing purpose. With this, you can only choose between a new project or import an existing one from Sketch and other UXPin alternative tools.
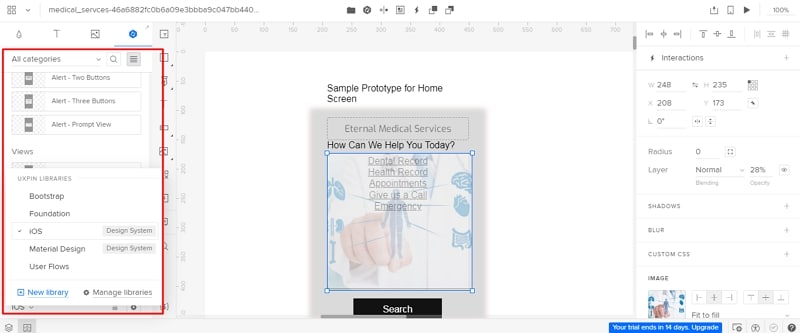
Step 1: After selecting the blank document from the dashboard, the artboard will open up, and there you can make your design as per the requirements. However, before beginning, make sure to identify the screen size of the platform on which your application or website will run.
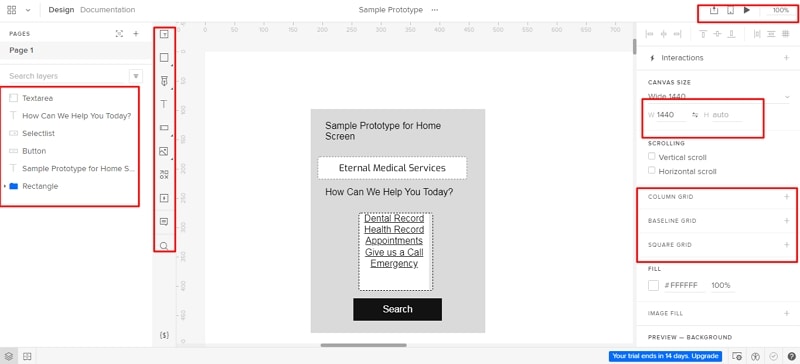
Because UXPin does not provide the option to select premade platform-specific artboards, you need to make your own size. There are detailed dimensions visible on every figure, element, drawing visible on the right-side panel.
Start selecting the needed elements from the sidebar panel, which lets you add figures, shapes, images, video, audio, text, forms, and various other items that are required for the prototype.
Moving on, you can also create any shape or form with a pen or pencil and refine it before finalizing the design. To ace the usage of a pencil or pen, we would recommend going through the UXPin style guide and other resources before starting with the design.
Step 2: After adding the required text and setting their typography, add the other elements like an image. You can easily import any image from your device to the design and set its size according to the design.
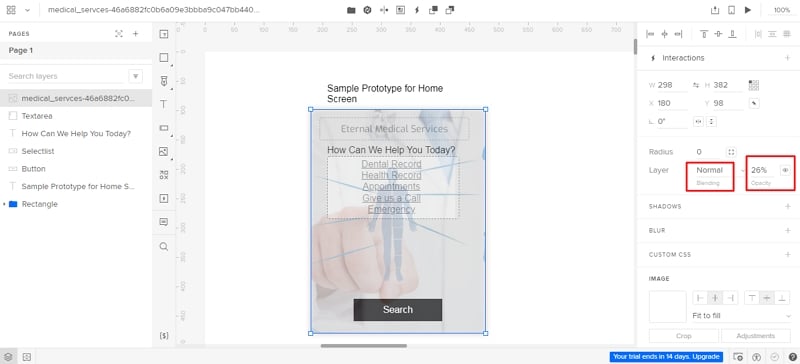
This is one of the greatest things about the UXPin UI kit, as it gives you the freedom to drag the cursor to fit the image into the design as opposed to adding the original sized image and then editing its size.
Plus, you have the option to either set the image at the entire screen's background by using the opacity function or set it at any other place.
Step 3: The UXPin material design UI kit is pre-loaded with the most used buttons and other elements used for the design. Here, you can select the category of icons from the drop-down menu and insert the right design.
Once the design is ready, hit the Preview button to check out how it looks on the screen. However, you won't be able to get the true user experience because of the absence of an underlying device.
However, it is possible to share the design with the client and other team members. Plus, just like any other UXPin alternative, you can allow the users or clients to add comments and view the design specifications for easy handoff.
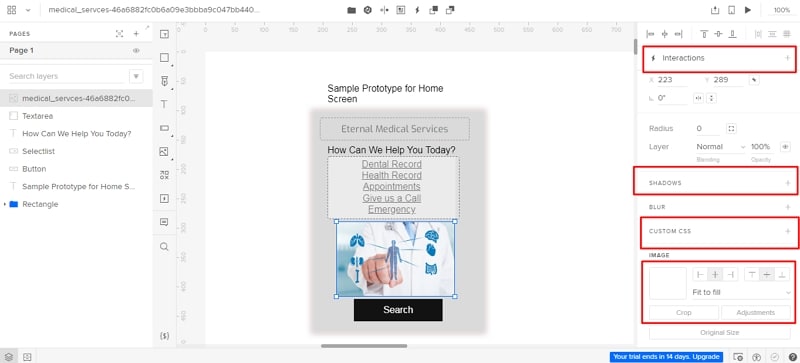
Step 4: In the last step, you can also add interactions that will act like a transitioning sequence from one screen or page to another.
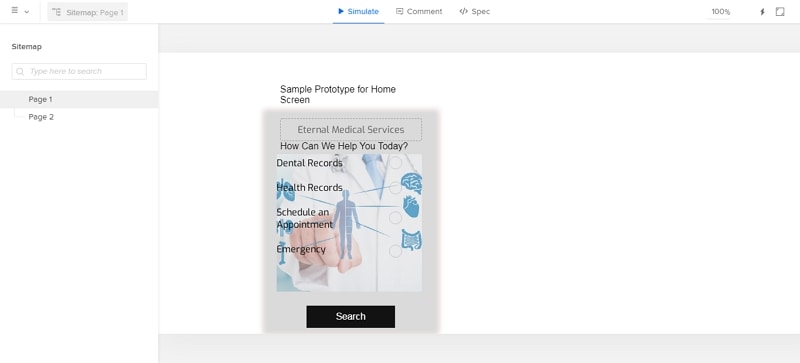
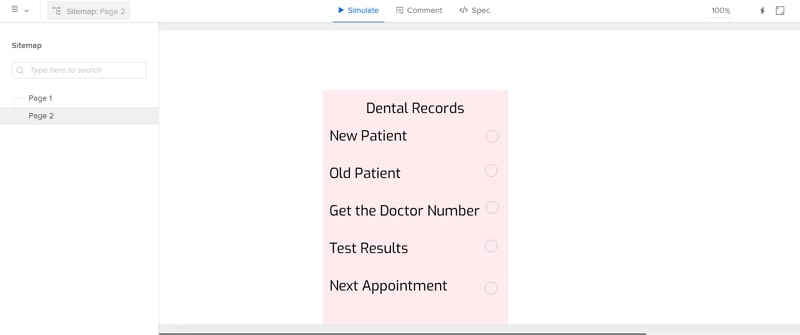
From this screen, you can set an interaction on Dental Records. Once the user clicks on the circle made in front of the text, they will land on the second page, i.e., Dental Records.
After making a design, you will realize that there are few things that every user wished that the UXPin UI kit should, and some other elements must have been made more smooth and easy to access.
How to create a prototype with an UXPin alternative?
To solve your problems in UXPin, we have brought Wondershare Mockitt, a fantastic designing tool that creates bespoke designs with a much more simple interface loaded with a ton of elements and items. Let's check out how you can make a prototype with UXPin alternative, .
The tool also runs with the same methodology as UXPin, but it is better from various angles. Starting your design by signing up with an email address. After signing in, you will enter the workspace, click "Create" to create a new project, then name the project, and choose your desired size of the canvas, the design dashboard looks like below.

As you can see in the picture, on the left side, there are some fast widgets like adding text, rectangle, oval, line, and pictures you can drag to the canvas rapidly. On the right side, you can click the second button "Built-in" to add more different kinds of widgets. Simply drag and drop the widgets you want to the canvas or double-click it, then you can modify the shape, size, color, vectors, borders, padding, and much more from the panel.
One of the best things about this tool is its speed and responsiveness to your commands. Plus, setting up interactions is as simple as dragging the lightning bulb beside the widget and connecting it to the desired screen.
Moreover, the users can add comments on the artboard and on the preview screen. As an UXPin alternative free, Mockitt is one of the best tools made for every type of designer, helping them create any type of design.
Plus, with UXPin, you cannot select from templates, whereas it has various pre-made templates made according to the target industry needs, and they can be edited.
All in all, this tool is smarter, ingenious, faster, and has a huge assets library. These elements allow creating a real-life application and create high-fidelity prototypes for an amazing representation.
