How to Create Mockup with Marvel App

In the design industry, mockups are becoming an integral part of a well-designed product's eventual realization. There are plenty of mockup design platforms out there and Marvel mockup is one of the best choices. What if you are new to mockup marvel and want to design a mockup without trouble? You need to up to speed on how to create a mockup with the Marvel app. Fortunately, this article walks you through a comprehensive guide on how to create a Marvel mockup with ease and speed.
- Part 1. How to Create a Mockup in Marvel App
- Part 2. How to Create a Mockup in Marvel App Alternative
Steps to Create a Mockup in Marvel App
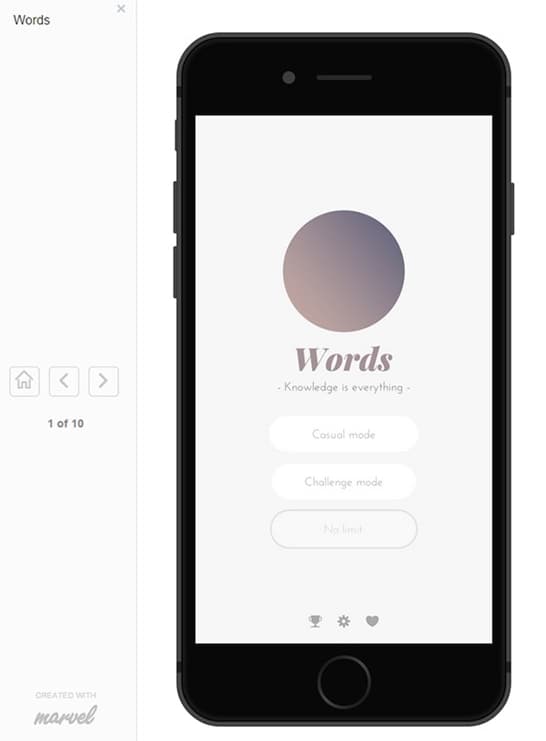
Marvel is one of the best tools to create mockups, wireframes, and prototypes. This tool makes it easy for designers to create and hand over their designs to developers. The program is easy to use and has plenty of components to choose from. This way, you can create amazing designs in no time. The following steps illustrate how you can create a mockup in the Marvel app.
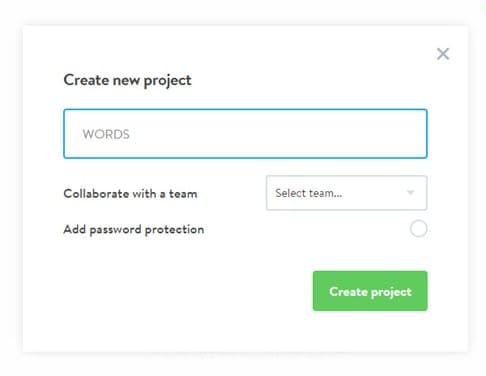
Step 1. Log in to Marvel to access the dashboard. Here, click the "Create Project" button on the top right to access the "Create prototype project" window. Enter the project name, select the project type, and click "Create project."
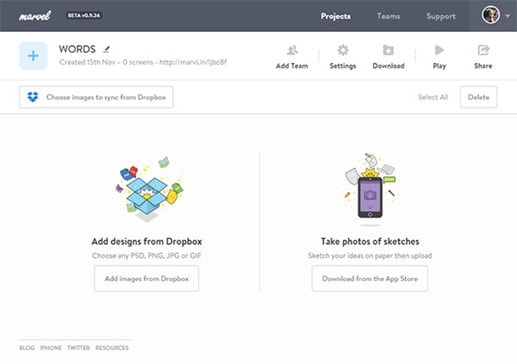
Step 2. On the subsequent window, click the "Upload or create designs" button and then choose to either design in Marvel or upload from the computer.
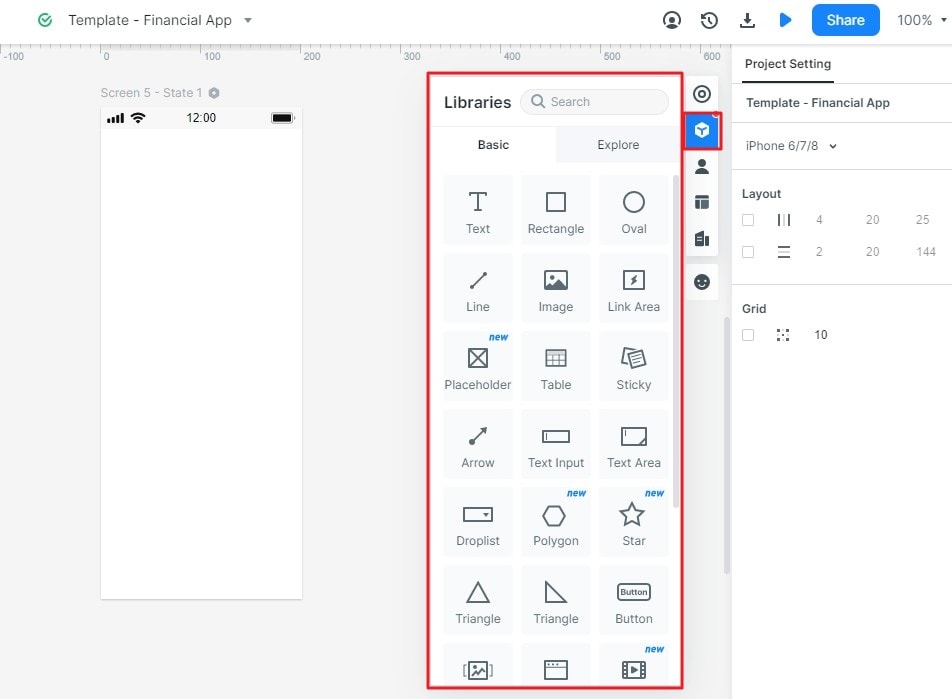
Step 3. When you are in the design space, click on the target widgets/object/icons on the left window pane and the program will add them to the active canvas/screen. To add more screens/canvas, simply click the "+New" button at the widgets' bottom. Again add the desired widgets/components to individual screens.
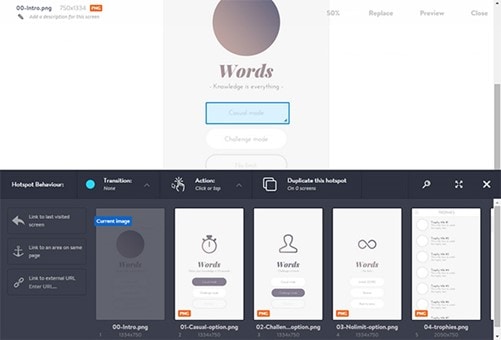
Step 4. When you have added all the necessary components on the individual screens, click the "Close" button on the top right to enter the prototype phase. Hover the cursor over the screen and click the "Prototype" button. Draw the hotspot region and choose the screen transition and action. Now click the "close" button. If you are not satisfied with the design, you can always hit the "edit design" button at the bottom of the screen.
Step 5. To preview your mockup, click the "Play" button. Click the hotspot region and see the behavior of the interaction you created.
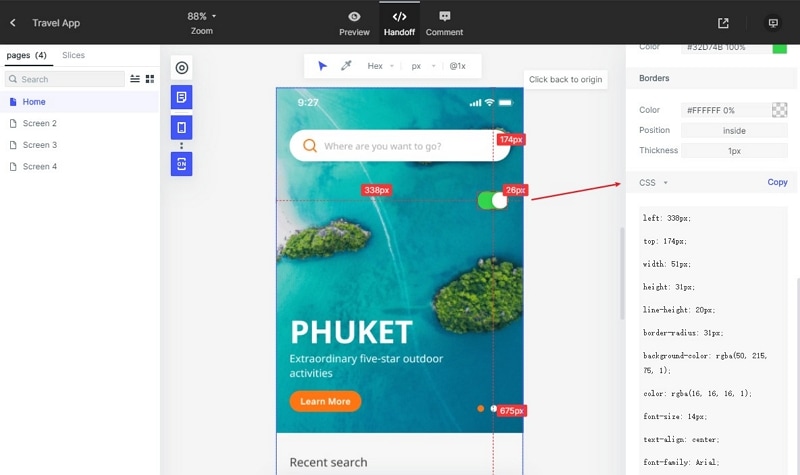
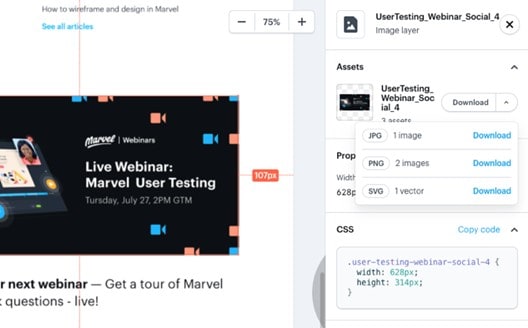
Step 6. Click the "Handoff" button at the bottom to hand over the mockup to developers. You can copy the handoff link and share it with your team members. Also, you can copy and use the swift code at the bottom.
How to Create a Mockup in Marvel App Alternative
Wondershare Mockitt is a powerful and easy to use mockup tool. This program is enriched with an assortment of excellent features that transform how you create mockups and prototypes. Even if you are a novice, you have plenty of resources to learn from. With a few clicks, you can create an amazing mockup and impress your clients or customers without a struggle.

- It allows users to simultaneously co-edit, add comments, and share image material with team members.
- Users can handover designs to developers and generate CSS code.
- It offers interactive effects such as page transition simulation, carousel, and a time jump, among others.
- It offers plenty of built-in components, allows users to save widgets, and download prototype templates.
Step 1. Create a Project
To begin with, visit Mockitt and log in using your username and password. Once logged in, select the "Personal Space" tab at the top center and click the "Create" drop-down arrow. Select "Project", and you will be taken to the "Create New Project" dialog box. Here, provide the name of your project and the desired device screen. Click "Create" to start creating a blank project.

Step 2. Add Widgets and Screens
In the subsequent window, go to the "Widget" section and click the drop-down arrow to select the desired widget categories. Drag the target widgets to the canvas.
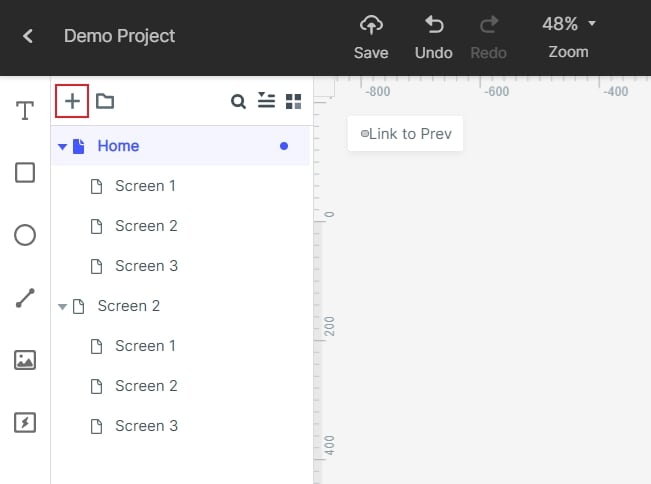
Also, add as many screens as dictated by your mockups by clicking the "+ " button at the top left. Again add desired widgets to individual screens.
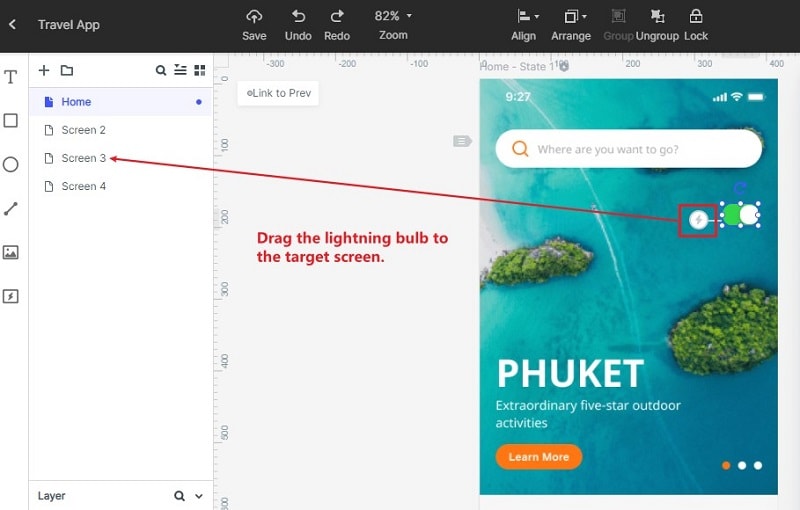
Step 3. Create Interactions
Now that you have added the desired widgets and elements to every relevant screen, you need to link them to enable screen and element interactions. Click the element/object you want to connect to another screen, and you will see an arrow on the left of the object. Drag this arrow to the target screen and a connecting arrow will appear. Do this for the rest of the screens and objects that you want to link.
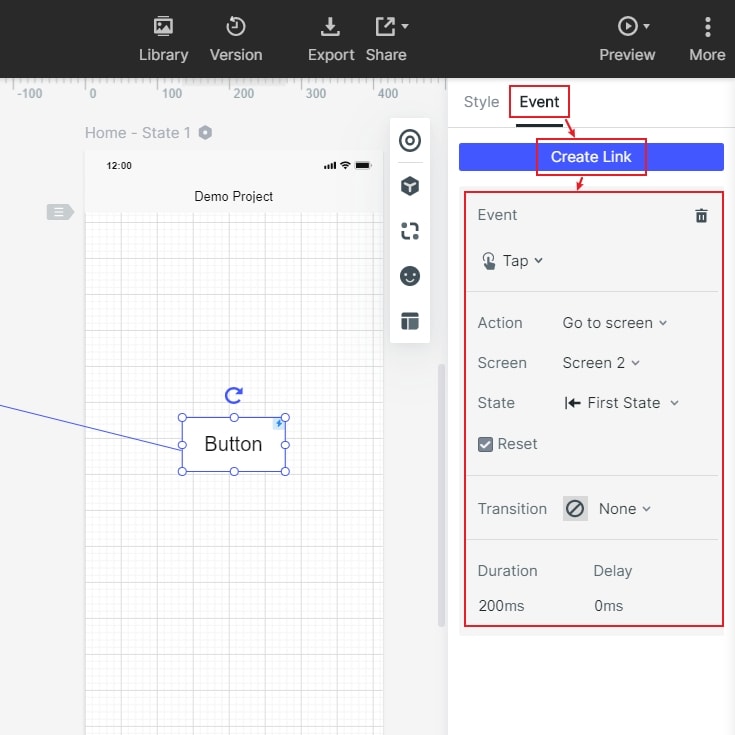
Step 4. Create Interactions through Events
Another way to link objects and screens is through the "Create Link" button. Simply select the target widget/component, then click "Event" at the top right, followed by the "Create Link" button. Choose the desired Event, Transition, and Action, among others.
Step 5. Preview the Mockup
Once you are through with your design, it is time to preview and see whether it meets your needs. Simply go to the top right of the window and click the "Preview" tab.

Step 6. Hand Over to Developers
If you found everything is fine in the preview, proceed to hand over your mockup to developers. Click the "Handoff" button and copy the code under the CSS tab.