What is Atlassian Design System and Its Advantages
Perhaps you have heard people say Atlassian design system creates design harmony at scale, yet you can't figure it how because maybe you don't know how to use it. Without bias, the Atlassian design system is used by many organizations due to the plenty of benefits it offers. This platform has been in use for a long time and is constantly evolving to meet changing user needs. If you have been struggling to build designs with the Atlassian design system, then your struggles are over. This article shall take you through a detailed guide on how to build an Atlassian design system with ease.
- Part 1. What is Atlassian Design System
- Part 2. How to Build a Design system in Atlassian
- Part 3. The Easy Prototyping Tool You Must Have
What is Atlassian Design System and Its Advantages
Atlassian design system is a platform used to create simple, intuitive, and beautiful user experience tools. In simple terms, the Atlassian design system is used to create software development and collaboration tools. The likes of Jira and Trello are just some of the examples of tools created with Atlassian. Thousands of people worldwide use these tools and show how committed Atlassian is in designing great products and services for all teams. Atlassian design system aims to make teams work together in a better, scalable, agile, and open way. This design system has plenty of resources, including tools, plugins, and guides to help users create designs with ease. You can use various templates like posters and letterheads, logos and lockups suitable for all programs, presentation kit assets and graphic assets, Figma components and patterns, and a library of fonts. The unique color, iconography, and typography make it a great platform.
Advantages of Atlassian Design System
- Atlassian design system has plenty of design resources to create better and scalable designs. These resources include tools, plugins, and kits.
- It has patterns that are a reusable combination of components used to solve user problems.
- It has an intuitive interface that makes it easy to create designs.
- It has a responsive and reliable customer service that helps you when you get stuck or have issues.
- Atlassian design systems are very flexible and suitable for all kinds of projects and functions.
- It has a cloud-based version, and therefore users can leverage across diverse devices without space or time limitation.
- It offers design consistency.
- It offers plenty of powerful design tools that help scale work across multiple products.
- The platform constantly evolves to meet the dynamic needs of people and organizations.
How to Build a Design System in Atlassian
In this guide, we are going to build a design system in Atlassian using Confluence.
Step 1. Create a Project
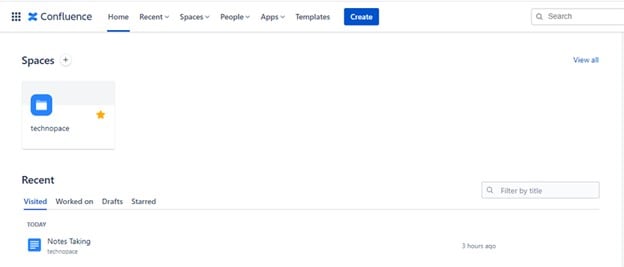
Visit Atlassian and login to Confluence using your account details. Once logged in, navigate to the toolbar and hit the "Create" button. This should display a new page to allow you to create a design for your team.
Step 2. Build Your Design System in Atlassian
You can build your designs from scratch on the new page or use a template to get things done with speed.
- Design From Scratch
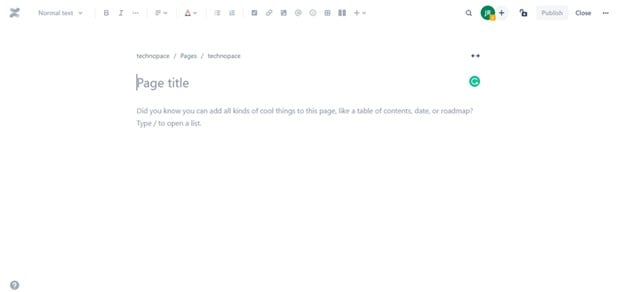
When you create a new page, you should see "Page title" and some texts below it. Put the cursor on the "Page Title" section and type your page title. Type the sub-title and then select the text style that corresponds to the sub-tile. Just click on the "headings" drop-down icon and select a suitable style, say "Heading 2".
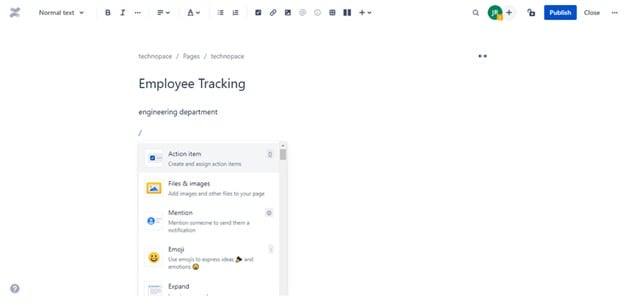
To start a design, type the slash character on the page and plenty of micros will display. You can select tables, layouts, bullet lists, and so forth. For example, select the "Table" option. A table is automatically inserted on the page. Here, enter your desired information in the rows and columns as defined by your design. If you want to add micros in the table fields, simply type the slash character on your keyboard and the micros will be displayed for you to select.
- Design with Templates
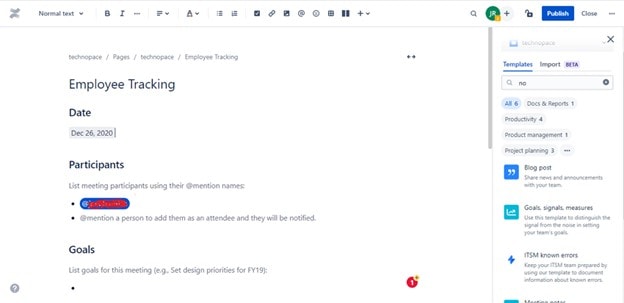
There are plenty of templates on this platform to choose from on the tool. To select a template, just go to the "Templates" tab and search for a template. You can select a template category and choose a specific template in that category to make your work much easier. When you choose a template, it is immediately displayed on the current page.
Step 3. Edit your Design
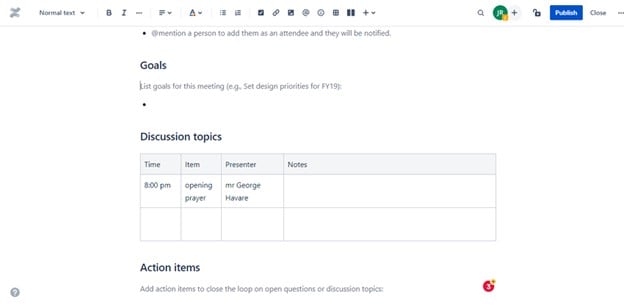
Now that the template is added to your page, it is time to start editing it. Edit the titles and various segments of the template to meet your design needs. Let's suppose we picked the popular Meetings notes template for example. Here, we will edit the date, add participants, list our goals, put down discussion topics, action items, and decisions that are made.
Step 4. Add Permission and Close your Project
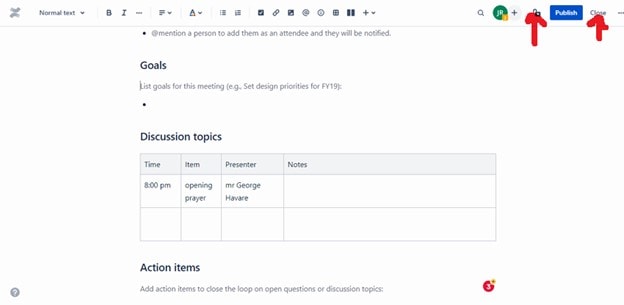
When you are through with your design, you can define permissions with the help of permission settings. Just click the permission icon at the top right and set permissions accordingly. Now click the "Close" button again at the top right to save your design as a draft.
Step 5. Publish and Share the Design System in Atlassian
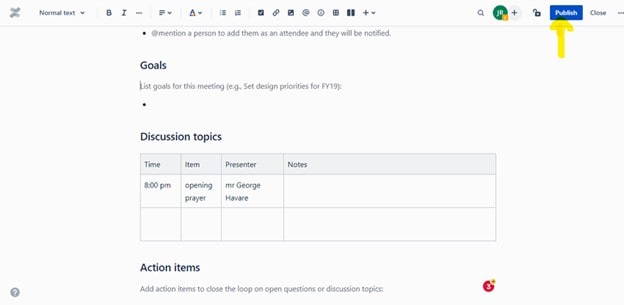
Go to drafts and open your project. Once opened, click the "Publish" button. Here, you can add comments and share your projects by clicking the "Share" button.
The Best Tool for Prototyping and Design
Wondershare Mockitt is the home for rapid prototyping, direct workflow, and collaborative teamwork. This program is no doubt, an all-in-one package for project designers, developers, managers, and other stakeholders. It is equipped with every single feature you would demand from an up to par prototyping platform.

It is cloud-based and hence users can create prototypes across different devices. They simply log in to their account using a browser and their project syncs across these devices. Mockitt has an elegant interface that makes user-navigation extremely seamless. You can create amazing prototypes in no more than 10minutes!
Instead of starting your design from scratch, pick a suitable template from the several templates available. Also, add widgets and icons to make your design more appealing. The good thing is that these widgets and icons are plenty and available in categories. You can create your library of templates, icons, and widgets then reuse them anytime you need. If you want to impress your customers/clients, turn your static prototypes into interactive ones with a few clicks. You can create links and interactions without limitations. Once your design is ready, you can invite team members to contribute in real-time. They can give suggestions, comments and share feedback in real-time.
Key Features
- This platform allows users to create interactive and animated prototypes.
- It has libraries with plenty of UI assets and templates that make prototyping easier.
- It has plenty of widgets and icons that help make your design more eye-catchy.
- It allows users to work together on the same page in real-time.
- It has an intuitive comment system that makes communication around a project well organized.
- It supports integration with other popular design and communication platforms.
- Users can retrieve up to 10 previous versions of their project.
- It allows users to test and directly hand over their prototypes to developers.

