Guide:Manage Projects in Wondershare Mockitt
Managing a project can be quite challenging. The task becomes even more demanding when working with multiple accounts or members. Fortunately, Wondershare Mockitt makes it easy for you to manage projects.
Here is a guide that includes everything you need to know regarding a project in Wondershare Mockitt. Let’s get started!
- Transfer a Project To A Different Account
- Transfer A Project After an Employee Leaves
- Outsource a Project To Another Account
- How To Copy a Project
- Restore Deleted Projects
- Merge Pages In A Project
- Access Project Settings
- Set Project As a Favorite
- Lock/Archive a Project
- Pro-Tip On How To Manage Projects
The Ultimate Guide to Handle Projects Efficiently
Transfer a Project To A Different Account
Here are some prerequisites for this task:
- One account should have the enterprise version of Wondershare Mockitt.
- The enterprise version should consist of more than a single seat. Only then can you transfer the project between two accounts.
For this guide, we will consider two accounts. If your account has the enterprise version, follow the steps below:
Step 1: Invite the target account to your enterprise team and assign them a seat.
Step 2: Move the project into the enterprise project folder.
Step 3: Add the target account as a collaboration member for the project.
Step 4: Now, the account can copy the project from the enterprise to their personal space.
Transfer A Project After an Employee Leaves
You will also need the enterprise edition of Wondershare Mockitt for this guide. Here’s how it works:
If The Project Is In Personal Space
Step 1: Create enterprise space and a folder for the project.
Step 2: Move the project from personal space to enterprise space into the folder.
Step 3: Other enterprise collaborative members can access the project, and the super administrator can remove the leaving employee from the space.
If The Project Is In Enterprise Space
Step 1: Transfer the super administrator authority of the enterprise space from the leaving employee to another account.
Step 2: Add other members into the enterprise space and remove the leaving employee account.
Outsource a Project To Another Account
Step 1: Create an enterprise account on Wondershare Mockitt with 2 or more seats.
Step 2: Assign the super administrator permission to the source account.
Step 3: Make an enterprise project folder.
Step 4: Invite the target account to the enterprise team members.
Step 5: Add the target account to the enterprise project folder.
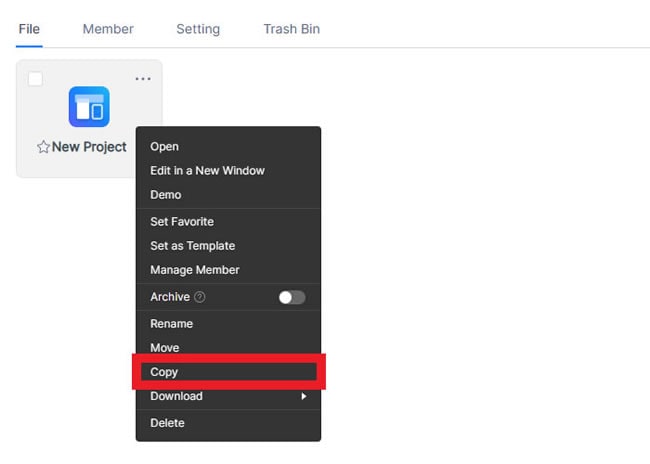
How To Copy a Project
Step 1: Open Wondershare Mockitt on a desktop or the web.
Step 2: Go to your projects.
Step 3: Please select a project and right-click it.
Step 4: Click Copy from the drop-down menu.
Restore Deleted Projects
Step 1: Go to your projects.
Step 2: Click the Trash Bin tab to open it.
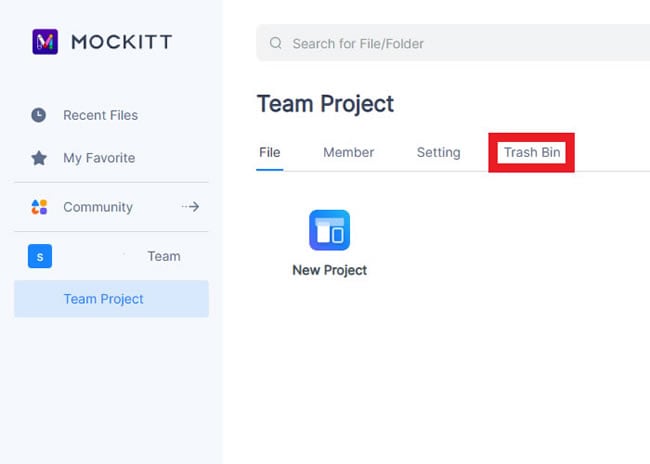
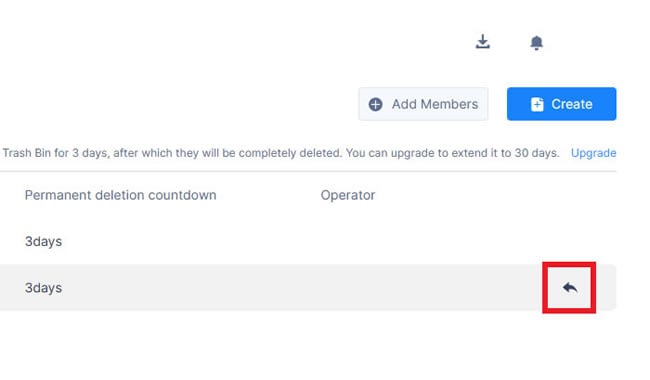
Step 3: You will see all the deleted projects in the Trash Bin. They will delete permanently after 30 days. Click the Arrow icon at the right corner to restore a project.
Merge Pages In A Project
Step 1: Open a project in Wondershare Mockitt.
Step 2: Select the Contents icon from the left toolbar.
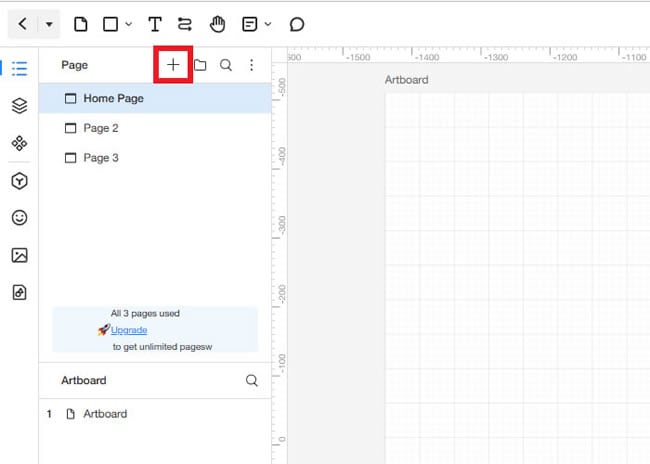
Step 3: Create pages under the Page section by clicking the + icon.
Step 4: Right-click a page and select Move To.
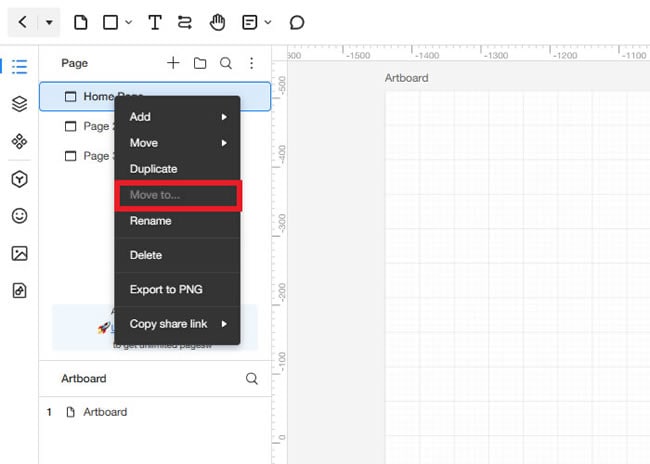
Step 5: Lastly, enter the destination folder and project name to merge it.
Access Project Settings
Step 1: Open your Team Project tab.
Step 2: Click Settings on the top.
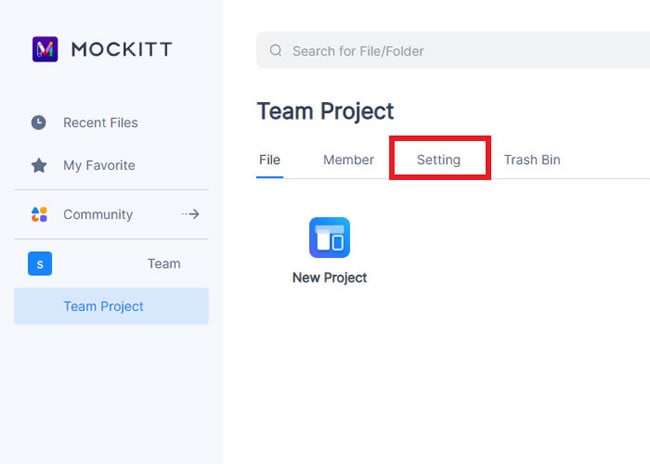
Step 3: You can now access and change the project settings from this tab.

Set Project As a Favorite
Step 1: Choose a project and right-click its icon.
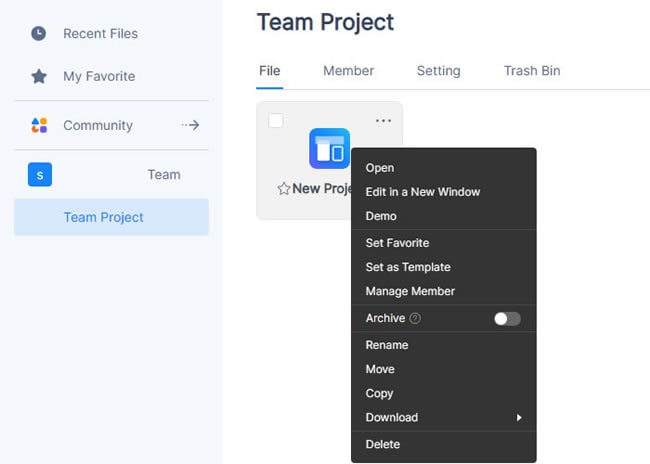
Step 2: Next, select Set Favorite from the drop-down menu.
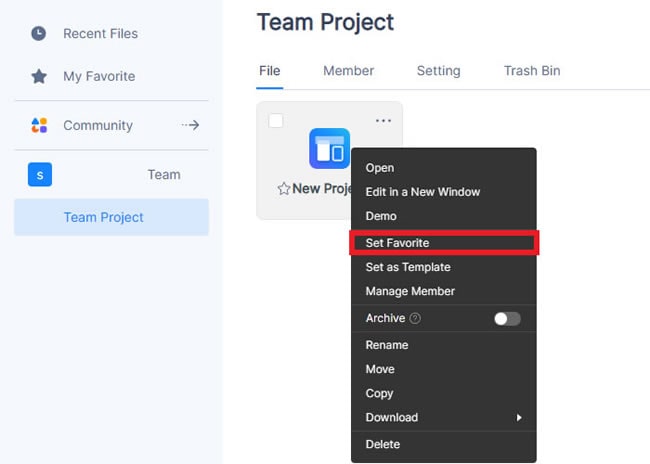
Step 3: Another method is to click the Star icon on the project. Click on it again to cancel the star. You can also right-click the project and remove it from favorites.

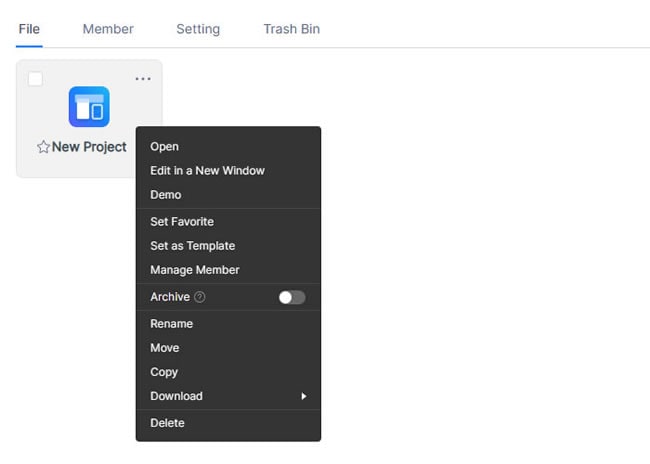
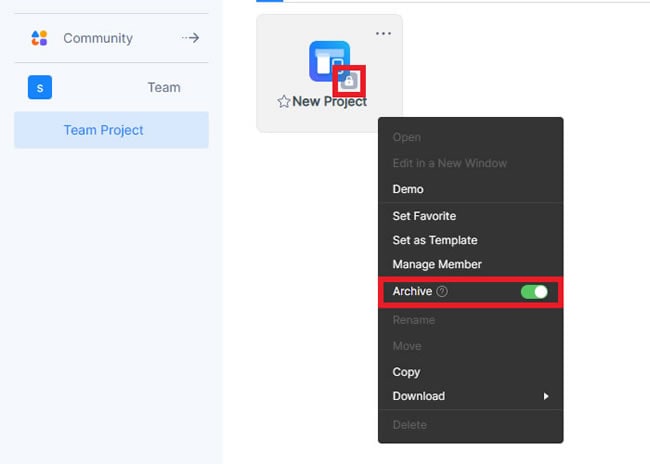
Lock/Archive a Project
Step 1: Click the three dots on a project to view its drop-down menu.
Step 2: Toggle Archive to lock the project.
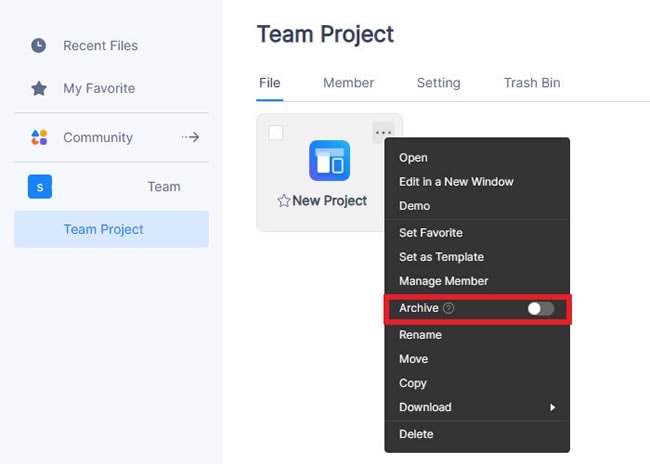
When a project is locked, it does not appear on the main screen. In order to view it, you must head to the Archive tab.
Step 1: Click All Types on the right corner and select Archived.
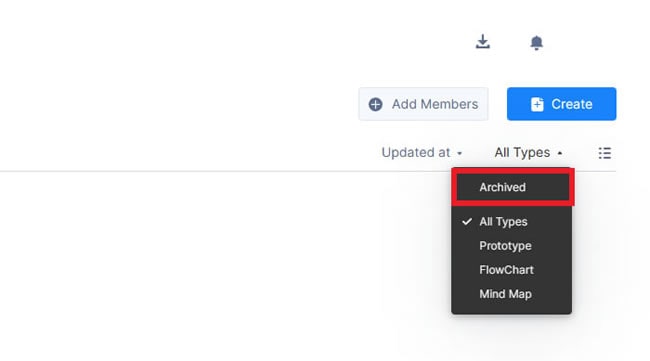
Step 2: Now the project will be visible. Right-click it and select Archive to remove it from the lock.
Pro-Tip On How To Manage Projects
One thing every beginner should follow is to keep a clean project. Do not store unnecessary files, as it can create ambiguity among the project team members. Secondly, make the best use of settings. Choose a name, model, profile, and description that describes your project perfectly. It will make managing much more straightforward.