Is It Possible to Make a Website Free of Cost Using Google Sites
Since Google Sites is one of those website builders that offers a platform to make a website free of charge, it is imperative to understand the options we have within this tool.
Old Classic Google Site vs. New Google Sites
Google Sites is the new version of that service that Google previously provided under the Classic site. Within the Google Classic site (Old version), you could have made and published internal project sites, public-facing sites, and intranets.
From November 1, 2020. Google restricted its users to create a new website using the old classic sites theme. And, since then, a user can create a new website using Google Sites and not with its old Classic Google Site.
Google Sites uses a drag and drop editor, and you do not need to be familiar with HTML language to make your website. It also allows its users to add a custom domain name when they make a website free on google. So, technically Google sites are the best way to make a website among other free website building platforms.
General Steps to make a website with Google Sites
Step 1: Name and URL Selection
The first thing you require to make a website free on google is selecting a name and URL. By default, the URL of a site will be sites.google.com/view/yoursitename. The URL site is supposed to be unique; otherwise, it will show you an error if that name is not available.
To start, you must have a Google account, and that is enough.
Step 2: Template and Theme Selection
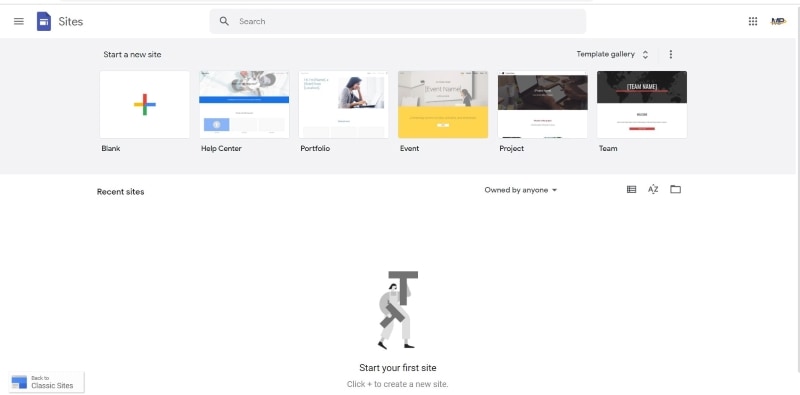
When you enter https://sites.google.com, you will find a screen in which there will be an option of creating a new site. Along with that, Google gives you a choice of selecting among various pre-defined templates. You can click any of them as per your preferences and start customizing it according to your tailored requirements.

Source: Google
Google categorized these templates under the category of personal, work, small business, and education. These templates are fully customizable.
Once you are done with Template selection, click that particular template, and you will be taken to the editing window. You can select an appropriate theme based on your choice. Go to the theme tab within the navigation pane and click that suitable theme.
Step 3: Site layout customization
Under the tab of Insert, you will find a layout section. With these layouts, you can divide pages within Google sites into various sections. You can either upload an image in these sections, paste a YouTube video link, insert a calendar and map. At the moment, there are six main layouts that Google is providing under the layout section.
Step 4: Page Creation
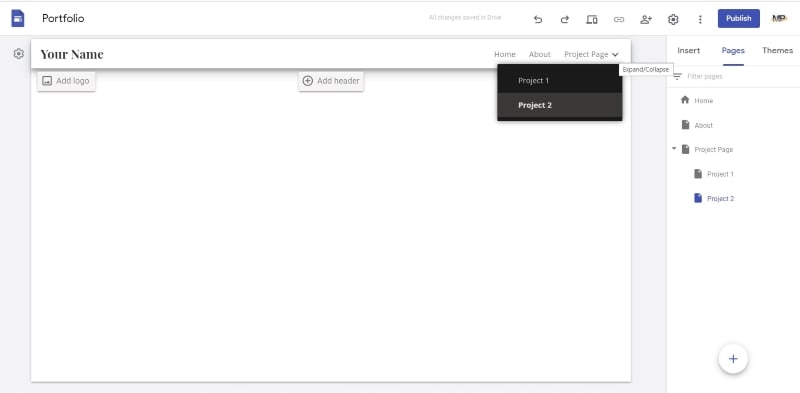
If you want to add a new page or delete the previous one under the pages section, you can do this job. You will find a plus symbol at the bottom of this selection pane. Use that button to create a new page, name it, and customize the URL as per your requirements. Drop down navigation menu can be made by dragging sub-pages into the main pages.

Source: Google
If you want to add a couple of different services under the main service menu, you can do that here easily.
Step 5: Upload Content
Now when you complete designing your site, you should start adding content. Content can be images, text boxes, and videos link. Google sites give you this flexible option of adding content by using drag and drop functionality. Under the layouts button, there is an option to add multiple elements.
You can use your google drive to get access to your content and upload it to your site. You can also resize any element by just clicking it and dragging it from the edges.
Step 6: General Settings
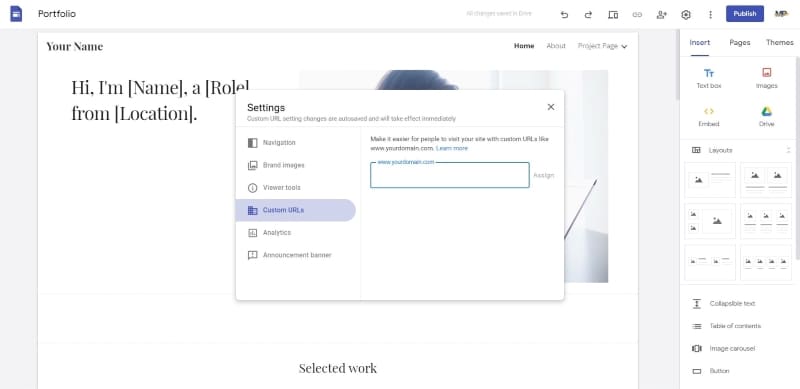
Before publishing a website, you should configure a few settings. There is a gear icon, click it, and a window will appear. You will choose to set some navigation settings, brand image, viewer tools, custom URLs, analytics, and announcement banner within that window.

Source: Google
Under navigation, you can change settings related to navigation. With the brand image option, upload a logo if you have one. Similarly, you can set up google analytics as well to get information on your website traffic.
Step 7: Authorization
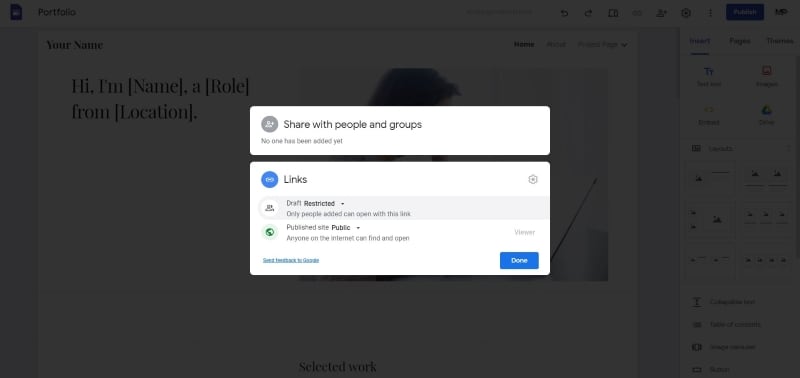
You can authorize few people to have access to your website with the help of a direct link. Click the share icon and populate emails of all those people in a blank box "Add people and Groups" to whom you want to show your website.
You can also preview changes to your website with a preview button and see past versions of a website by clicking version history.

Source: Google
We have seen how one can make a website free with Google sites, and we also witnessed that it is the best way to make a website. However, it is not only the best website to make a website free of cost, but undoubtedly it has a slight edge over other website building platforms.
Pre-requisites of Website Development
Irrespective of how user-friendly any website builder is, one must not start developing a site without having a design prototype. A prototype gives a direction and sparks new ideas for website development.
Wondershare Mockitt is a platform that knows no boundaries when it comes to facilitating its users with tons of features and elements to choose from for their design prototypes.

- Mockitt is a design prototyping and collaborative tool and is designed to be used by professionals and novice designers.
- Create modern designs by using a combination of various widgets and icons.
- Induce curiosity within your prototype by using various colors from the color palette.
- With stylish fonts, types, and sizes, explore the full potential of typography so that your content and copy persuade visitors.
- Create linking within pages so that you get to see how a user would feel when they will visit your website.
- Use navigation menus to get a feel of how your home page would feel like in actuality.
- Save time by letting your stakeholders be onboard with you on Mockitt and getting their feedback.
- Make your Design Risk free by engaging with all of your stakeholders on a single platform
Mockitt knows how valuable your time is; It's worth it!

